Install Kidde Smoke And Carbon Monoxide Alarm

Alright, confession time. How many of us have looked up at that dusty, yellowed smoke alarm and thought, "Hmm, maybe I should… eventually… check that thing"? Yeah, me too. For ages. But then, a little nudge (okay, maybe a shove) from my inner responsible adult, plus the undeniable truth that our old one was probably older than my youngest houseplant, spurred me into action. It was time for an upgrade. And because I like things straightforward and reliable, I went for a Kidde Smoke and Carbon Monoxide Alarm. Wanna know how it went? Pull up a chair, grab your imaginary latte, let's chat.
Why Kidde? And Why Now?
So, why Kidde specifically? Honestly, they've been around forever, right? It's like the Kleenex of fire safety – a name you just trust. Plus, I snagged one that does both smoke and carbon monoxide. Because why have two ceiling gadgets when one can be a superhero and tackle both invisible threats? It’s like getting a two-for-one deal on peace of mind. And "why now?" Well, apart from the aforementioned existential crisis over old electronics, winter's creeping in, furnaces are roaring, and it just felt like the right time to make sure our little fortress was extra safe. You know, adulting stuff. It's surprisingly satisfying, in a "I totally just protected my family from silent killers" kind of way. High five!
The old alarm was probably just counting dust bunnies anyway. Seriously, I think it was powered by good vibes and wishful thinking. So, out with the old, in with the shiny, new guardian of our airways!
Must Read
Unboxing: The Thrill of Safety Tech!
Okay, maybe "thrill" is a strong word for unboxing a smoke alarm, but hear me out! It’s still new tech, right? I cracked open the box, and there it was: sleek, white, and surprisingly compact. None of that bulky, "I swear this thing is going to fall off the ceiling" vibe. It came with the alarm itself, a mounting bracket (super important, obviously), some screws, and, crucially, batteries. Yes, folks, batteries! Pre-included! Can I get an amen? Because nothing kills DIY momentum faster than realizing you need AAs and only have AAA batteries in the junk drawer. Kidde, you get me.
I always do a quick read of the instructions – mostly to confirm I don’t accidentally turn it into a karaoke machine or something. But honestly, the guide was pretty straightforward. Lots of diagrams, not too much jargon. Perfect for someone like me who needs things explained in crayon drawings and interpretive dance.

Installation: Easier Than Assembling IKEA Furniture (Promise!)
Step 1: Location, Location, Location!
First things first, where's this bad boy going? The general rule of thumb is one on every level, especially near bedrooms, and in common areas. Think hallways, stairwells. You want to hear it wherever you are, even if you're dreaming of winning the lottery. I decided on the main hallway, right where the old one was, because, hey, if it ain't broke (the location, that is), don't fix it. Just make sure it’s not too close to vents or anything that could give false readings. We're looking for real emergencies here, not just a drafty corner.
Step 2: The Mighty Mounting Bracket!
This is where the magic happens. You hold the bracket up, mark your spots (a pencil is your best friend here), and then, gasp, grab a screwdriver. Or, if you’re feeling fancy and have a drill, go for it! Just remember, we're attaching it to the ceiling, not performing brain surgery. Two screws, a little elbow grease, and bam! The bracket is up. It felt sturdier than I expected, which is always a good sign when you're trusting something with your life (and your house).
Step 3: Batteries In, Power Up!
Okay, this is crucial. You want your alarm to actually work, right? Pop those beautiful, pre-included batteries into their slots. Most Kidde alarms are pretty smart; once the batteries are in, they might even give a little chirp or a blink to let you know they're alive. It’s like the alarm is saying, "Hello, world! I'm ready to protect!" Mine did, and I felt a little surge of pride. "Good job, little alarm! You're doing great!"

Step 4: The Twist and Lock!
Now for the satisfying part. Take the main alarm unit, align it with the mounted bracket, and give it a firm twist. You'll usually feel it click securely into place. It’s designed to be foolproof – or at least, me-proof. Once it's locked, it's not going anywhere. It’s a very gratifying feeling, like you’ve just solved a mini-puzzle that could save your life. Which, technically, you have!
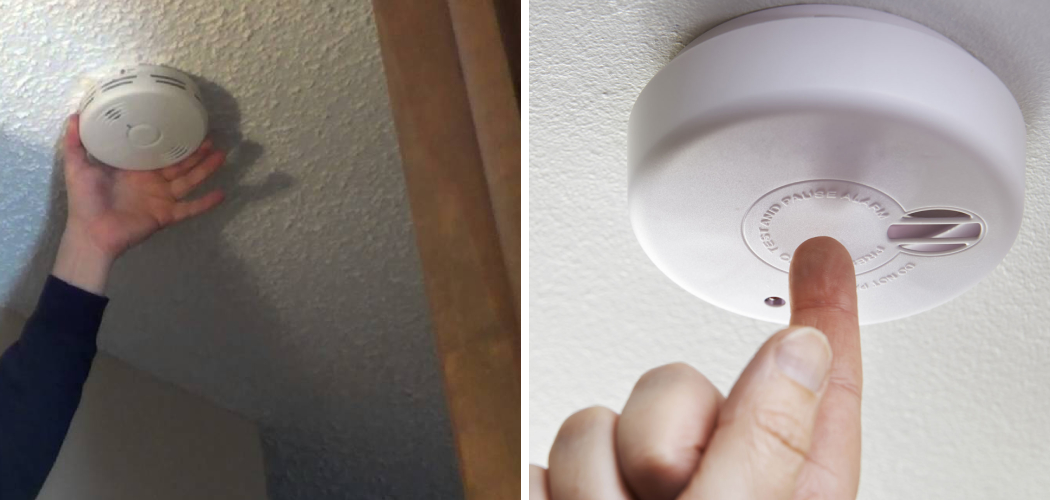
The Moment of Truth: The Test Button!
Okay, deep breath. Time for the test button. You know the one. The little button that you press, and then your ears regret everything for the next five minutes. I pressed it. And boy, did it work! A loud, ear-splitting BEEP-BEEP-BEEP-BEEP! followed by a clear voice announcement, "FIRE! CARBON MONOXIDE!" My cat shot off the sofa like a rocket, and I probably flinched hard enough to pull a muscle. But hey, it worked! It was loud, clear, and utterly impossible to ignore. Mission accomplished! I could practically hear my inner responsible adult doing a celebratory jig.
After the ringing subsided and the cat eventually forgave me (with treats, obviously), I felt this incredible wave of relief. This wasn’t just a device; it was a little sentinel, standing guard, day and night. It’s one of those small, easy home improvements that delivers a huge punch of peace of mind.
So, What Are You Waiting For?
Seriously, if you've got an old alarm, or worse, none at all, now's the time. Installing a Kidde Smoke and Carbon Monoxide Alarm took maybe 15 minutes, tops, and honestly, the hardest part was deciding where to put the old, expired one. It's a small investment in time and money for something so incredibly vital. No complex wiring, no arcane tools, just basic common sense and a desire to keep your loved ones safe.
Go on, go check your alarms. And if they're looking a bit tired, treat yourself (and your family) to an upgrade. Your future self will thank you. And probably your cat, too. Just warn them before you press the test button, okay? Lesson learned!