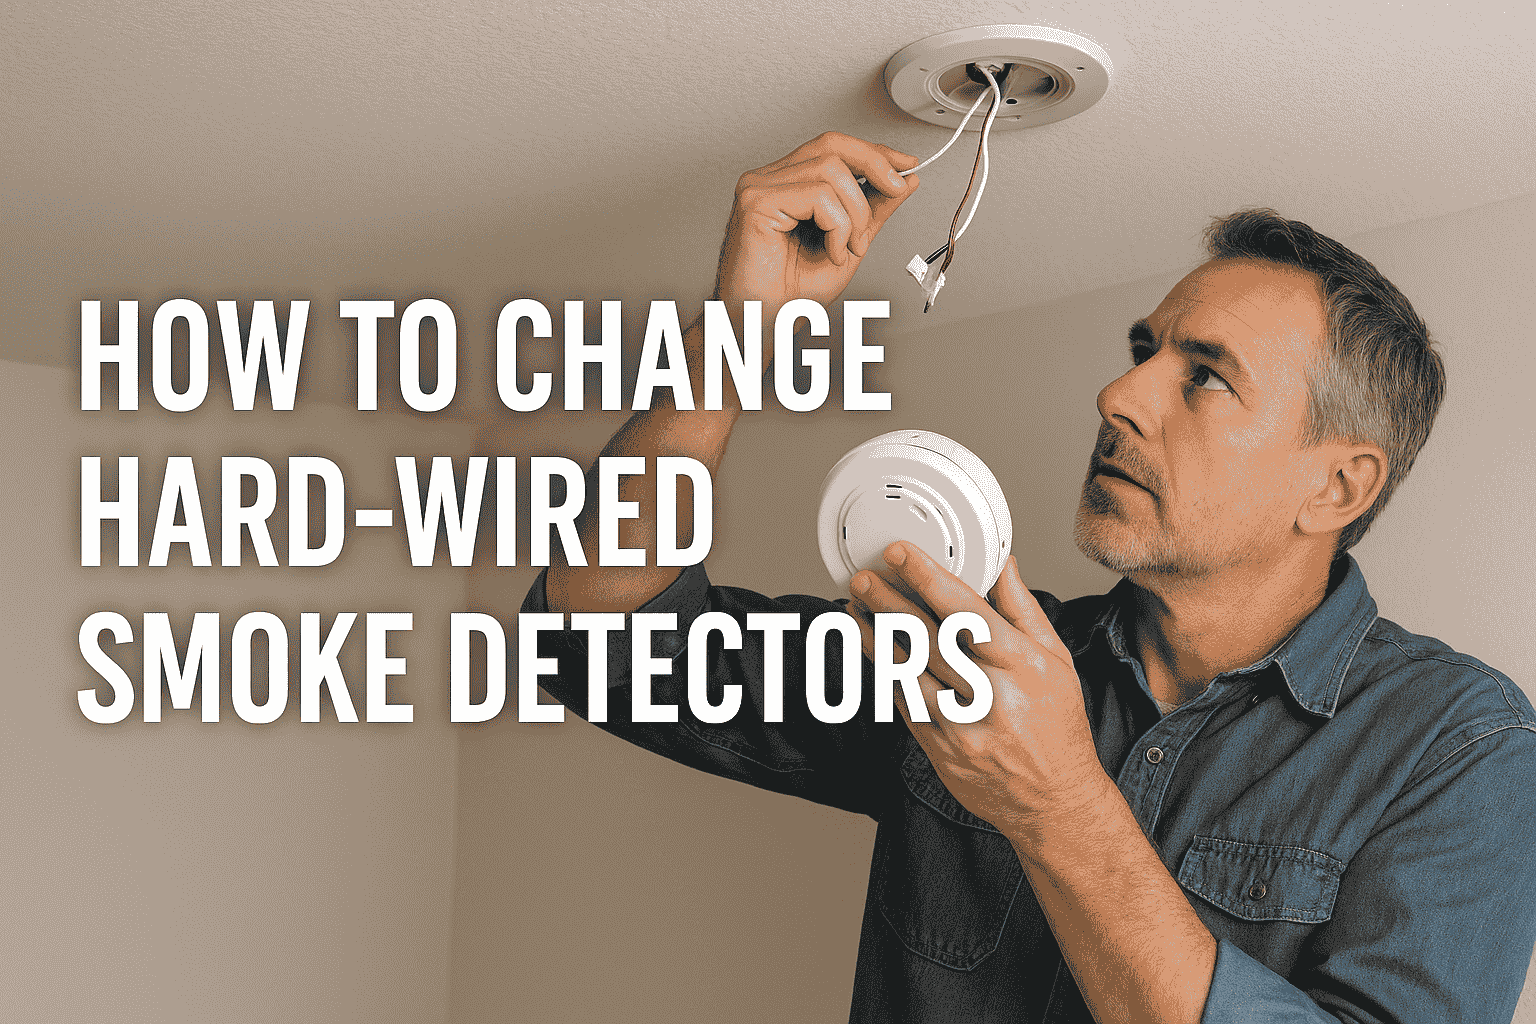
How To Replace A Hard Wired Smoke Alarm

Alright, let's talk about that little sentinel on your ceiling. You know the one. The silent guardian... until it decides to blast you with an ear-splitting shriek at 3 AM because a dust bunny looked at it funny, or worse, because its battery is dying a slow, agonizing death. Or maybe it's just old. Like, really old, judging by its yellowed plastic and retro charm (or lack thereof).
Sound familiar? You've probably thought, "Ugh, replacing a hard-wired smoke alarm? That sounds like a job for a professional. Or a wizard. Definitely not me." Well, my friend, get ready to embrace your inner DIY superhero, because we're about to show you that this seemingly intimidating task is actually a total breeze. And guess what? It's going to make your life incrementally, delightfully, and refreshingly more fun!
Why Embrace the Beep-Be-Gone Mission?
First off, let's get the obvious out of the way: safety. Old smoke alarms are less effective. Period. Experts recommend replacing them every 10 years. But beyond the crucial safety aspect, there's a world of pure, unadulterated satisfaction waiting for you. Imagine:
Must Read
- No More Random Chirps: Seriously, the peace of mind alone is worth it. No more jumping out of your skin because your alarm decided to sing the song of its people in the dead of night.
- A Boost of Confidence: You fixed something! With electricity! Without calling a handyman! That's a badge of honor right there. You'll walk taller, we promise.
- Saving Your Hard-Earned Cash: Professional electricians are fantastic, but for a job this straightforward, why not pocket those savings for something fun, like a fancy coffee maker or that gadget you've been eyeing?
- Modern Aesthetics (and Smarts!): New alarms are often sleek, less obtrusive, and can even link up to give you whole-home coverage. Some even connect to your smart home system. Imagine that! Your home, getting smarter because of you.
The "Zap-Free Zone" Protocol (aka Safety First!)
Okay, let's address the elephant in the room: electricity. Sounds scary, right? Sparks! Zaps! Cartoon-level hair standing on end! But here's the secret: it's only scary if you don't follow the golden rule. And the golden rule is simple: turn off the power!
Think of it as disarming a very mild, non-explosive device. Once the power's off, it's just wires. Innocent, harmless wires. So, take a deep breath, channel your inner MacGyver, and let's get ready!

Your Super Simple, Step-by-Step Guide to Smoke Alarm Victory!
1. Gather Your Tools (The Adventure Prep!)
You'll need a few trusty sidekicks:
- New Smoke Alarm: Make sure it's a hard-wired replacement. If you have an interconnected system, ensure the new one is compatible.
- Screwdriver: Likely a Phillips head.
- Voltage Tester: This is your superpower! It tells you if electricity is present. Get one that lights up or beeps.
- Step Stool or Ladder: Safety first for reaching those high places!
- Wire Nuts: Usually come with the new alarm, but good to have spares.
2. Power Down! (The Heroic Shut-Off)
Head to your electrical panel. This is where you become the master of your domain. Find the breaker that controls your smoke alarms (often labeled "Smoke Alarms," "Lighting," or the room it's in). Flip it to "OFF."
Pro tip: If you're unsure, flip the main breaker. No power anywhere means no surprises! Just remember to unplug your computer first.
3. Double-Check! (The Moment of Truth... before the real moment of truth)
Back at the smoke alarm, use your voltage tester. Touch it to any exposed wires. If it lights up or beeps, the power is still on! Go back to the panel and try another breaker. Do not proceed until the tester confirms no power. This step is non-negotiable.
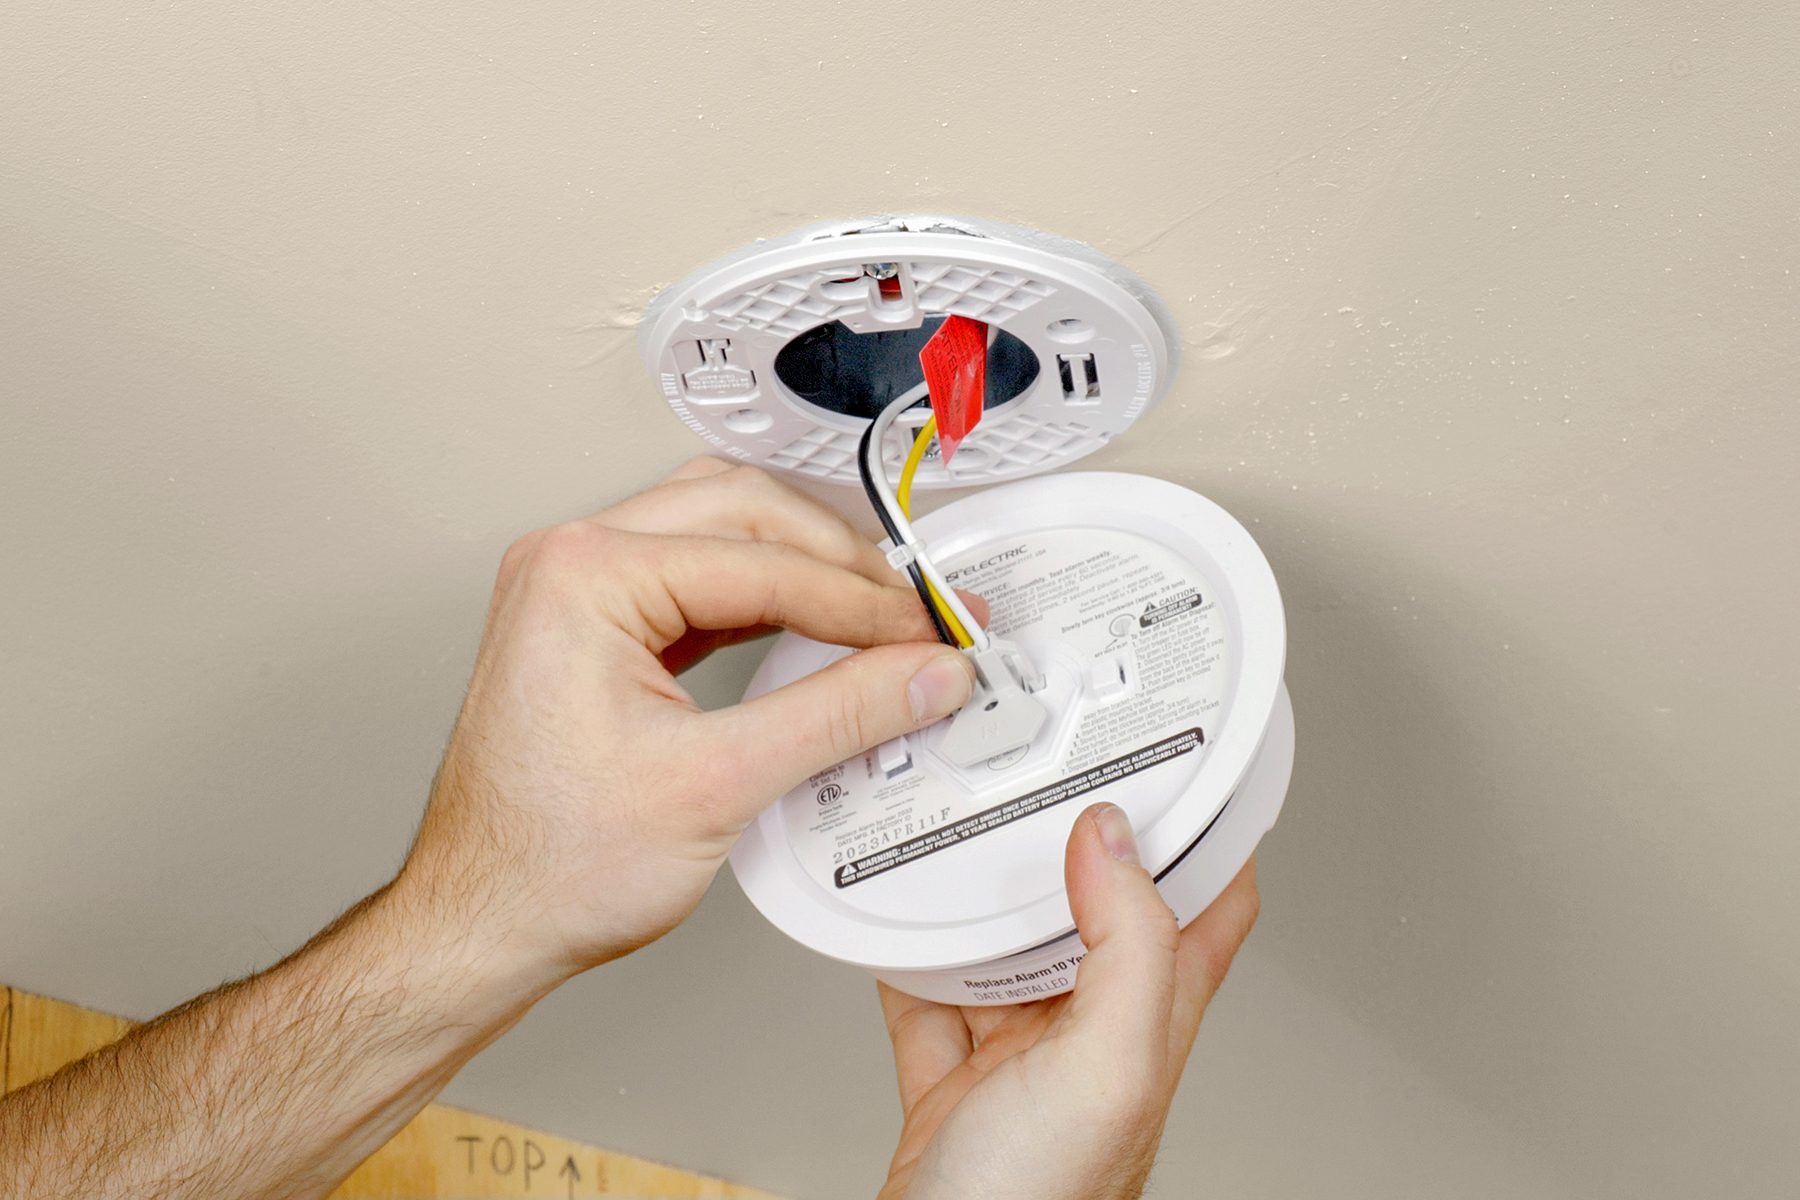
4. Disconnect the Old Alarm (The Gentle Eviction)
Most hard-wired alarms have a quick-connect plug. Give it a twist and a pull to detach it from the alarm base. Then, unscrew the old mounting bracket from the ceiling. You'll see wires connected with wire nuts. Carefully untwist the wire nuts and separate the wires. Pay attention to the colors! Usually, black is "hot," white is "neutral," and red/orange is for interconnectivity (if you have multiple alarms).
5. Install the New Bracket (The Fresh Start)
Take your new alarm's mounting bracket and secure it to the ceiling using the existing screws or new ones provided. Easy peasy!
6. Wire Up the New Alarm (The Color-Match Game)
This is where your detective skills come in handy. Match the wires from your ceiling to the wires from your new alarm's connector plug:
- Black to Black
- White to White
- Red/Orange to Red/Orange (if applicable, for interconnected alarms)
Twist the ends of matching wires together, then screw on a new wire nut until it's snug and secure. Give each wire a gentle tug to ensure it's firmly connected.
7. Mount and Test! (The Grand Finale!)
Plug the new alarm into its connector. Tuck the wires neatly into the electrical box, then twist or snap the alarm onto its new mounting bracket. Now for the exciting part! Go back to your electrical panel and flip the breaker back to "ON." Once the alarm powers up (it might chirp once or twice), press the "Test" button. It should let out a loud, confident beep. Success!

You Did It! Now Go Brag!
See? That wasn't so bad, was it? You just tackled a household task that many people outsource, and you did it safely and effectively. You've brought peace, quiet, and enhanced safety to your home, all with your own two hands. You're not just a homeowner; you're a home-conqueror!
This feeling of accomplishment? It's addictive! This little project is just one tiny step in a much larger journey of empowering yourself around your home. What other little nagging tasks have you been putting off? A leaky faucet? A wobbly chair? A drafty window? The world of DIY is waiting for you, filled with fun challenges and the immense satisfaction of making your space truly your own, one triumphant project at a time.
So, go ahead. Pat yourself on the back. Enjoy the silence. And start dreaming about your next DIY adventure. What else can you learn? What else can you conquer? The possibilities are endless!