How To Draw A Maltese Dog Step By Step
Hey there, fellow art enthusiast! Ever looked at a Maltese dog and thought, "Wow, I wish I could draw that adorable fluffball?" Well, guess what? Today's your lucky day! We're going to break down the process of drawing a Maltese, step-by-step. Don't worry, it's easier than teaching a cat to fetch (though maybe not much easier!). So grab your pencil, paper, and a dash of patience, and let's get started!
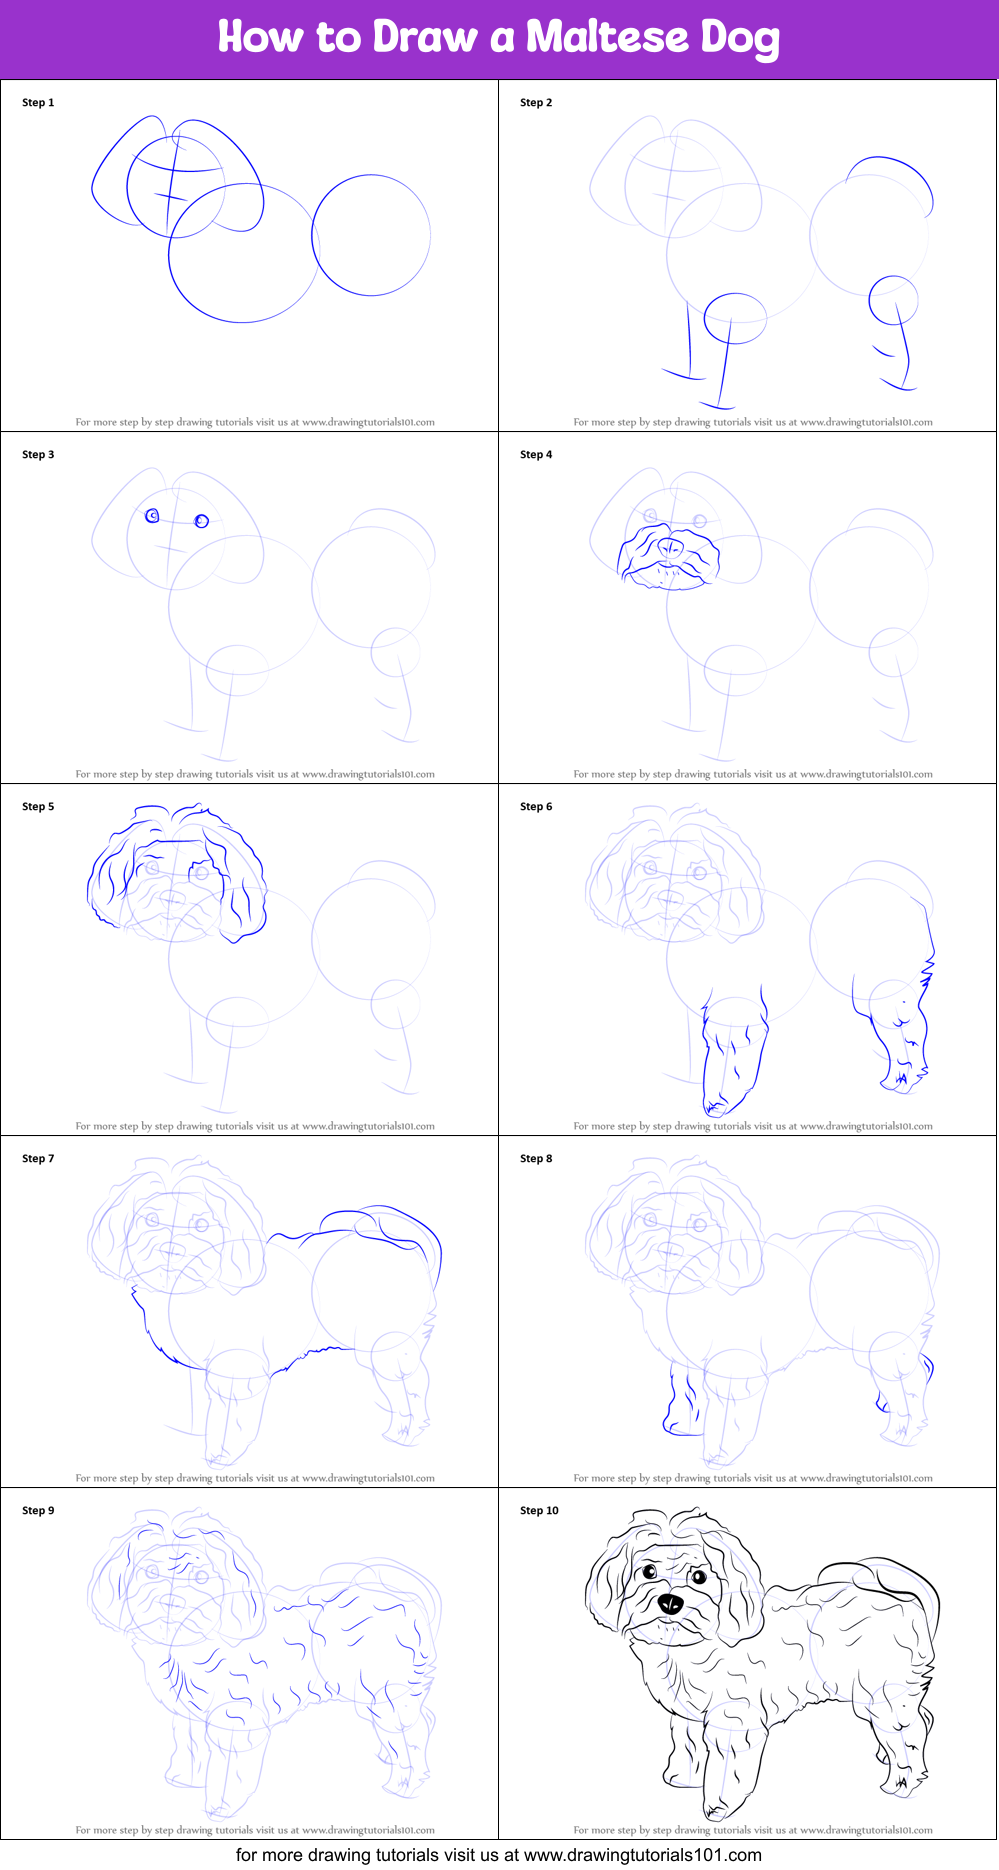
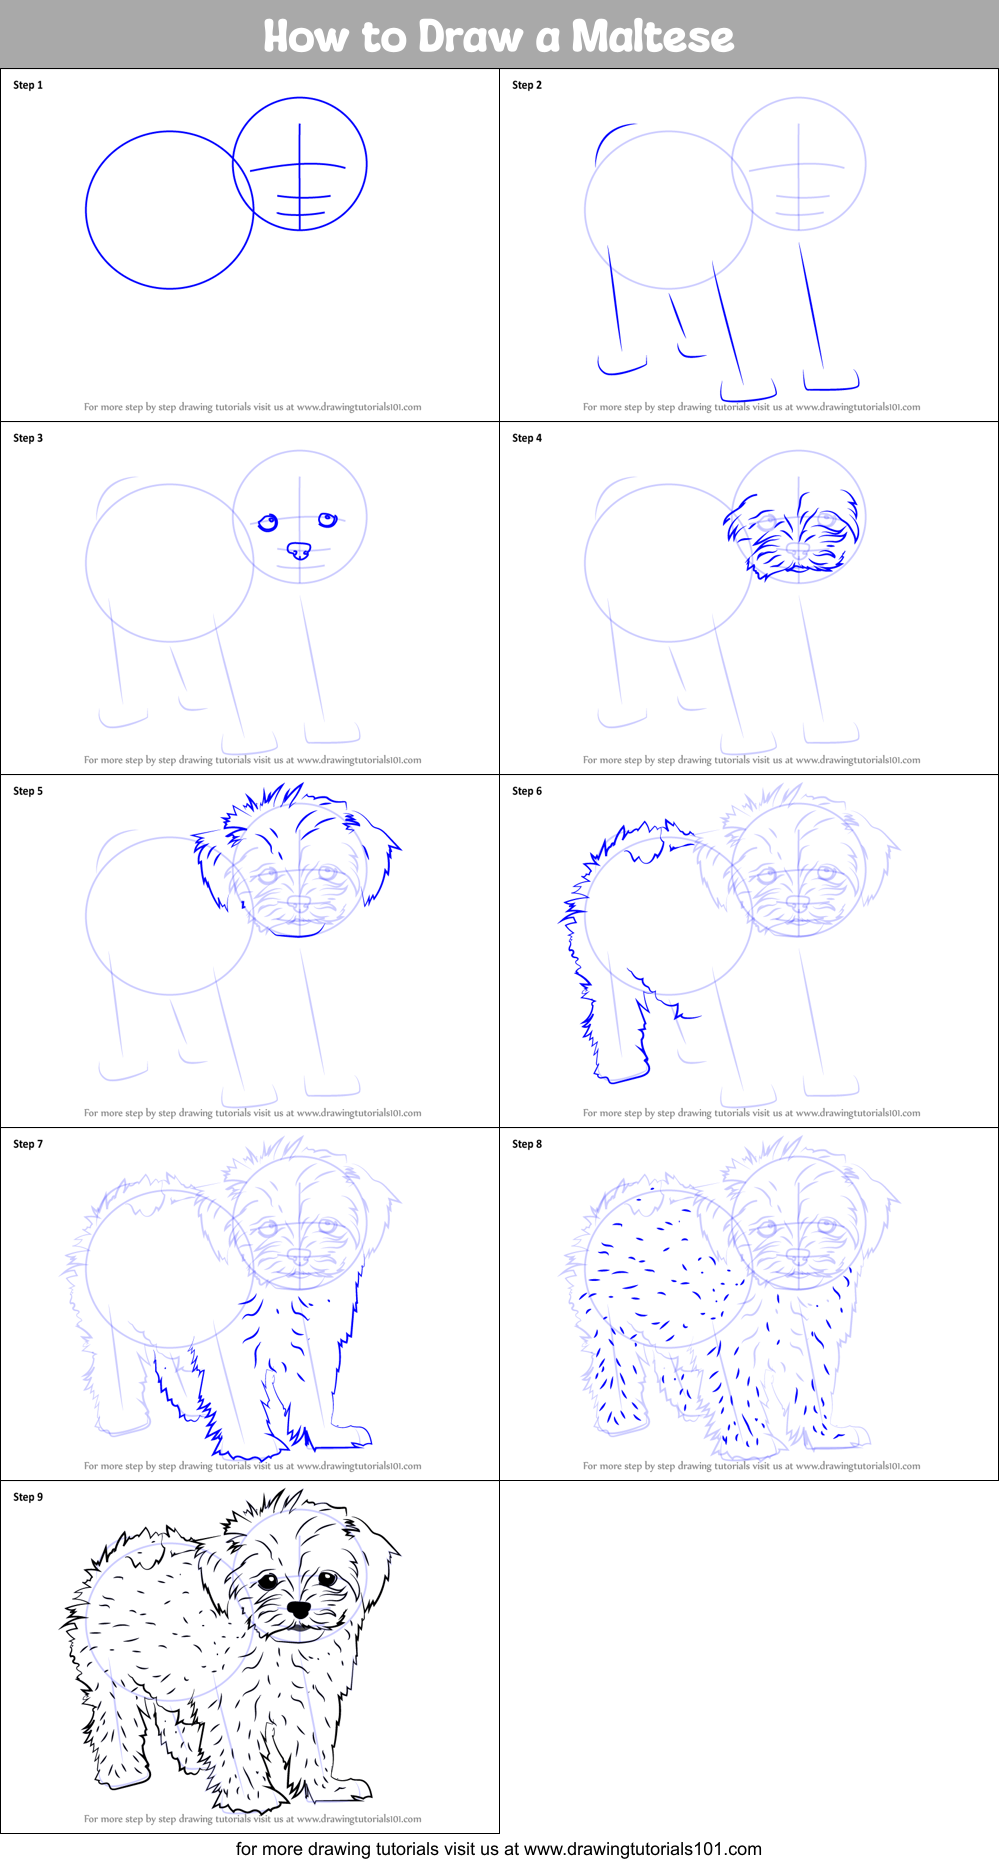
Step 1: The Basic Shapes – Like Building a Snowman, But Fluffier
Every great drawing starts with simple shapes. Think of it like building a snowman, only instead of snow, we're using circles and ovals. And instead of a carrot nose, well... you'll see!
First, draw a circle for the head. Don't worry about making it perfect; we're going for charm, not robotic precision! Next, draw a slightly smaller circle overlapping the bottom of the head – this will be the body. Now, a long, thin oval extending from the body will be our guide for the fluffy tail. See? Already looking a bit dog-shaped, right?
Step 2: Facial Features – Give 'Em Those Puppy-Dog Eyes!
Now for the fun part – adding the face! Draw a small, rounded triangle for the nose. Underneath the nose, sketch a tiny line for the mouth. Remember, Maltese dogs have the sweetest expressions, so make sure that mouth is smiling...or at least not frowning! (Unless you're going for a grumpy Maltese – hey, we don't judge!)
Next, the eyes. These are super important for capturing the Maltese's soulful gaze. Draw two small circles for the eyes. Leave a tiny white spot in each eye to give them that adorable sparkle. Now, this is key: Maltese dogs usually have dark eyes, so fill them in with a dark shade. Instant cuteness!
Step 3: Ears and Fluff – Prepare for Maximum Fluffiness!
Maltese dogs are famous for their long, flowing hair, so we need to get those ears right. Draw two slightly curved, elongated shapes on either side of the head. These will be the basic shape of the ears. Now, the real magic happens: add lots and lots of fluffy lines around the ears to simulate the hair. Don't be afraid to go wild! The fluffier, the better!
Speaking of fluff, let's add some around the head and body. Use short, light strokes to create a soft, fluffy texture. Remember, Maltese dogs are practically walking clouds, so don't skimp on the fluff!
Must Read
Step 4: Legs and Tail – Support Systems for All That Fluff!
Time to add the legs! Draw four slightly curved lines extending from the body. Keep them relatively short and thin, as Maltese dogs have delicate legs. Add small ovals for the paws.
Now, the tail! Remember that oval we drew earlier? Let's turn it into a fluffy tail. Add short, light strokes all around the oval to create a feathery texture. Maltese tails are often curled slightly over their backs, so give yours a nice, gentle curve.

Step 5: Refining and Adding Details – Time to Shine!
Now comes the cleanup! Erase any unnecessary guidelines or construction lines. Go over your drawing with a darker pencil to emphasize the outlines and details. Add some shading to give your Maltese some depth and dimension.
Here’s a tip: pay attention to the direction of the fur. Shade along the direction of the fur to create a more realistic look. You can also add some subtle details, like whiskers or a slightly darker patch of fur around the eyes or nose.
Step 6: Celebrate Your Masterpiece – You Did It!
Congratulations! You've officially drawn a Maltese dog! Give yourself a pat on the back (and maybe give your drawing a pat on the head too). It might not be perfect, but who cares? The important thing is that you had fun and created something!
Remember, drawing is all about practice and experimentation. The more you draw, the better you'll become. So keep practicing, keep experimenting, and keep having fun! And who knows, maybe one day you'll be drawing Maltese dogs that are even fluffier and cuter than the real thing! Now go forth and create some adorable artwork!