How To Add A Gradient To A Shape In Premier

Ever looked at a video and wondered how they got those cool color transitions within shapes, making them look modern and dynamic? Maybe it's a subtle background shift in a lower third, or a vibrant overlay on a logo. Chances are, it's a gradient! And guess what? You can create them yourself in Adobe Premiere Pro. It's not as daunting as it might sound, and learning how to add a gradient to a shape opens up a world of creative possibilities. Gradients can transform simple visuals into something captivating and professional-looking.
So, what exactly is a gradient, and why should you bother learning how to create one? Simply put, a gradient is a gradual blend of two or more colors. This smooth transition, rather than a harsh line, is visually appealing and adds depth to flat designs. In Premiere Pro, adding a gradient to a shape lets you customize the look and feel of your graphics, titles, and even video clips. The benefit is control: you can precisely define the colors, their positions within the gradient, and the angle of the color transition. This level of customization means you can perfectly match your gradients to your brand or the overall aesthetic of your project.
Think about it: in education, a teacher creating a video lesson could use a gradient background to highlight key information on a graphic. Instead of a boring solid color, a gradient makes the graphic more engaging. In daily life, vloggers could use gradient overlays on their intro sequences, making their channel stand out. Content creators producing explainer videos can use gradients to emphasize different sections of a visual, guiding the viewer's eye and improving comprehension. Imagine a video editing tutorial using a shape with a gradient to point towards a certain button on screen; much better than a plain arrow!
Must Read
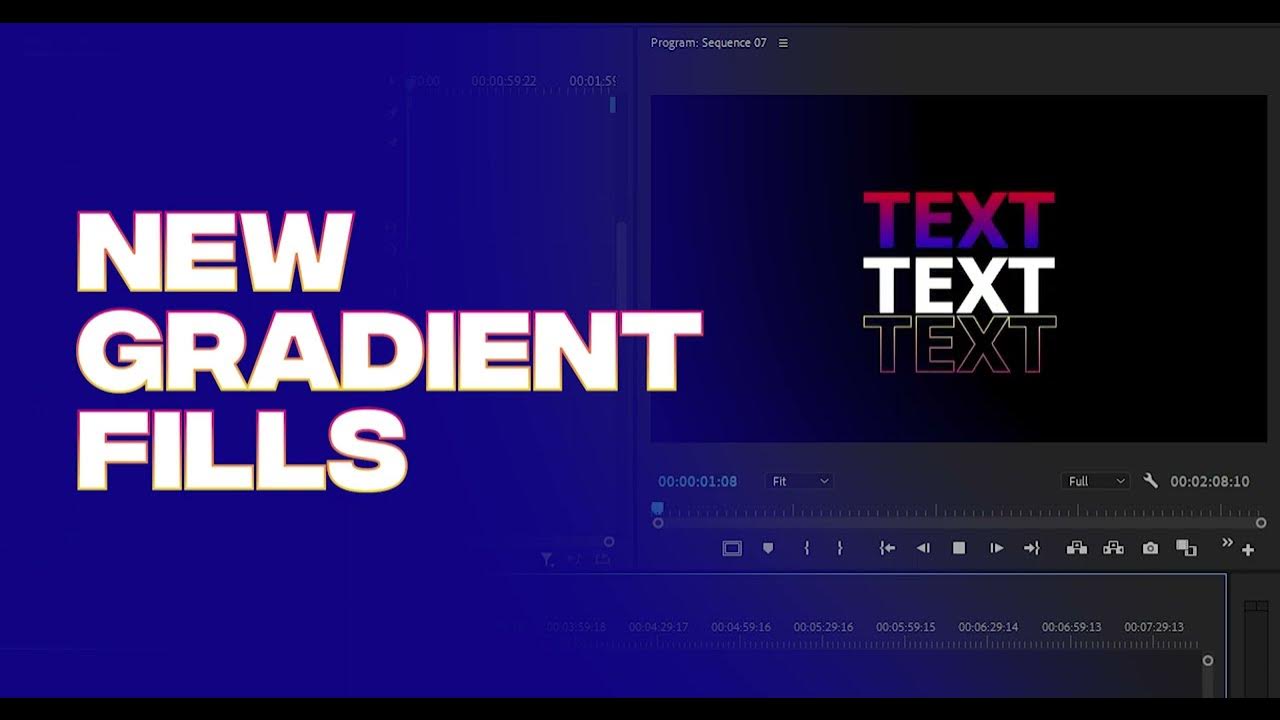
Okay, let's talk about getting started. Premiere Pro doesn't have a direct "gradient fill" option within its basic shape tools. Instead, you'll usually achieve this effect by using the Essential Graphics panel and manipulating effects. Start by creating a shape using the pen tool or by importing an existing shape. Next, look for effects like "Fill" and "Gradient Ramp" (search for them in the Effects panel). Apply these to your shape layer. The "Fill" effect lets you choose a base color if you want to build on top of it. "Gradient Ramp" is where the magic happens. It allows you to define two colors and their starting and ending points, creating the gradient.
Here's a practical tip: play around with the "Ramp Shape" setting in the "Gradient Ramp" effect. You can choose between a linear gradient (a straight line transition) and a radial gradient (colors radiating outwards from a central point). Don't be afraid to experiment! Adjust the colors, their positions, and the gradient angle until you achieve the desired effect. A simple way to explore is to start with two contrasting colors like blue and orange, then tweak them to softer tones like light blue and peach for a more subtle effect. Finally, remember to save your customized shapes as Motion Graphics templates for future use. Have fun exploring the colorful world of gradients in Premiere Pro!