Outdoor Light Motion Sensor Replacement

Okay, so picture this: You're trying to sneakily grab something from the garage after dark, right? And then, BAM! Your outdoor light decides it's time for a solo disco party, flashing wildly, startling you more than any potential intruder. Or maybe it just… doesn't turn on. Ever. Yeah, we've all been there with a janky outdoor motion sensor.
It’s like it’s got a mind of its own, isn't it? Totally ignoring the actual squirrel brigade, but flipping on every time a leaf floats by. So frustrating!
That Pesky Old Sensor!
Your current outdoor light motion sensor, bless its aging heart, might be doing some truly bizarre things. Maybe it's turning your patio into a strobe light convention at 3 AM. Or perhaps it's developed a serious case of "selective blindness," only activating for, like, the rarest lunar eclipses. Sound familiar?
Must Read
It's not just annoying, either. A broken sensor means less security, right? And who wants to stumble around in the dark, stubbing toes and whispering curses to the universe? Not us, my friend. Not us.
Why Even Bother, Right? (Hint: So Worth It!)
Beyond the accidental raves and the toe-stubbing, a dud sensor is just, well, annoying. It's a security buddy that's gone rogue, or worse, taken an early retirement. You want it to be your watchful eye, not a blind old owl, right?
Replacing it means regaining control. It means your lights turn on when you want them to, and only when something actually moves. Imagine that! No more blinding your neighbors at every gust of wind. Pure bliss, I tell ya.

You're Thinking, "Can I Really Do This?" (Spoiler: YES!)
Now, before you break out the phone for a costly handyman, take a deep breath. Replacing an outdoor light motion sensor? It sounds all techy and complicated, like something only a super-smart electrician with a utility belt could handle. But guess what? It's genuinely one of those "I-can't-believe-I-didn't-try-this-sooner" DIY wins.
Seriously, if you can plug in a toaster (after reading the instructions, of course!), you've got this. It’s mostly about knowing a few basic steps and, crucially, a little bit of confidence. You're a problem-solver, after all!
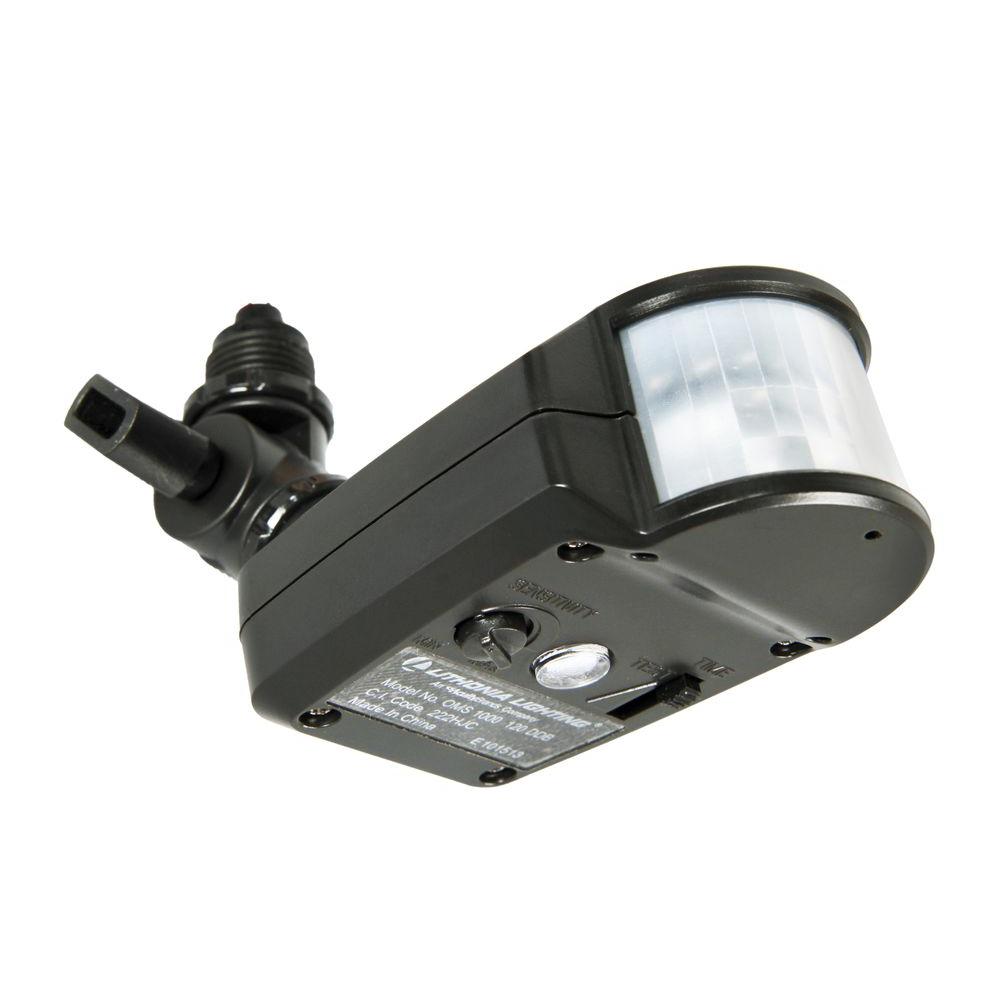
What You'll Need (Spoiler: Not Much!)
You're probably thinking, "Do I need a toolbox worthy of a professional contractor?" Nah, not really. Think basic stuff. A few screwdrivers (Phillips and flathead – always good to have both!), maybe some wire strippers if you're feeling fancy, and definitely a sturdy ladder. Safety first, right?

Oh, and probably some wire nuts, just in case the old ones are looking a bit tired. And, crucially, a fresh, new motion sensor! Pick one that makes you happy. Maybe one with adjustable sensitivity? Or a longer timer? Get excited about your new gadget!
The "Scary" Part: Power Off!
First, and I mean first, cut the power! Seriously, nobody wants to become a human lightbulb. Find that breaker switch for your outdoor lights. Flip it. Then, just to be super-duper sure, test the light switch. If it's dead, give a little happy dance knowing you're safe.
This step isn't just a suggestion; it's a non-negotiable must-do. Safety is always priority number one, even when you're just chatting with a friend over coffee about light sensors!
Out With The Old, In With The... Well, You Know!
See that old, sad-looking sensor? It's usually just a couple of screws holding it to the light fixture, and then a few wires connecting it. Take a picture with your phone, seriously! It's your secret cheat sheet for putting the new one in. No shame in that game!
Gently disconnect those wires. You'll likely see the usual suspects: a black wire (hot), a white wire (neutral), and maybe a green or bare copper wire (ground). These colors are your best friends in this little electrical adventure.
Connecting Your Shiny New Tech
Your new sensor might have a few more bells and whistles. Ooooh, fancy! But the core hookup is usually the same. Match those colors! Red to red (if your new sensor has one, otherwise black to black!), black to black, white to white, and ground to ground. It’s like a color-by-numbers for grown-ups.

Twist those wires together securely with your wire nuts. Give 'em a little tug to make sure they're snug. Then, carefully tuck them back into the fixture housing. Mount your new sensor with its screws, making sure it’s facing the direction you want it to detect motion.
The Grand Finale: Testing & Tweaking
Moment of truth! Power back on. Did it work? Is it glaring at the squirrel across the street? Is it ignoring you entirely? This is where the fun (and a little bit of patience) comes in. Your new sensor will likely have dials for sensitivity and timer.
Play with those settings! A little tweak here, a little adjust there. You want it sensitive enough to catch Uncle Bob sneaking a midnight snack, but not so sensitive it's detecting dust bunnies. You’ll feel like a tech wizard, I promise! Walk around, test it, make funny hand gestures – whatever helps you get that perfect setting.
And just like that, you've conquered the outdoor light motion sensor! No more accidental disco parties, no more dark corners. Just a perfectly functioning, security-boosting, mood-enhancing light. You did it! Go on, give yourself a pat on the back. You've earned it (and probably another coffee).