How To Remove An Old Honeywell Thermostat

Ever gazed at that trusty old Honeywell thermostat on your wall and thought, "You know what? It's time for a change"? Maybe you're dreaming of a sleek smart thermostat that talks to your phone, or perhaps you just want to declutter your living space. Whatever your motivation, bidding farewell to an old Honeywell is easier than you might think. Think of it as a mini home glow-up, a gentle nudge towards a smarter, more aesthetic future. Let's make this a fun, empowering little DIY adventure!
First Things First: Safety is Sexy!
Before we even think about touching that vintage box, we need to talk about the golden rule of home improvement: power off! Seriously, this isn't the time to channel your inner MacGyver with live wires. Head to your electrical panel – that metal box usually in your basement, garage, or a utility closet – and find the breaker that controls your furnace or air conditioning unit. It might be labeled "Furnace," "AC," or simply "HVAC." Flip it off! If you're unsure, you can always flip the main breaker for your entire home, but that might mean a temporary blackout for your Netflix binge. Once it's off, double-check by trying to adjust the thermostat – if it's truly dead, you're good to go.
A Quick Nod to an Icon
Honeywell thermostats have been a fixture in homes for decades, almost like the reliable family sedan of temperature control. From the iconic T87 Round ("The Round" to enthusiasts) introduced in 1953 – so classic it’s in the Museum of Modern Art! – to the more rectangular models many of us know, they’ve kept us cozy for generations. While we're sending ours off to greener pastures (or the recycling bin), it's worth a moment to appreciate its steadfast service. But hey, even legends need to retire sometimes, right?
Must Read
Gather Your Glamorous Gear
No need for a full toolbox here, just a few humble heroes:
- A screwdriver (usually Phillips, but sometimes a flathead).
- A camera or smartphone (for taking pictures – your future self will thank you!).
- Maybe a small baggie or container for tiny screws.
- (Optional) A bit of painter's tape if you're feeling extra cautious about loose wires.
The Great Unveiling: Step-by-Step
Alright, power's off, tools are ready. Let's do this!
1. Pop the Cover
Most Honeywell thermostats have a cover that either snaps off or gently pulls away from the base. Look for small tabs on the sides or bottom, or simply try gently pulling the front plate straight out. It might feel a little stuck if it's been there a while, like an old sticker that's become one with the wall. Don't be afraid to apply a little steady pressure.
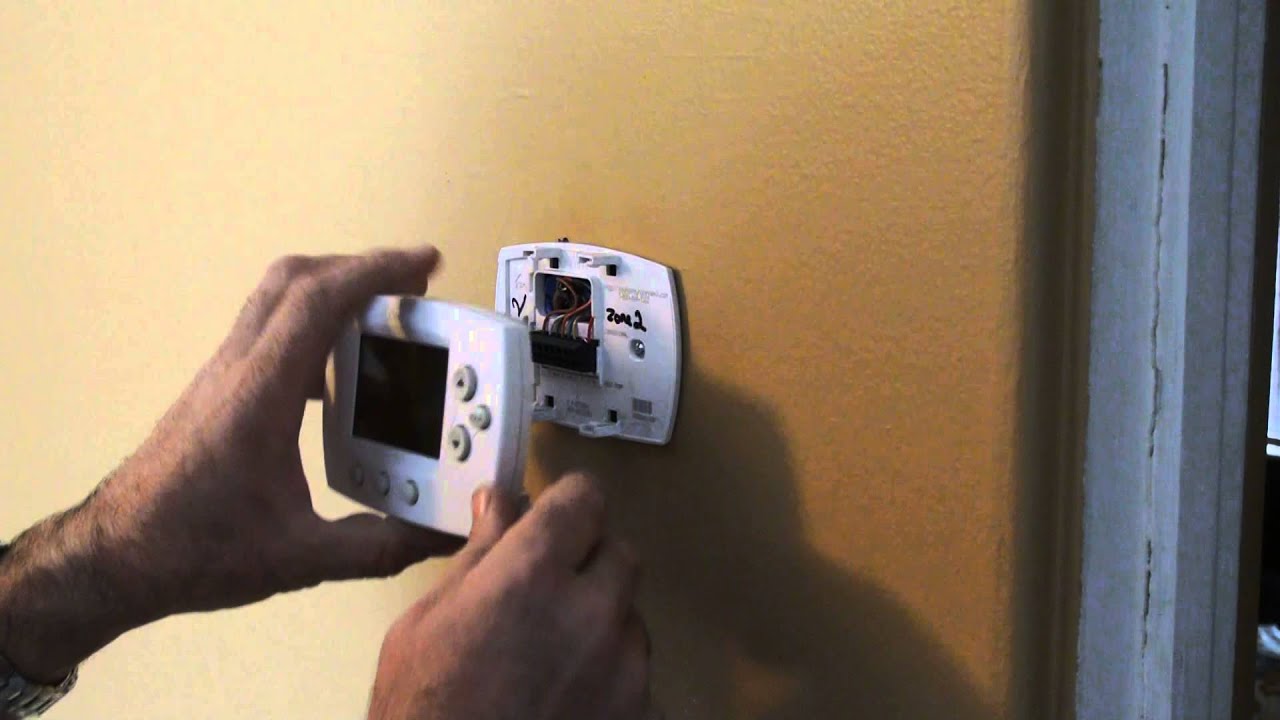
2. The Wire Map: Your DIY Compass
Once the cover is off, you'll see a bundle of thin wires connected to terminals. This is your crucial photo op! Snap a clear picture of how each wire is connected to its labeled terminal (e.g., "R," "G," "Y," "W," "C"). This image is gold, especially if you're installing a new thermostat later. Think of it as your secret decoder ring for future comfort.

3. Disconnect and Conquer
Now, it's time to release those wires. Each wire is usually held in place by a small screw. Using your screwdriver, gently loosen each screw and pull the corresponding wire free. As you disconnect them, let them hang freely, or if you're worried about them disappearing into the wall (a common, slightly panicked scenario!), you can gently tape them to the wall or to each other with a bit of painter's tape. Remember, the power is OFF, so no worries about sparks!
4. The Base Farewell
With the wires liberated, the thermostat's backplate (the part still screwed to the wall) is all that's left. You'll typically find two or more screws holding it in place. Unscrew these, and voila! The old Honeywell base should lift right off the wall. You might discover a delightful collection of dust bunnies or a slightly discolored patch of wall where it used to live – a true archaeological find!

Afterglow: What's Next?
And just like that, you're done! You've successfully removed your old Honeywell thermostat. You now have a blank slate, ready for a modern upgrade, a fresh coat of paint, or simply a moment of satisfaction. Pat yourself on the back – you're officially a DIY hero. The world of smart home tech or just a sleeker aesthetic awaits!
A Little Reflection on Letting Go
There's something oddly satisfying about taking down an old piece of technology that's served its purpose. It's a small act, but it reflects a bigger truth: sometimes, we need to let go of the old to make space for the new, whether it's an outdated thermostat, a worn-out habit, or an idea that no longer serves us. Embracing change, even in the smallest corners of our homes, can be incredibly liberating. So, cheers to your newly freed wall, and to the small, mighty steps you take every day to upgrade your space – and your life!
