How To Remove A Hardwired Smoke Alarm
Alright, confession time. I once had a smoke alarm that decided to start chirping its low-battery warning at 2 AM. Not a gentle little chirp, mind you. More like an insistent, high-pitched shriek designed to penetrate the deepest corners of your REM sleep. After a week of this, and the realization that its "battery backup" wasn't exactly backing up anything useful, I decided enough was enough. But then came the kicker: it was hardwired. Ah, the joy! This wasn't just a pop-off-the-ceiling-and-swap-the-AAAs situation. This was a "time to confront the electrical beast" moment.
Sound familiar? Maybe your smoke alarm is past its prime (they do expire, you know!), or it's giving you false alarms every time you look at the toaster, or perhaps you're just doing some reno work and it's in the way. Whatever your reason, if you've got a hardwired smoke alarm that needs to go, you've come to the right place. Let's tackle this beast together, shall we? No shockers, just good, old-fashioned DIY courage.
Seriously, Safety First (No, Really!)
Before we even think about touching that alarm, let's have a little chat about electricity. It's fantastic for keeping our lights on and our coffee hot, but it's not so great when it's zapping you. So, consider this your non-negotiable, loud-and-clear warning: we are dealing with electricity here. If you're even a smidge uncomfortable, or if this whole concept makes your eyebrows jump, please, call a professional. No shame in that game! Your safety is paramount.
Must Read
Step 1: Gather Your Tools (The Usual Suspects)
You don't need a full electrician's kit, but a few things will make your life much easier:
- A sturdy step ladder (don't try to balance on a wobbly chair, please).
- A Philips head screwdriver (most alarms are mounted with these).
- Wire nuts (if you're capping off wires or connecting a new alarm).
- Electrical tape (always good to have).
- A voltage tester (the non-contact kind is super handy and highly recommended!).
- A flashlight or headlamp (because ceilings are surprisingly shadowy).
- Safety glasses (to protect those peepers from dust or debris).
- Gloves (optional, but a good idea for grip and minor protection).
Step 2: Kill the Power! (The Most Important Step, Period.)
Okay, this is where we get serious. Go to your electrical panel (usually in the basement, garage, or a utility closet). You need to find the breaker that controls your smoke alarms. Do NOT just flip off the main breaker unless you really want to sit in the dark for a while. Look for labels like "Smoke Alarms," "Lighting," or "General Circuits." If you're unsure, you can turn off the main for a moment, but ideally, you want to isolate the circuit.

Once you think you've found it, flip it to the "OFF" position. Now, here's the crucial part: go back to the smoke alarm and use your voltage tester. Touch it to the wires coming out of the ceiling (even through the insulation if you can). If it lights up or beeps, guess what? The power is still on. Go back to the panel and try another breaker. Repeat until the voltage tester confirms no power whatsoever. Trust me, this little step can save you a nasty surprise.
Step 3: Unmounting the Beeping Menace
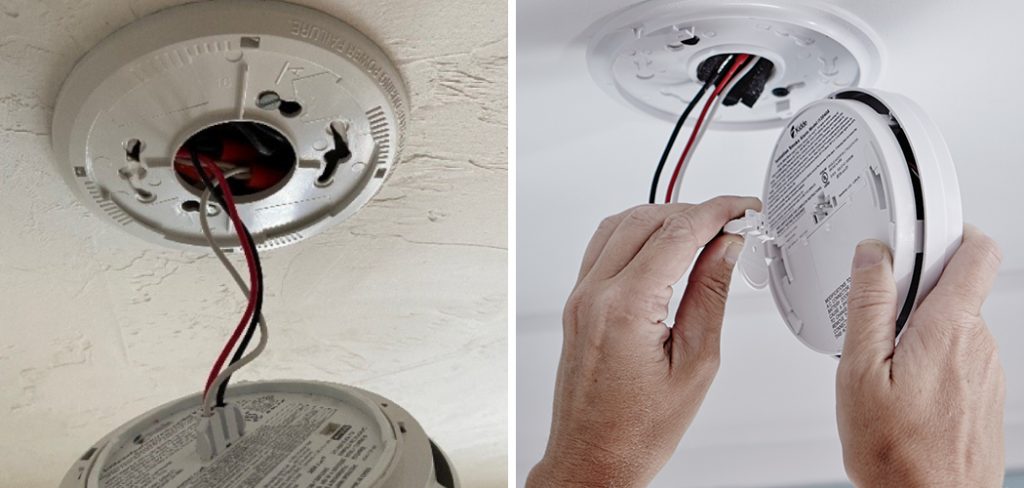
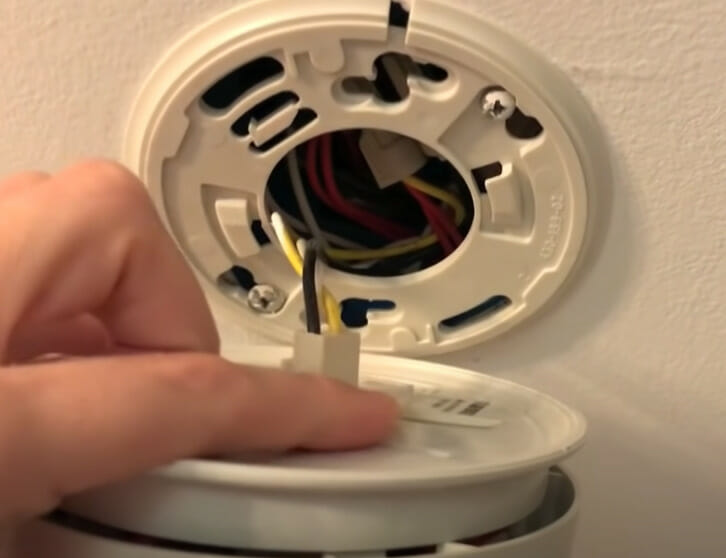
With the power confirmed off, it's time to get hands-on. Most smoke alarms twist off their mounting bracket with a counter-clockwise turn. Give it a firm but gentle twist. If it doesn't budge, check for small tabs or clips you might need to press. Once the alarm unit is detached, you'll see a bundle of wires coming out of the ceiling and usually a quick-connect plug that goes into the back of the alarm. Disconnect this plug. Ta-da! The alarm unit itself is free.
Step 4: The Wiring Tango
Now you're looking at the mounting bracket still attached to the ceiling, with wires sprouting out. There will likely be three wires: a black (hot), a white (neutral), and often a red or orange (the inter-connect wire, which talks to other alarms in your house). There might also be a bare copper or green wire, which is the ground.
If you're installing a new hardwired alarm, you'll likely just connect the new quick-connect plug. If you're removing it entirely, or capping it off, you'll need to deal with the individual wires. Unscrew the mounting bracket from the ceiling. You'll then see how the wires are connected – usually with wire nuts. Carefully twist off the wire nuts to disconnect each wire. Remember which color goes where, just in case you need to re-connect later!
Step 5: What Now with These Wires?
So, you have loose wires hanging from your ceiling. What's the plan? If you're replacing the alarm with a new one, simply follow the new alarm's instructions to connect the wires (matching color to color) and then plug it into the new quick-connect harness.

If you're not replacing it immediately, or ever, you need to make those wires safe. Twist a wire nut onto the end of each individual wire. That's right, even the ground wire. You don't want any exposed copper. Then, gently push the capped wires back into the electrical box in the ceiling. You can then cover the hole with a blank ceiling plate. This keeps everything tidy and, more importantly, safe.
A Few Parting Thoughts (Because We're Thorough Like That)
Interconnected systems: Remember that red/orange wire? If you have multiple hardwired alarms, they're usually interconnected. Removing one might affect the others. If you're just swapping one for a new one, this usually isn't an issue as long as the new one is compatible. If you're removing one permanently from an interconnected system, the remaining alarms might still function, but check their operation manually. Sometimes, a special end-of-line resistor is needed if you break a circuit.

The mounting plate: Don't forget to remove the old mounting plate if you're not putting a new alarm back in the same spot, or if the new alarm comes with its own plate. Just unscrew it from the electrical box.
Once you've safely capped the wires or installed your new alarm, head back to your electrical panel and flip that breaker back on. If you've installed a new alarm, test it according to the manufacturer's instructions. If you've capped the wires, double-check that your lights and other circuits are working as expected.
And there you have it! You've faced the hardwired smoke alarm, stared it down, and emerged victorious. No more mystery chirps, no more random shrieks. Just a job well done. Now, go grab yourself a celebratory snack – just maybe don't burn the toast this time, okay? You just did all that work!