How To Install A Keypad For Garage Door

Ever played that thrilling, yet utterly exhausting, game called "Where's the Garage Door Remote Now?" It usually involves frantic pocket patting, a quick rummage through the car's abyss (which, let's be honest, could hide a small civilization), and then the inevitable sigh as you realize it's probably chilling on the kitchen counter, taunting you from afar.
Or perhaps you've experienced the joy of juggling a grocery bag, a squirming toddler, and your keys, all while trying to wrestle the remote out of its hiding spot. It’s enough to make you consider a career as a circus performer.
Well, my friend, there’s a superhero in town, and it goes by the name of a garage door keypad. It’s like having a secret handshake with your garage, except instead of a handshake, it’s a simple four-digit code. No more fumbling, no more forgetting, just pure, unadulterated convenience. And the best part? Installing one is easier than assembling most flat-pack furniture – seriously!
Must Read
Why You Need This In Your Life (and why it's a game-changer)
Imagine this: Kids are playing outside, they need their bike, but you’re in a Zoom meeting looking professional (ish). Instead of yelling "Go find the remote!" or breaking your concentration, they just tap in the code. Freedom!
Or maybe you're out for a walk or a run. You don't want to carry your keys or phone, but you still need to get back in. Ta-da! Keypad to the rescue. It's like having a trusty butler, but without the awkward small talk or the need to polish his silver tray.
Alright, Let's Get Down to Business (Lightly)
Before you picture yourself in a hard hat, wielding heavy machinery, let’s talk tools. You won't need a degree in advanced physics, just a few everyday heroes:
- A screwdriver (Phillips head is usually the star).
- A drill (to make tiny pilot holes – nothing intimidating, I promise).
- A pencil (for marking, not for writing your memoirs).
- Maybe a measuring tape (if you’re feeling extra precise).
- And of course, your shiny new keypad (with batteries, because nobody likes a keypad that's all talk and no action).
Step 1: Location, Location, Location!
First up, picking your prime real estate. Think of it like choosing the perfect spot for a tiny, digital sentinel. You want it somewhere easily accessible from your driveway, but not so low that your dog could accidentally open the garage with a well-placed sniff. Most people put it at eye level, just beside the garage door itself. Use your pencil to mark where the screw holes will go.

Step 2: A Little Drilling, A Lotta Thrilling
Now, channel your inner Bob the Builder (or Brenda the Builder!). Use your drill to create small pilot holes where you made your pencil marks. Remember, just a little nudge, not a full-on excavation. These pilot holes make screwing in the keypad much easier and prevent the plastic from cracking. Gentle does it!
Step 3: Mount That Marvel!
Align your keypad with the pilot holes and secure it with the screws provided. Don’t overtighten like you’re trying to win an arm-wrestling contest with a screw. Just snug enough so it feels solid. Give it a little wiggle test. If it doesn't move, you're golden!

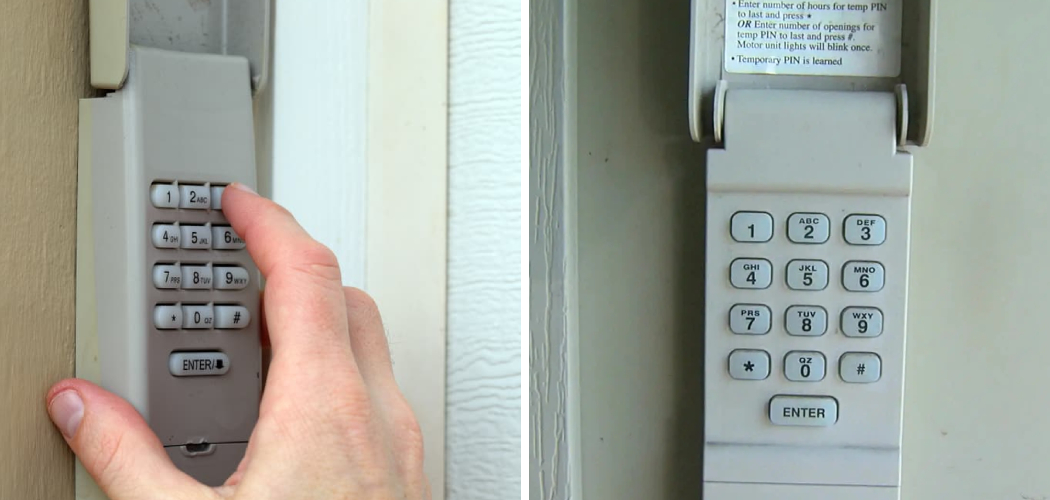
Step 4: The Brainy Bit – Programming Your Code
This is where the magic happens, and it’s surprisingly simple. Every keypad comes with instructions specific to its brand (Chamberlain, LiftMaster, Genie, etc.), so definitely give those a quick glance. Generally, it involves:
- Pressing a "learn" button on your garage door opener unit (the big box hanging from the ceiling). This button usually has a little LED light next to it.
- Within about 30 seconds (don’t dilly-dally!), entering your chosen personal code on the keypad.
- Pressing the "enter" or "#" button on the keypad.
- Watching for the garage door opener light to blink or hearing a click. That's its way of saying, "Got it, boss!"
If it doesn't work the first time, don't panic! It’s not judging you. Just repeat the steps. Sometimes it takes a couple of tries, like trying to teach a new trick to a slightly stubborn cat.

Step 5: The Grand Finale – Testing!
Step back, take a deep breath, and enter your freshly programmed code. Then press the 'enter' button. Did the garage door open? Close? If so, congratulations! You've just leveled up your home's IQ. You deserve a round of applause, or at least that forgotten fry at the bottom of the bag you've been saving.
What If It Doesn't Work Right Away? (The Mildly Annoying Bit)
Don’t throw in the towel just yet! Most common issues are pretty easy fixes:
- Check the batteries: Are they in correctly? Are they fresh? Keypads are like teenagers; they need their energy.
- Is the "learn" button active?: Make sure you pressed it and initiated the programming sequence within the time limit.
- Code mix-up?: Did you accidentally type a different code than you intended? It happens!
- Compatibility: Very rare, but double-check your keypad is compatible with your garage door opener brand.
And there you have it! A garage door keypad installed, ready to bring peace, convenience, and remote-free bliss to your everyday life. Go forth and enjoy your newfound freedom from the "Where's the remote?" saga!