Nest Learning Thermostat Installation Instructions
Ever gazed longingly at those sleek, futuristic thermostats, wondering if your home could be that smart? You've seen the Nest Learning Thermostat in action, effortlessly managing temperatures, saving energy, and generally being the unsung hero of a cozy household. But then you think, "Installation? Ugh, electrical wires, complicated manuals..." Well, hold your horses! Installing a Nest thermostat is often way less daunting than you might imagine. It's less like defusing a bomb and more like assembling a fancy LEGO set for adults. Seriously! Let's dive into why bringing this little genius into your home isn't just a cool upgrade, but a surprisingly achievable DIY victory for you.
Getting Ready for Your Smart Home Adventure
Before you even think about unscrewing anything, there are a couple of chill, important steps. It's like preparing for a road trip – you wouldn't just hop in the car and hope for the best, right?
Is Your Home Nest-Ready? The Compatibility Check!
First things first: you need to see if your current system and your dream Nest are a match made in HVAC heaven. Nest offers a super handy online compatibility checker. You'll answer a few simple questions about your current thermostat's wiring – often just peeking behind the faceplate for a moment. This step is crucial, like checking if a puzzle piece actually fits before you try to force it. Most systems are compatible, but it’s always better to know upfront!
Must Read
Gather Your Tools (Spoiler: You Probably Have Them!)
Good news! You won't need a whole toolbox worthy of a professional contractor. Usually, all you need is a screwdriver (flathead and Phillips), your smartphone for photos (a lifesaver!), and maybe a pencil. That’s it! No fancy wire strippers or voltmeters required for most installations. It's almost disappointingly simple, right?
Power Down, Buttercup!
This one is non-negotiable! Before you touch any wires, head to your circuit breaker and turn off the power to your HVAC system. This protects both you and your unit. Think of it like putting your system to sleep before surgery – you definitely don’t want it kicking on mid-operation! Always double-check by trying to turn on your old thermostat; if it’s dead, you’re golden.
The Moment of Truth: Wires and Wonders
Okay, deep breaths! This is the part that often gives people pause, but honestly, it’s mostly about observation and careful replication. You're not reinventing the wheel; you're just swapping out a slightly less intelligent wheel for a super-smart one.
The Old Thermostat: Snap a Pic!
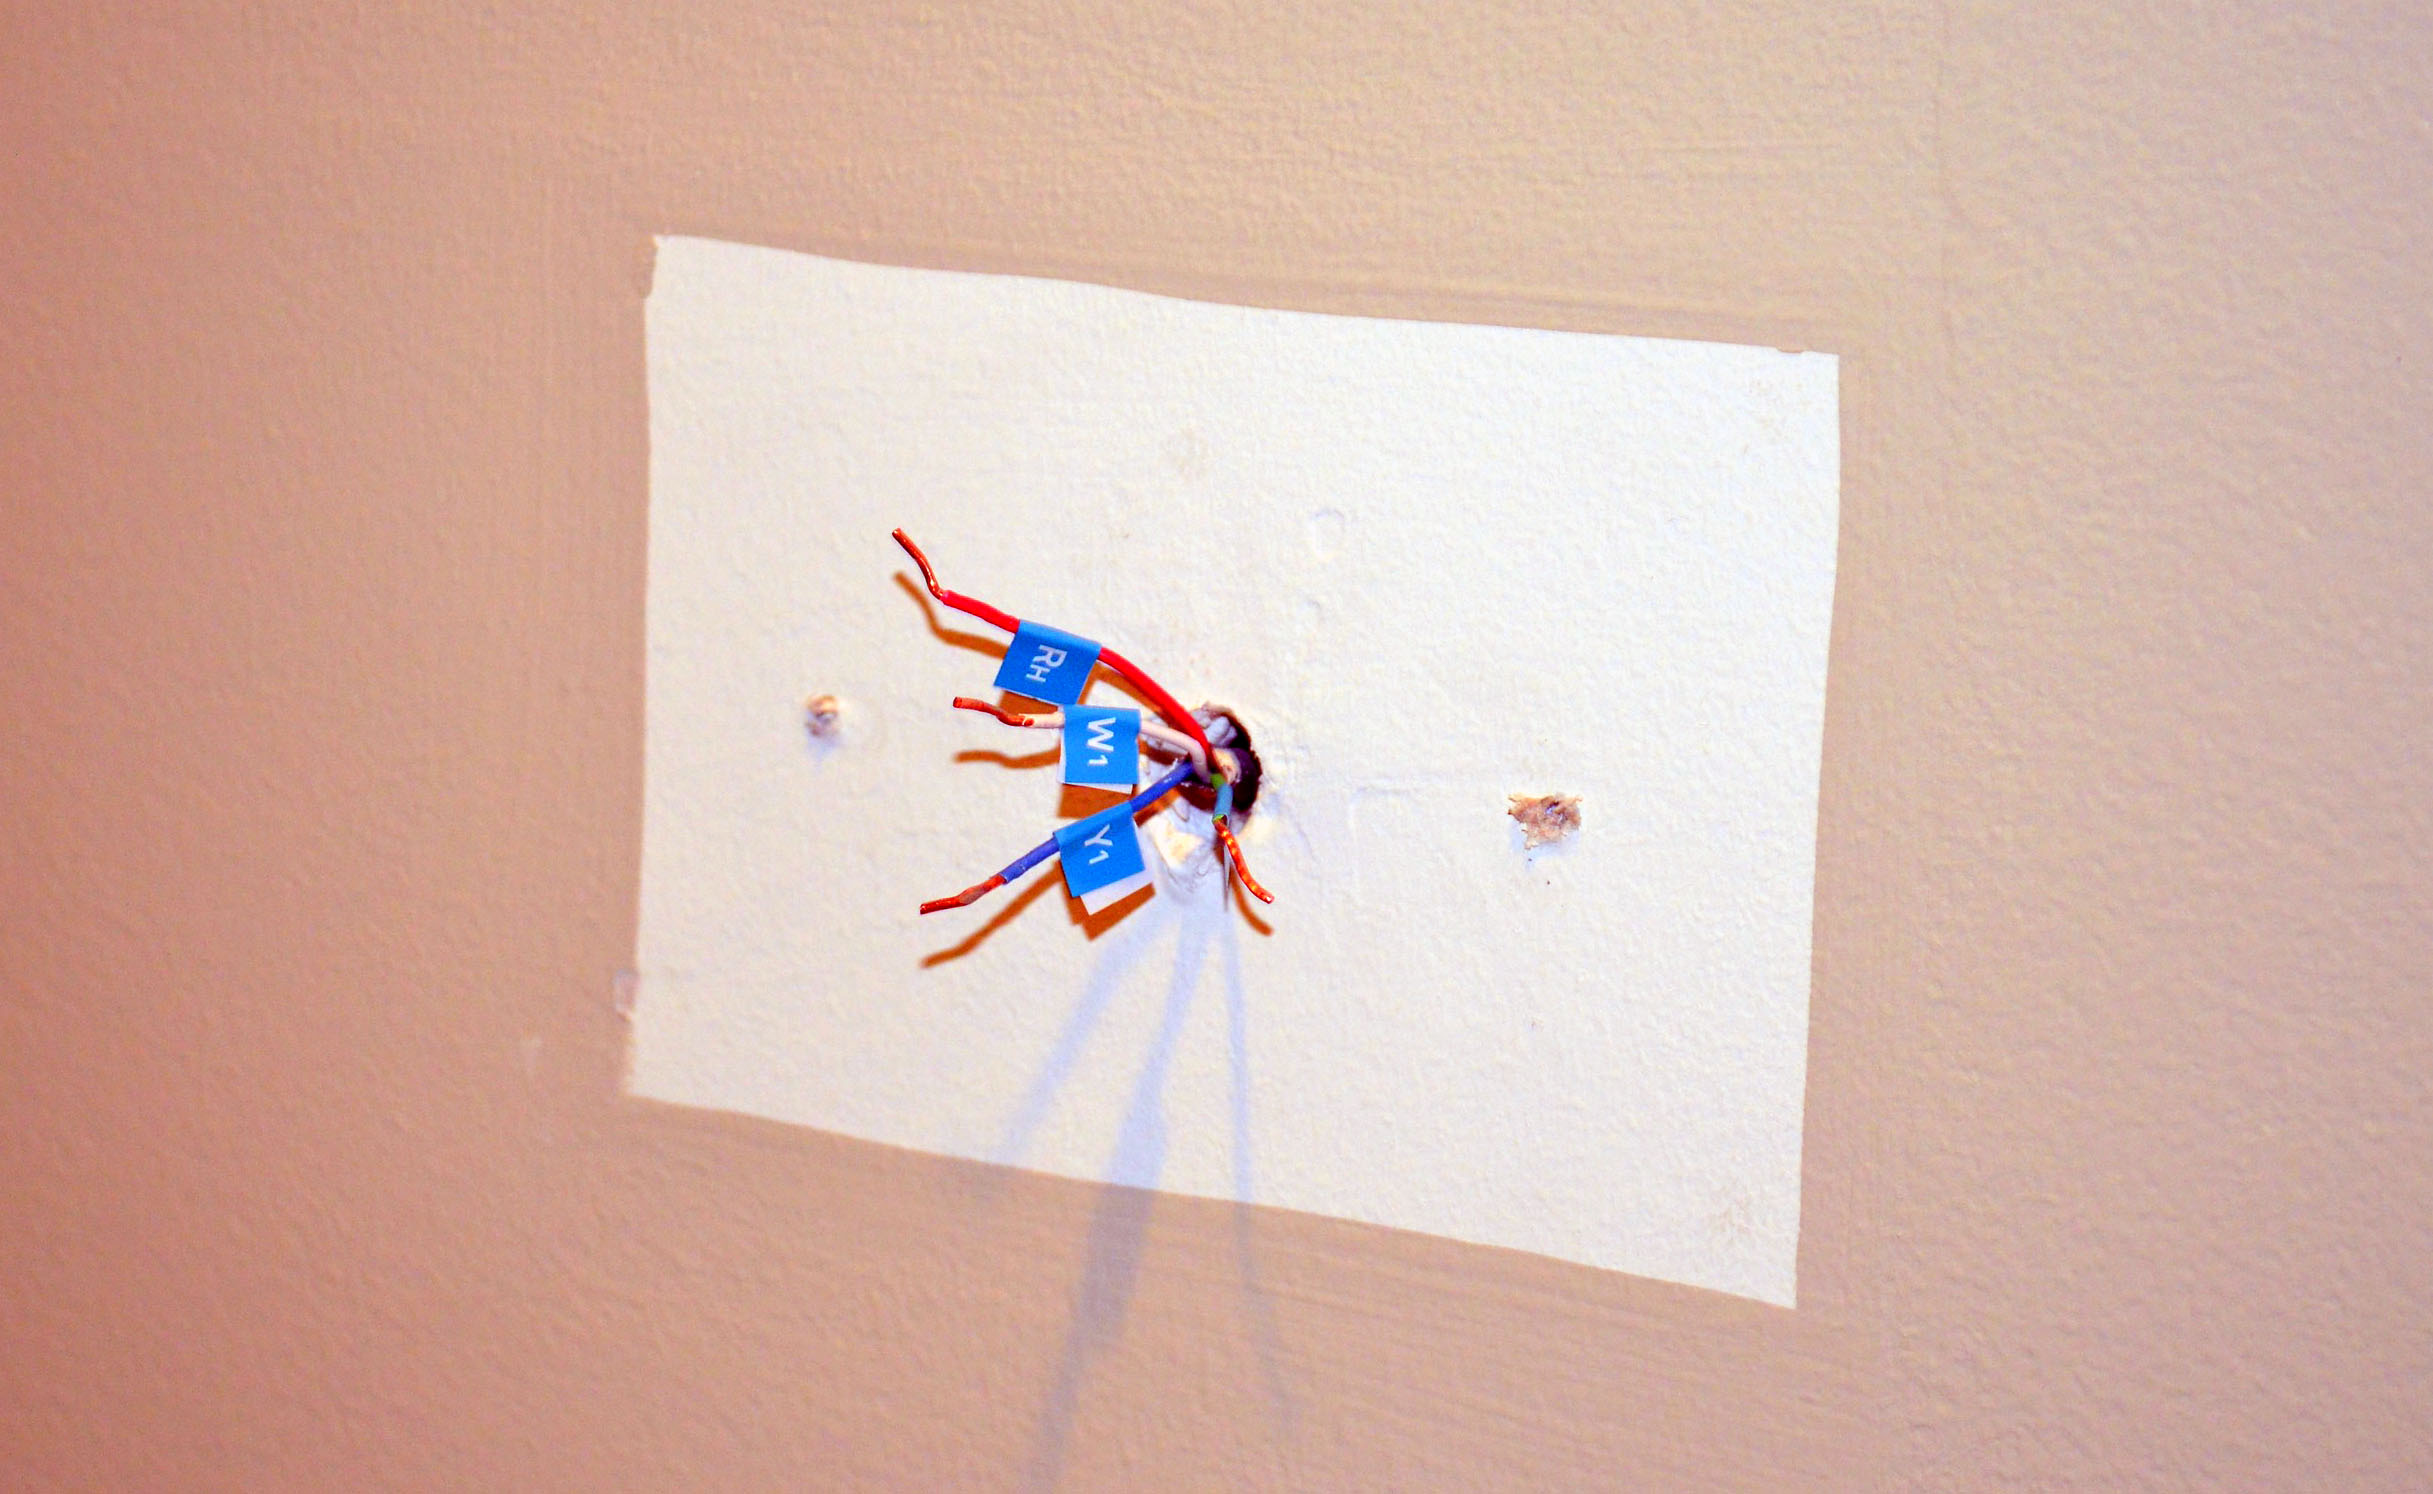
Carefully remove the faceplate of your old thermostat. See those wires connected to terminals (R, G, Y, W, C, etc.)? This is where your smartphone shines! Take a clear, well-lit picture of how everything is currently wired. This photo is your map, your safety net, your precious guide. Trust us, future you will thank present you for this invaluable reference!

Unwiring the Past, Connecting the Future
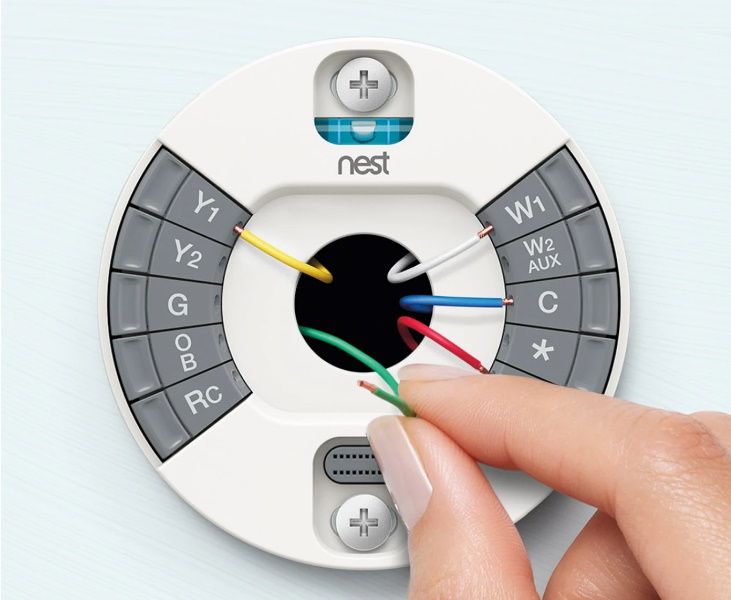
Now, gently disconnect the wires from your old thermostat and remove its backplate. Don't worry about marks on the wall; Nest often includes an optional trim plate for a clean finish. Grab your Nest base, designed with user-friendly terminals (often levers or push-buttons). Refer to your photo and simply connect each wire to its corresponding terminal on the Nest base – R to R, G to G, and so on. It’s like a grown-up "match the colors" game! Ensure each wire is securely seated; a loose connection means a grumpy thermostat.
The C-Wire Conundrum (or Non-Conundrum!)
You might hear talk of a "C-wire," which provides continuous power. Smart thermostats, being little brains, often prefer one. But here's the cool part: many Nest thermostats are designed to work even without a C-wire, using built-in rechargeable batteries and clever power management. If you don't have one, Nest often has a solution, like an optional power connector accessory. It’s like having a super adaptable device that finds a way to power itself!

The Grand Finale: Mounting and Setup
With wires connected, mount the Nest base neatly to the wall. Then, for the most satisfying part: snap the Nest display onto the base. Hear that click? That's the sound of smart home success! Now, head back to your circuit breaker and turn the power back on. Your Nest will boot up, greet you, and guide you through initial setup on its beautiful display – connecting to Wi-Fi, setting location, and preferences. Finally, download the Google Home app (or Nest app) on your smartphone. This is where the real magic happens: controlling your climate from anywhere, seeing energy reports, and letting Nest truly begin its learning journey.
Why All This DIY Effort is Worth It
So, why go through this little adventure? Beyond the satisfaction of a successful DIY project, the Nest Learning Thermostat is a true game-changer. It learns your schedule and preferences, automatically adjusting temperatures to save energy when you're out and ensuring comfort when you're home. It's like having a personal climate butler, anticipating your every need, without you lifting a finger. Imagine coming home to a perfectly cool house without blasting the AC all day, or waking up to cozy warmth without unnecessary heating all night. This isn't just about convenience; it’s about smarter living and potentially significant savings on your energy bills. Plus, it just looks incredibly cool on your wall, quietly doing its smart thing.
So, if you're thinking about upgrading to a Nest, don't let the "installation instructions" scare you off. Embrace the curiosity, grab a screwdriver, and prepare to welcome a genuinely smart, energy-saving friend into your home. You've totally got this!
