How To Replace A Smoke Alarm Battery

Alright, intrepid home adventurer, has that tiny, persistent parrot in your ceiling started its annoying chirp? You know the one – that intermittent, high-pitched plea for attention that seems to follow you from room to room? Fear not! You are about to embark on a mini-mission to silence the beast and restore peace to your sanctuary. This isn't rocket science; it's more like a fun little puzzle, and you, my friend, are the brilliant solver. Get ready to feel like a total superhero without even needing a cape!
Gather Your Super Tools!
Every superhero needs their gear, right? For this thrilling escapade, you'll need just a couple of things. First up, the star of our show: a fresh battery! Most smoke alarms are powered by a 9-volt battery, that chunky, rectangular kind. It's like the powerhouse of the tiny electronic world. Make sure it's brand new and ready for action. Next, you'll probably need something to reach your smoke alarm. Think of it as your trusty steed – a sturdy step stool or a small ladder will do the trick. Safety first, so make sure it's stable!
Pro Tip: Always have a spare 9-volt battery tucked away in a drawer. Future You will thank Present You for your incredible foresight!
Step 1: The Great Silence (Muting the Beep!)
Okay, let's tackle that persistent chirper. Climb up to your smoke alarm. Most alarms have a "Test" button. Give it a good, firm press for a few seconds. It might let out a loud, reassuring scream (which means it's working!), but sometimes, just engaging with it can help it settle down for a moment. This step isn't about silencing it permanently yet, but rather confirming its existence and perhaps giving it a temporary pause before the main event. Think of it as a respectful acknowledgment before you get down to business. You're showing it who's boss, gently.
Must Read
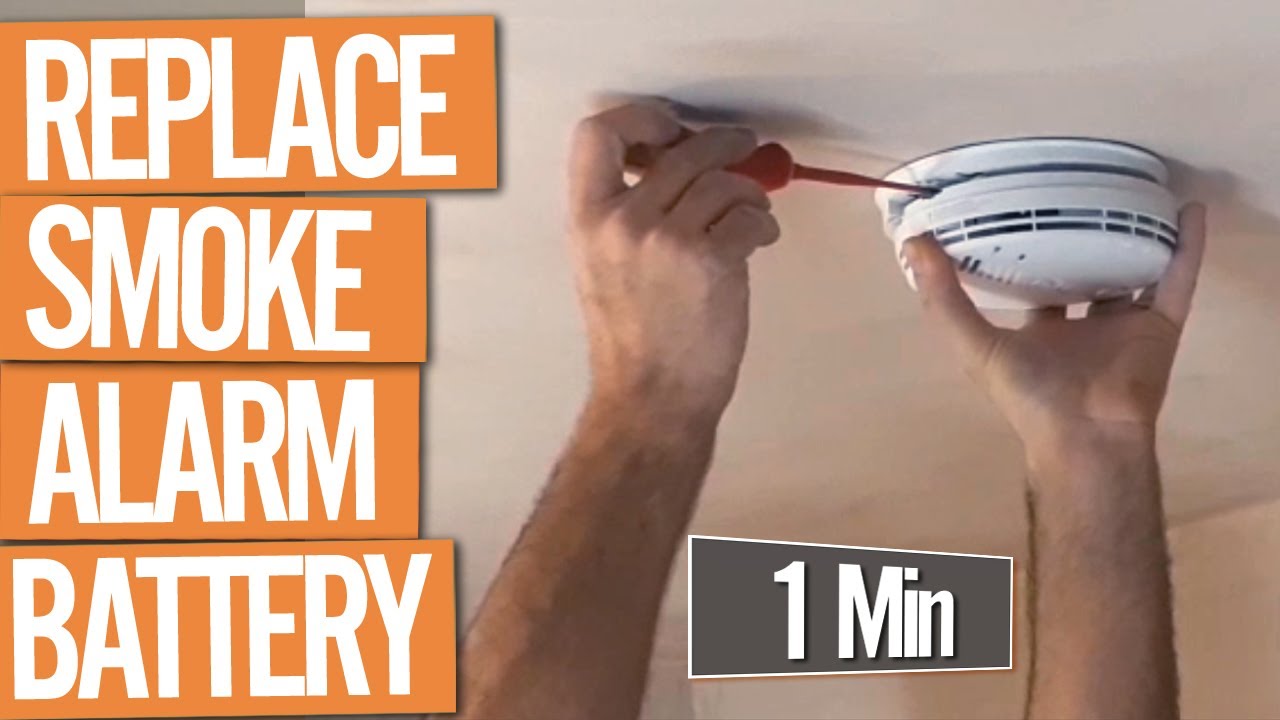
Step 2: The Mighty Twist (Opening the Alarm!)
Now for the fun part! Look closely at your smoke alarm unit. Many models attach to the ceiling or wall with a simple twist-and-lock mechanism. Imagine you're opening a really stubborn jar, but instead of jam, you're liberating a tiny electronic guardian. Gently but firmly grasp the body of the alarm and give it a counter-clockwise twist. It should unlatch from its base. If it doesn't twist, some models might have little clips or a small latch you need to press. Don't be afraid to give it a little exploratory wiggle – it's designed to be opened for maintenance, so it won't crumble in your hands!
Friendly Warning: A cascade of ancient dust bunnies might descend upon you. Consider it confetti celebrating your DIY prowess!
Step 3: The Old Battery Eviction (Out with the Old!)
Once you've got the alarm in your hands (or dangling safely if it's still wired), you'll see the battery compartment. This is where the magic happens! Locate the existing 9-volt battery. It will likely be connected by two small terminals – a positive and a negative. Carefully pull the old battery away from these terminals. Sometimes they're quite snug, so a gentle tug or a slight sideways wiggle will help. Don't worry, you won't get a shock – just a sense of satisfaction as you disconnect the source of that annoying chirp. Bid farewell to the expired power source; its watch has ended.
Step 4: The New Battery Welcome (In with the New!)
Time for the grand entrance of your shiny, new 9-volt battery! Take your fresh battery and carefully align its terminals with the connectors inside the alarm. The positive end (the smaller, hexagonal one) should connect to its matching positive clip, and the negative end (the larger, rectangular one) to its negative clip. They're usually labeled, or it's fairly intuitive which way they go. Gently but firmly snap the new battery into place. You might hear a tiny click, or feel it secure. This is the moment of rejuvenation! You've just breathed new life into your essential home guardian.
Step 5: The Resealing Ceremony (Closing it Up!)
Now that your smoke alarm has a revitalized heart, it's time to put it back together. Carefully align the alarm unit with its base on the ceiling or wall. If it was a twist-and-lock model, position it so the notches line up, then twist it clockwise until it clicks securely into place. If it had clips, gently push it back until it snaps. Give it a gentle tug to make sure it's firmly attached – we don't want any unexpected aerial acrobatics! You're almost there, practically a certified smoke alarm whisperer at this point.

Step 6: The Grand Test (Proof of Your Awesomeness!)
This is the triumphant finale! Once your alarm is securely back in its spot, reach up and firmly press the "Test" button again. This time, instead of a mournful chirp, you should be rewarded with a loud, glorious, and sustained alarm sound! This means your new battery is installed correctly, and your smoke alarm is fully operational and ready to stand guard. Give yourself a pat on the back, a round of applause, or perhaps even a little victory dance. You've conquered the chirping menace and emerged victorious!
See? That wasn't so bad, was it? You just performed a vital home maintenance task with the grace of a seasoned pro. You've saved yourself from endless future chirps and gained a huge boost of confidence. Go ahead, bask in the glow of your accomplishment. You're not just a home occupant; you're a DIY champion, a tech wizard, and most importantly, someone who just made their home a little bit safer, all with a fresh 9-volt battery and a can-do attitude!