How To Remove Silk Screen From Shirt

Okay, so you've got a shirt. A shirt that used to be awesome. Now, it's sporting a screen print that's about as welcome as a skunk at a picnic, right?
Maybe it's a band tee of a band you no longer, ahem, appreciate. Or perhaps it's a corporate logo from that soul-crushing summer internship you'd rather forget. Whatever the reason, you're itching to get that silk screen gone. And guess what? You've come to the right place!
Let's ditch the blah and get to the how-to. Seriously, it's not as scary as it sounds.
Must Read
The Arsenal: What You'll Need
Alright, gather 'round. Before we dive in headfirst (metaphorically, of course, unless you really like screen printing), let's make sure you've got the right tools. Think of it as gearing up for battle... against ink!
- Your Target: The shirt with the offensive screen print. (Duh!)
- An Iron: Your weapon of choice. The hotter, the better... within reason, of course. We're removing ink, not incinerating fabric.
- Parchment Paper or a Thin Cotton Cloth: Our shield against direct heat. Think of it as the shirt's personal bodyguard.
- Rubbing Alcohol (Isopropyl Alcohol): The magic potion! 90% or higher is your best bet. Lower percentages work, but it'll take a wee bit longer.
- Cotton Balls or Sponges: For applying the magic potion.
- A Dull Knife or Spoon: For gently scraping away the loosened ink. Think butter knife, not Rambo knife. We're going for finesse, not destruction.
- Patience: The most crucial tool of all! Seriously, this isn't instant. Think of it as a slow, methodical victory.
Got all that? Good! Let's move on to the fun part... kinda.
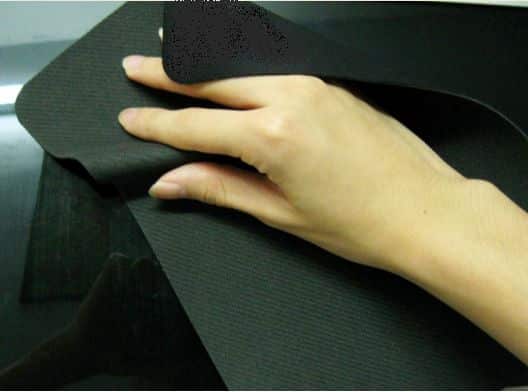
The Heat is On: Ironing Time!
First things first: Turn your iron on. Crank it up to a medium-high heat setting. No steam, though! We're not trying to steam clean the ink away. That's just a recipe for disaster (and a soggy shirt).
Now, place your shirt on a flat, heat-safe surface (ironing board, anyone?). Cover the screen print with your parchment paper or thin cotton cloth. Iron over the design in circular motions for about 30-60 seconds. The heat will soften the ink, making it easier to remove. Think of it as giving the ink a nice, relaxing spa treatment before evicting it from your shirt.
Careful! Don't hold the iron in one place for too long. We want to soften the ink, not melt the shirt into a sticky mess.

Rubbing Alcohol to the Rescue!
Time for the magic potion! Dab a cotton ball or sponge with rubbing alcohol. Gently blot the heated screen print. The alcohol will help to further break down the ink. Be generous, but not too generous. We're aiming for damp, not soaking wet.
Let the alcohol sit for a minute or two to work its magic. This is a good time to grab another cup of coffee. You deserve it!
Scrape Away! (Gently, of Course)
Now, using your dull knife or spoon, gently scrape at the edges of the design. The softened ink should start to peel away. Don't apply too much pressure! We don't want to damage the fabric. Slow and steady wins the race (or, in this case, removes the screen print).
Repeat the ironing, alcohol application, and scraping steps as needed. It might take a few rounds to get all the ink off, but stick with it! You're doing great!
Wash and Behold! (Hopefully)
Once you've removed as much of the screen print as possible (and you're probably tired of scraping, let's be honest), wash your shirt according to the care instructions on the tag. This will help to remove any remaining ink residue and alcohol. Plus, it'll get rid of that lingering "chemical" smell. (Mmm, rubbing alcohol!)
After washing, check your shirt. Hopefully, the screen print is gone! If there's still a faint outline, you can repeat the process one more time. Sometimes, stubborn ink needs a little extra persuasion.
Important Note: This method works best on newer screen prints. Older prints that have really bonded with the fabric might be more difficult (or even impossible) to remove completely. But hey, it's worth a shot, right?
And there you have it! You've successfully (hopefully!) removed a screen print from a shirt. Now go forth and rock your newly blank (or ready-for-a-new-design) garment!