How To Remove Old Honeywell Thermostat

There’s a unique satisfaction that comes with shedding the old to embrace the new, especially when it comes to the heart of your home's comfort system: the thermostat. For many of us, that old, beige, perhaps slightly yellowed Honeywell box on the wall has been a steadfast, if uninspired, sentinel of our indoor climate for decades. But as technology marches on, the allure of a smarter, more efficient, and frankly, better-looking alternative becomes undeniable. The act of upgrading, of carefully disconnecting the past to wire in the future, is more than just a home improvement task; it’s a tangible step towards a more comfortable, connected, and often, more economical home life. It's the thrill of a DIY project with a clear, immediate reward.
The benefits of removing that vintage Honeywell and replacing it with a modern counterpart are multifold and significant. Firstly, there’s the obvious advantage of energy efficiency. Modern smart thermostats allow for precise programming, learning capabilities, and remote control, meaning you only heat or cool your home when and where you need to. This translates directly into lower energy bills and a reduced carbon footprint. Beyond savings, there's enhanced comfort; no more fiddling with imprecise sliders or guessing the right temperature. Smart thermostats often integrate with humidity sensors and can maintain a much more consistent indoor climate. And let's not forget the aesthetics – ditching a clunky relic for a sleek, minimalist smart device can instantly modernize the look and feel of any room.
This quest for thermal mastery and technological integration is widespread. You’ll find homeowners everywhere, from first-time buyers eager to personalize their space to seasoned residents finally saying goodbye to their home’s original thermostat, embracing this upgrade. It's a common undertaking during minor renovations, as part of a larger smart home integration project, or simply when the old unit finally gives up the ghost (or when you realize it's just costing you too much). It's particularly appealing to those who love the idea of controlling their home environment with a tap on their smartphone or a voice command, seamlessly fitting into a connected lifestyle.
Must Read
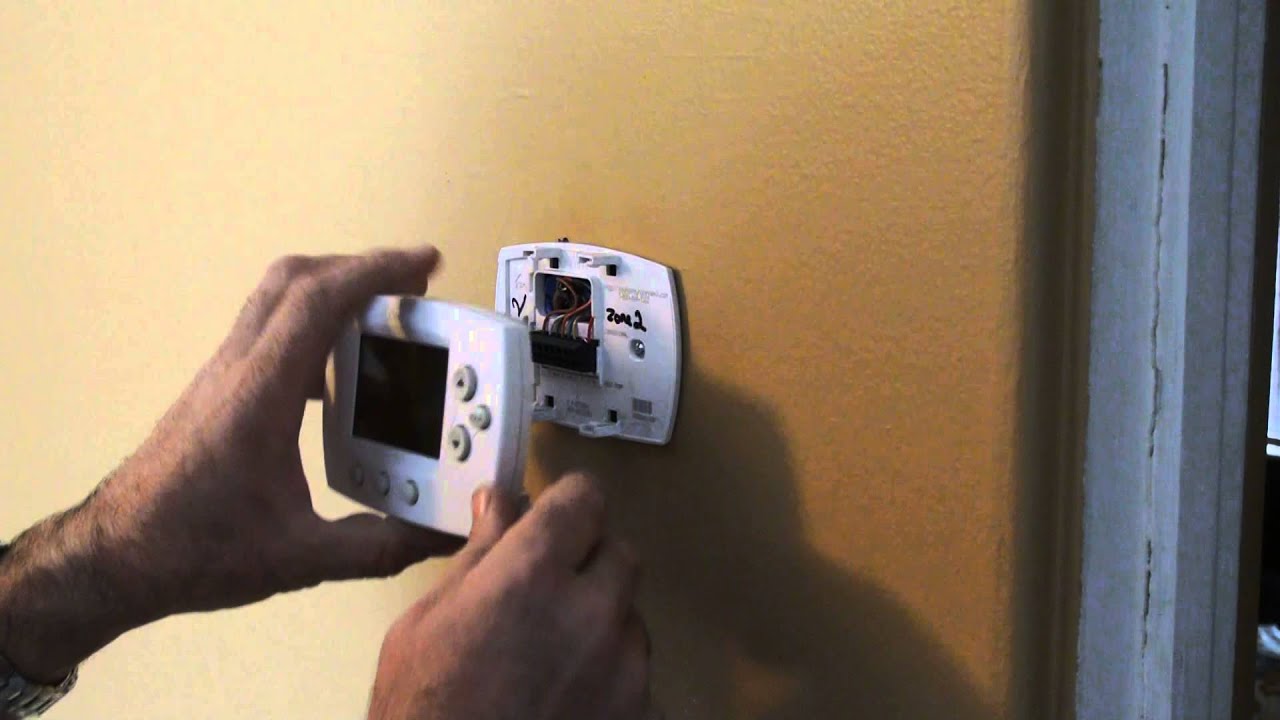
Ready to embark on this satisfying mission? Here are some practical tips to make the process smooth and enjoyable. First and foremost, safety is paramount. Before you touch a single wire, locate your circuit breaker box and turn off the power to your HVAC system. This is non-negotiable! Next, gather your tools: a Phillips head screwdriver, maybe a flathead, and a pencil. Now for the golden rule: document everything. Before disconnecting any wires, take a clear photo of the existing wiring configuration. This picture will be your roadmap when connecting the new thermostat. Additionally, use small pieces of masking tape and a marker to label each wire according to the terminal it was connected to (e.g., "R", "G", "Y", "W"). Carefully disconnect the wires, remove the old mounting plate, and patch any holes if necessary. Take your time, follow the instructions for your new thermostat meticulously, and don't be afraid to consult online tutorials if you get stuck. The feeling of powering up your new, smart thermostat and watching it hum to life, all thanks to your own two hands, is truly unbeatable.