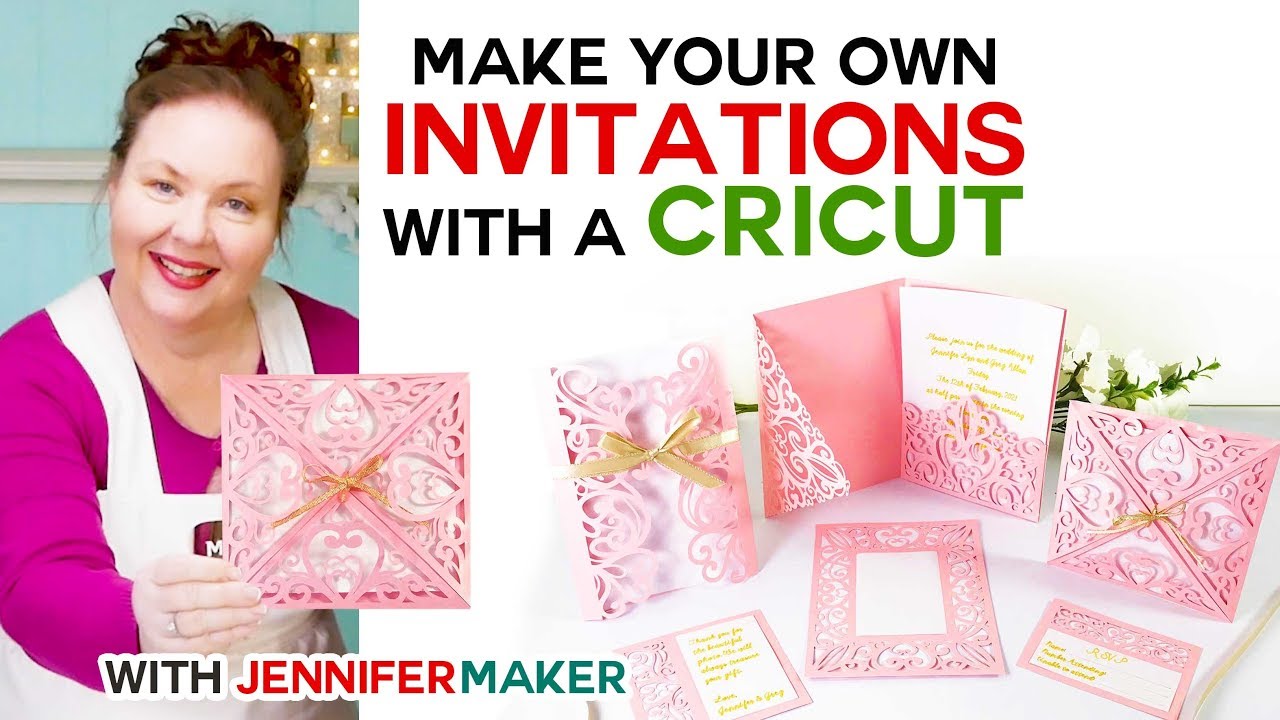
How To Make Laser Cut Wedding Invitations With Cricut

So, you're getting hitched! Congratulations! That's HUGE. And you're thinking, "Okay, the dress, the cake, the questionable DJ...it all adds up!" Let's talk about wedding invitations. Because let’s face it, those things can cost a small fortune. But what if I told you, you could create stunning, jaw-dropping, laser-cut-looking invitations from the comfort of your own home? And with a Cricut? Mind. Blown.
Ditch the Stress, Embrace the Cricut!
Forget sweating over calligraphy and emptying your savings account on fancy paper. We're going DIY, baby! And trust me, this isn't some Pinterest-fail waiting to happen. This is where your inner crafty genius shines! Think of your Cricut as your own personal invitation-making factory. It’s basically a magic wand that cuts paper. Okay, maybe not magic, but pretty darn close!
Gather Your Supplies (AKA the Fun Stuff!)
First, let's round up our supplies. It’s like prepping for a crafting party, except the guest of honor is your wedding invitation design! You’ll need:
Must Read
- Your trusty Cricut machine. Seriously, give it a little pat. It's about to become your best friend.
- Some cardstock. Go wild! Shimmering, metallic, textured...the possibilities are endless! Just make sure it's compatible with your Cricut. Nobody wants a paper jam disaster.
- A cutting mat. This is your Cricut's playground. Treat it with respect.
- Weeding tools. These little pokey things are lifesavers when it comes to removing tiny bits of paper.
- Glue or adhesive. To stick all the pretty pieces together.
- Envelopes. Because, you know, you need somewhere to put the invitation!
Design Time: Unleash Your Inner Artist!
Now for the creative part! You have a few options here:
- Cricut Design Space: This is your Cricut's software. It's full of pre-designed templates and images. You can customize them to your heart's content.
- Online Templates: The internet is bursting with free and paid invitation templates. Find one you love and upload it to Cricut Design Space.
- Create Your Own: If you're feeling super ambitious, design your invitation from scratch! (Just be prepared for a potential learning curve.)
The key is to choose a design that looks intricate but is actually fairly simple for the Cricut to cut. Think geometric patterns, delicate floral designs, or even simple silhouettes. Just avoid anything too detailed, or you'll be weeding until your fingers fall off!

Cutting and Weeding: The Zen Zone
Okay, deep breaths. This is where the magic happens. Load your cardstock onto the cutting mat, upload your design to Cricut Design Space, and hit "Make It!" The Cricut will whir and beep, and before you know it, your invitation design will be beautifully cut. Seriously, it's mesmerizing.
Now comes the weeding. This is where those little pokey tools come in handy. Carefully remove all the tiny bits of paper from your design. Think of it as a relaxing puzzle. Or a slightly tedious chore. Either way, put on some music and get to work!

Assembly Time: The Grand Finale!
You've cut, you've weeded, now it's time to assemble your masterpiece! Use your glue or adhesive to attach any layers together. You can add embellishments like ribbons, beads, or even a touch of glitter (if you're feeling extra fancy!).
Finally, slip your gorgeous, handmade invitation into its envelope. You did it! You created stunning, laser-cut-looking wedding invitations with your Cricut. And you saved a ton of money in the process! High five!
So go forth and create! Let your Cricut be your guide, your imagination be your limit, and your wedding invitations be the envy of all your guests. Now, go celebrate with some cake. You deserve it!