How To Install Carbon Monoxide Alarm

Ever wonder about the unsung heroes of our homes? Not the Wi-Fi router (though crucial!), but something even more vital, working tirelessly in the background: the carbon monoxide alarm. Often overlooked, these devices are quickly becoming a must-have modern marvel, offering a silent, steadfast guardianship that brings immeasurable peace of mind. Installing one isn't just a chore; it's a creative act of caring for your space and loved ones, a simple yet profound way to make your home truly a sanctuary.
Think of it as adding a tiny, vigilant superhero to your household lineup. For the casual learner in home maintenance, or even just the thoughtful homeowner looking to enhance their living environment, installing a CO alarm is incredibly empowering. You’re not just following directions; you’re taking an active role in protecting what matters most. It’s an easy win, a DIY project with an enormous payoff in safety and serenity. You'll discover the satisfaction of knowing you’ve added an invisible shield against an invisible threat, all with a few simple steps. It's about feeling competent, proactive, and wonderfully secure.
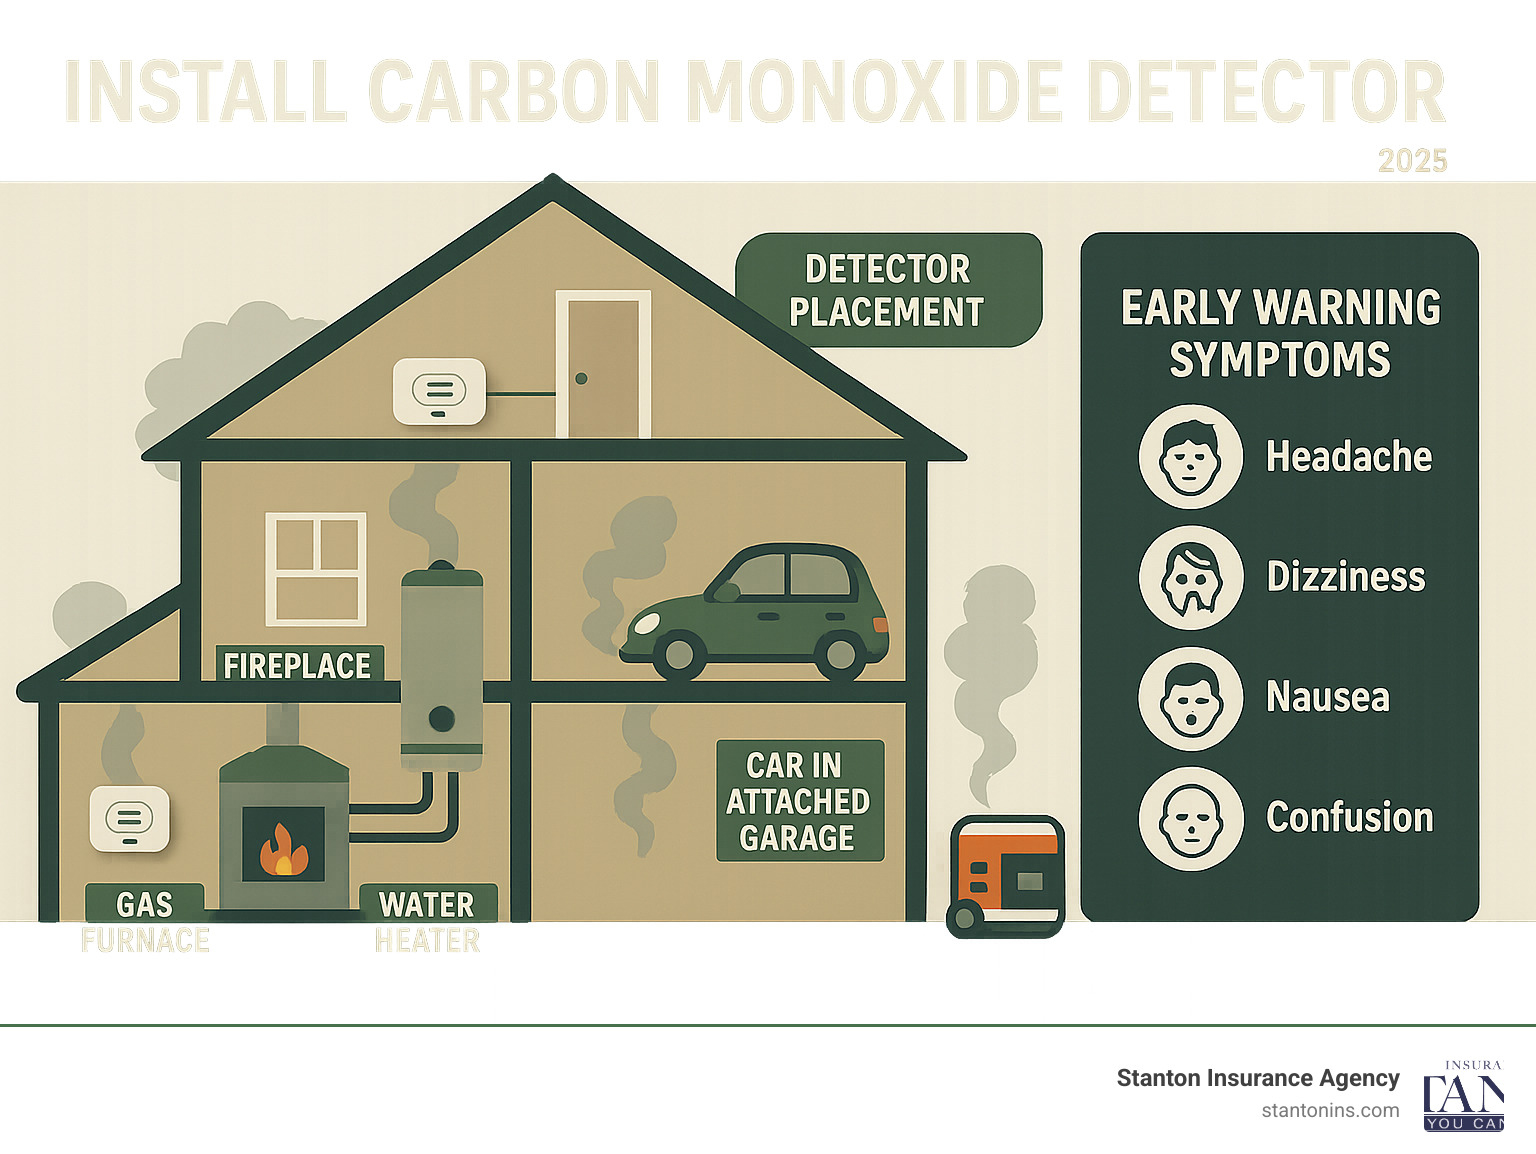
Just like there are many brushes for different strokes, there are a few variations of these essential devices. You'll find battery-operated models that offer ultimate flexibility in placement, plug-in alarms that can be moved as needed, and even hardwired units for a more permanent solution. Some even come combined with smoke alarms, offering double the protection in one sleek package. The "styles" might refer to their power source, but the "subject" is always the same: keeping you safe from the odorless, colorless, and otherwise undetectable danger of carbon monoxide. Place them near sleeping areas and on every level of your home, and perhaps even in a garage if it’s attached to the house, ensuring comprehensive coverage.
Must Read
Ready to become a home safety champion? Here’s your super simple guide for trying this at home:
- Read the Manual (Yes, really!): Every alarm is a little different. A quick glance at the manufacturer’s instructions will tell you the best placement and specific testing procedures.
- Choose Your Spot Wisely: Carbon monoxide disperses evenly in the air, so the location isn't as critical as for smoke, but generally, within 5 feet of sleeping areas is recommended. Avoid corners, behind furniture, or near fuel-burning appliances.
- Power It Up: For battery units, simply insert the batteries. For plug-ins, find an outlet that isn’t covered by drapes or furniture. Hardwired? Maybe call an electrician, but basic battery ones are a breeze!
- Test, Test, Test!: Most units have a "test" button. Press it! You should hear a loud alarm. This confirms it’s working. Make it a monthly habit to check your alarms.
And why is this particular "installation project" so enjoyable? Because you're not just screwing a device into a wall; you're actively creating a safer, more secure haven for yourself and your loved ones. There’s a quiet satisfaction in knowing you’ve completed a task that stands guard 24/7, providing constant vigilance without you lifting a finger. It’s about being prepared, being proactive, and ultimately, enjoying the deep, calming breath that comes from knowing you’ve taken an important step for your family’s well-being. It’s an investment in peace, and that’s a return on investment everyone can appreciate!