How To Change Battery On Adt Alarm System
Alright, let's talk about that sound. You know the one. It starts subtly. A little beep. Then another. Soon, it's a rhythmic, insistent BEEP-BEEP-BEEP that drives you bonkers. It's the unmistakable cry of your ADT alarm system battery, begging for a refresh.
Many of us think, "This is a job for a professional." But here's my slightly unpopular, very liberating opinion:
You can totally do this yourself.
Seriously. Changing your ADT alarm system battery is less like defusing a bomb and more like changing batteries in a big, grumpy remote control. It looks intimidating, but fear not, future household hero!
Must Read
The Great Battery Quest Begins!
First, gather your courage. And a Phillips-head screwdriver. You’ll also need the new battery. Your old one will have a label with its type, usually a 12V 4Ah or 7Ah sealed lead-acid battery. A quick online search helps you find the right replacement.
Now, locate your main alarm panel. It’s usually a beige or white box, often in a closet or utility room. This isn't your keypad, but the bigger brain behind the operation. Give it a friendly nod.

Operation: Open Sesame!
See those tiny screws on the side or bottom? Grab your screwdriver. Gently unscrew them. The alarm might chirp indignantly when you open it, perhaps a prolonged BEEEEEEEEEP. Acknowledge its protest, but proceed. You've got this.
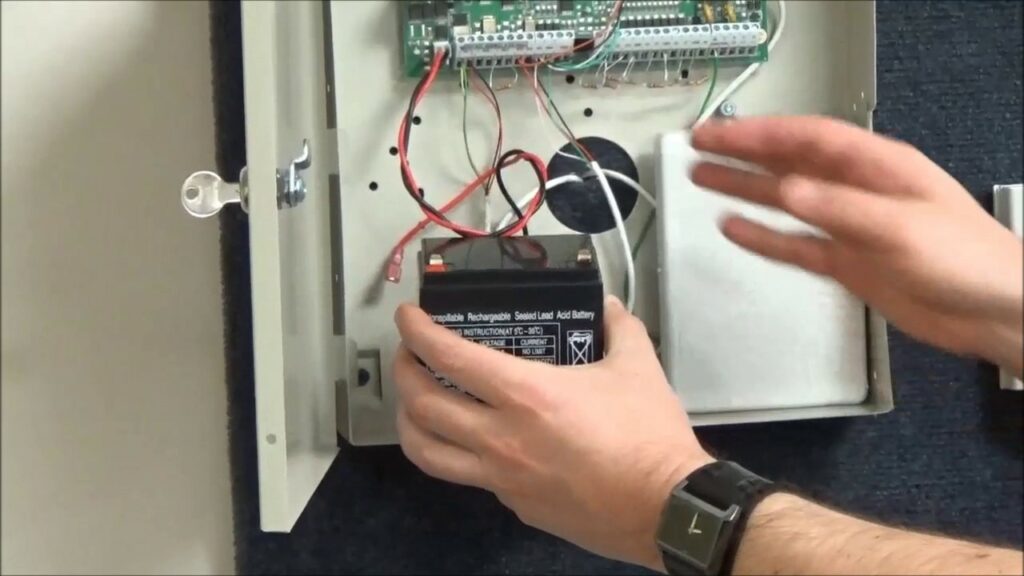
The cover should swing open or pop off. And there it is! The big, rectangular battery – usually a black or grey block, snugly tucked inside. Give yourself a small cheer. You’ve breached the perimeter!
Unplugging the Grumpy Old Friend
You’ll see two wires attached to the battery terminals: one red, one black. They're usually connected with little push-on connectors.

Here's a pro tip:
Always disconnect the black wire first, then the red.When reconnecting, it's the opposite: red first, then black. This helps prevent accidental sparks. Safety first!
Gently pull the connectors off the old battery. Don't yank. They should come off with a firm but gentle tug. The old battery might feel heavy.
Welcoming the New Powerhouse
Now, take your shiny new battery. Marvel at its potential. It's quiet. It's full of pep. It's ready to silence that incessant BEEP.

Carefully slide the new battery into place. It should fit perfectly where the old one was.
Remember our pro tip for connecting?
Red wire to the red terminal, then black wire to the black terminal.Make sure they're pushed on all the way. They should feel snug and secure.
Once connected, you might hear a happy little beep from the system, or perhaps nothing. That’s a good sign!

The Grand Finale: Securing Your Victory
Now, gently close the cover of the ADT alarm panel. Align it carefully and replace those screws. Don't overtighten; just get them snug.
Head back to your keypad. The low battery error should be gone! If not immediately, give it a few minutes. You might need to clear the trouble light, usually by entering your code and pressing "OFF" a couple of times.
And there you have it. Silence. Glorious, beautiful silence. You faced the beeping beast, performed electronic surgery, and emerged victorious. No cape needed, just a screwdriver and a dash of daring. Pat yourself on the back. You're officially a certified ADT alarm system battery changer. You saved yourself a service call! How's that for an unpopular opinion?