Garage Door Opener Switch Replacement
Ever feel like your garage door button is playing a game of hide-and-seek with your patience? One minute it works, the next it’s giving you the silent treatment, leaving you stranded outside like a knight locked out of their own castle. Fear not, brave home adventurer! Today, we're not just fixing a button; we're reclaiming our garage door destiny with a simple, exhilarating act of DIY wizardry.
Imagine a world where your garage door responds to your command with the eagerness of a well-trained puppy. A world where the click of a button brings forth a swift, satisfying ascent or descent, no dramatics involved. That world, my friend, is just a few delightful steps away!
This isn't rocket science, nor is it a quest requiring ancient scrolls or a team of highly paid experts. It's a fun, quick project that will leave you feeling like a certified home hero. So, let’s gather our simple tools and dive into the magnificent art of the garage door opener switch replacement!
Must Read
Your Arsenal of Awesome: The Tools You'll Love
Before we embark on this grand adventure, let's talk gear. You won't need a heavy-duty toolbox or a degree in mechanical engineering. Just a few humble heroes, ready to assist your brilliance.
First up, your trusty screwdriver. This isn't just any screwdriver; it's your wand of change, your precision instrument for gentle persuasion. A Phillips head or a flathead, depending on your switch’s tiny screws, will be your best friend.
Next, maybe a pair of wire strippers. Don't let the name intimidate you; these are simply little helpers that artfully remove the protective outer layer from wires, exposing their eager, copper hearts. They're like tiny, meticulous manicurists for electrical cords.
And then, the star of our show, the glorious new garage door opener switch. It's probably sleek, probably shiny, and definitely eager to start its new life of reliable garage door service. Hold it up; admire its potential!
You might also want a small pair of pliers, just in case a wire needs a gentle tug or a bit of shaping. Think of them as the supportive stagehands, always ready in the wings. And finally, a bit of electrical tape might come in handy for added peace of mind, a little security blanket for your connections.
The Grand Disconnect: A Moment of Pause
Before any heroic deed, we must first ensure safety. This isn’t a boring safety lecture; it’s about making sure your adventure is smooth, sparkling, and completely shock-free. Think of it as putting the entire garage door system down for a pleasant, well-deserved nap.

The golden rule, the sacred oath, the primary directive: unplug your garage door opener! Locate that power cord, often dangling from the ceiling near the motor unit, and give it a firm but gentle pull. It’s like hitting the "pause" button on reality, ensuring no rogue electricity tries to join our party.
Confirm the silence, revel in the newfound stillness. This small, crucial step means you can work with confidence, knowing everything is dormant and waiting patiently for your expert touch. No power, no worries, just pure, unadulterated DIY fun.
"Unplugging is like hitting the snooze button on potential surprises. Smart move, superstar!"
You’re not just unplugging an appliance; you’re disarming the dragon, ensuring your path to victory is clear and safe. Feel that surge of calm? That’s the power of preparedness, baby!
Operation Old Switch Out: The Farewell Tour
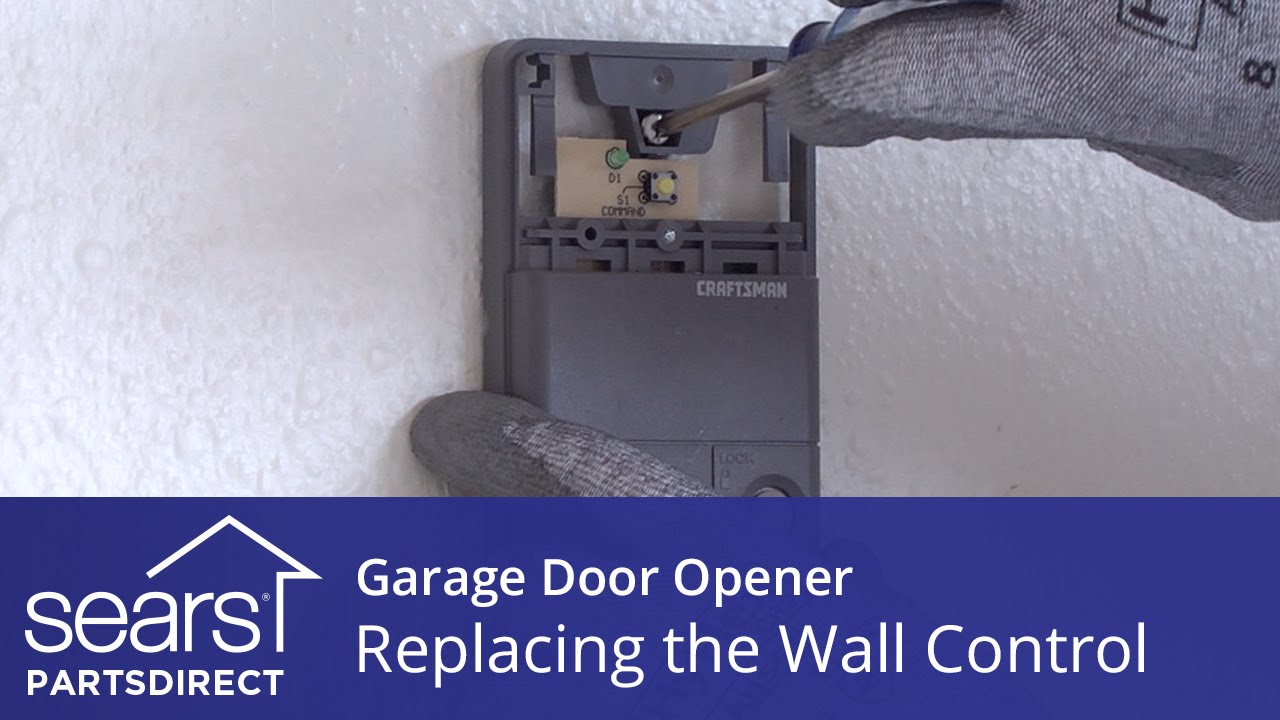
Now, let's turn our attention to the current occupant, the old switch that's been having a bit of a personality crisis. It’s time for its honorable retirement. Locate your wall-mounted button, the one that's been giving you grief.
Often, it’s just a simple cover that pops off or is held by a screw or two. Gently pry it open or unscrew it, revealing the inner workings. Don't be shy; peek behind the curtain! You'll likely see a couple of wires, usually thin, connected to two small screws.
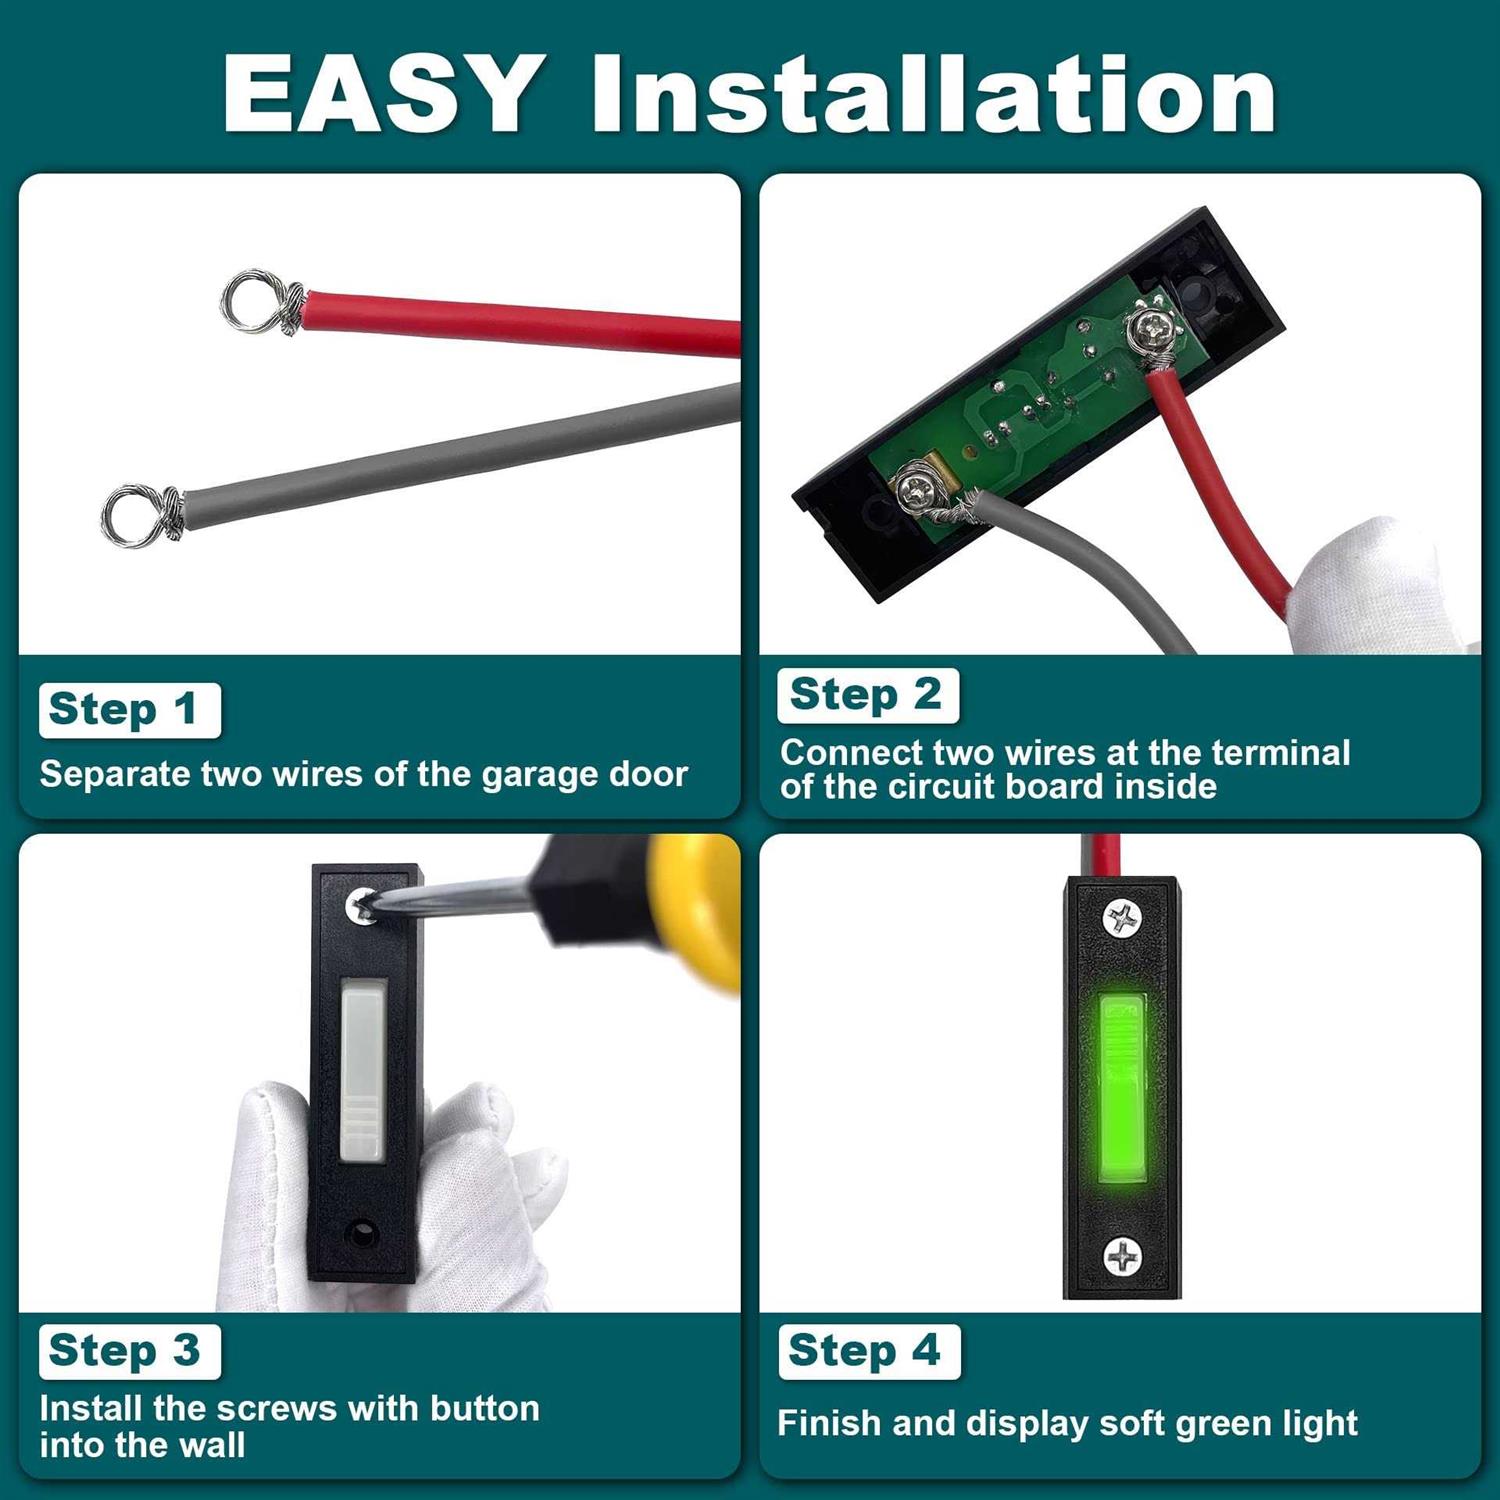
These wires are typically low voltage, which is another reason why unplugging the main unit makes everything super chill. With your trusty screwdriver, carefully loosen the screws that hold these wires in place. You don't need to remove the screws entirely, just enough so the wires can slip out.
One by one, gently detach the wires from the old switch. Sometimes they’re wrapped around the screws, other times they’re poked into a tiny hole and then secured by the screw. Just coax them free, like releasing a pair of sleepy butterflies.
Give a nod of appreciation to the old switch for its service, however erratic. It has served its purpose, and now it's time for its well-deserved rest. Set it aside, perhaps for a place of honor in your "retired gadgets" museum.
Installation New Switch In: The Grand Entrance
And now, for the triumphant moment! Unwrap your gleaming new garage door opener switch. Feel its fresh, reliable energy. It’s ready to make your life easier, to banish those frustrating moments of garage door indecision.
You'll notice your new switch has similar connection points – usually two little screws or terminals, just like the old one. It’s remarkably straightforward, like connecting two pieces of a puzzle designed for maximum simplicity.
Take one of your liberated wires and connect it to one of the terminals on the new switch. If your wires are a bit frayed or squished from their previous life, this is where your wire strippers can perform their magic, exposing a fresh, clean bit of copper. Wrap the wire neatly around the screw or insert it into the terminal hole.

With your screwdriver, gently but firmly tighten the screw, securing the wire in its new home. Give it a gentle tug to make sure it’s snug and secure, like tucking a blanket around a happy baby. Repeat this delightful process with the second wire, connecting it to the remaining terminal.
"You're not just connecting wires; you're forging a new, reliable relationship between you and your garage door!"
There's usually no "right" or "wrong" way to connect these two low-voltage wires; either can go to either terminal. It’s designed to be wonderfully forgiving. Once both wires are securely fastened, admire your handiwork. It looks professional, doesn’t it?
Carefully tuck the wires back into the wall box, making sure they’re not pinched, and then snap or screw the cover of your new switch back into place. Listen for that satisfying click; it’s the sound of success settling in.
The Moment of Truth: A Symphony of Motion
This is it, the crescendo, the grand finale of our delightful DIY escapade! It’s time to reintroduce power to your garage door opener and witness the fruits of your labor. Walk back to where you unplugged the main unit.
With a flourish, or perhaps just a casual confidence, plug that bad boy back into the outlet. You might hear a soft hum, a little whir; that’s just your garage door opener waking up, ready for action. It’s like bringing a robot butler back online, ready for your command.

Now, return to your newly installed, gleaming garage door opener switch. Take a deep breath. Stand tall. Extend your finger, and with the confidence of a seasoned wizard casting a powerful spell, press the button. What happens next?
Did your garage door respond instantly? Did it glide open or close with a satisfying, drama-free motion? Did a little "ding!" go off in your head, signaling a victory well earned? If so, congratulations, my friend! You’ve just performed a marvelous act of home improvement!
Relish in that moment. Feel the surge of accomplishment. You didn’t call an expensive technician; you didn’t spend hours troubleshooting. You took charge, you followed simple steps, and you made your home a little bit better, a little bit more responsive.
Bask in the Glory: You Are a DIY Champion!
Look at what you’ve done! You transformed a frustrating, unreliable button into a beacon of efficiency. Your garage door now obeys your every whim, smoothly, effortlessly, and without complaint. You are not just a homeowner; you are a DIY champion!
Every time you press that perfectly responsive button, you'll remember this little adventure. You'll remember the satisfaction, the ease, and the sheer joy of fixing something with your own two hands. It’s a small change, but it makes a big difference in your daily life.
So go ahead, give yourself a pat on the back. You earned it. Enjoy the newfound peace of mind and the effortless convenience of your perfectly functioning garage door. You’re awesome, and your garage door knows it!