2006 Honda Accord Head Gasket Replacement
Okay, let's talk about that trusty 2006 Honda Accord and its potential need for a little TLC. We're diving into the world of head gaskets! Don't worry, it's not as scary as it sounds.
Think of your car's engine like a finely tuned symphony. Everything needs to work in harmony, and the head gasket plays a crucial role.
It's like the conductor, making sure all the important bits stay where they're supposed to be. And when things go wrong? Well, that's when our little chat becomes important.
Must Read
Gathering Your Tools (and Enthusiasm!)
First things first, you're going to need some tools. A socket set is your best friend here, like having a universal translator for the mechanical language of your Accord.
You'll also want wrenches, pliers, and maybe a torque wrench. A torque wrench is like a gentle giant, ensuring everything is tightened just right, not too loose, not too tight, but juuuust right.
Don't forget safety glasses and gloves! We want to protect those peepers and hands from any rogue bits and bobs. Imagine trying to read a map with grease-covered fingers – no fun!
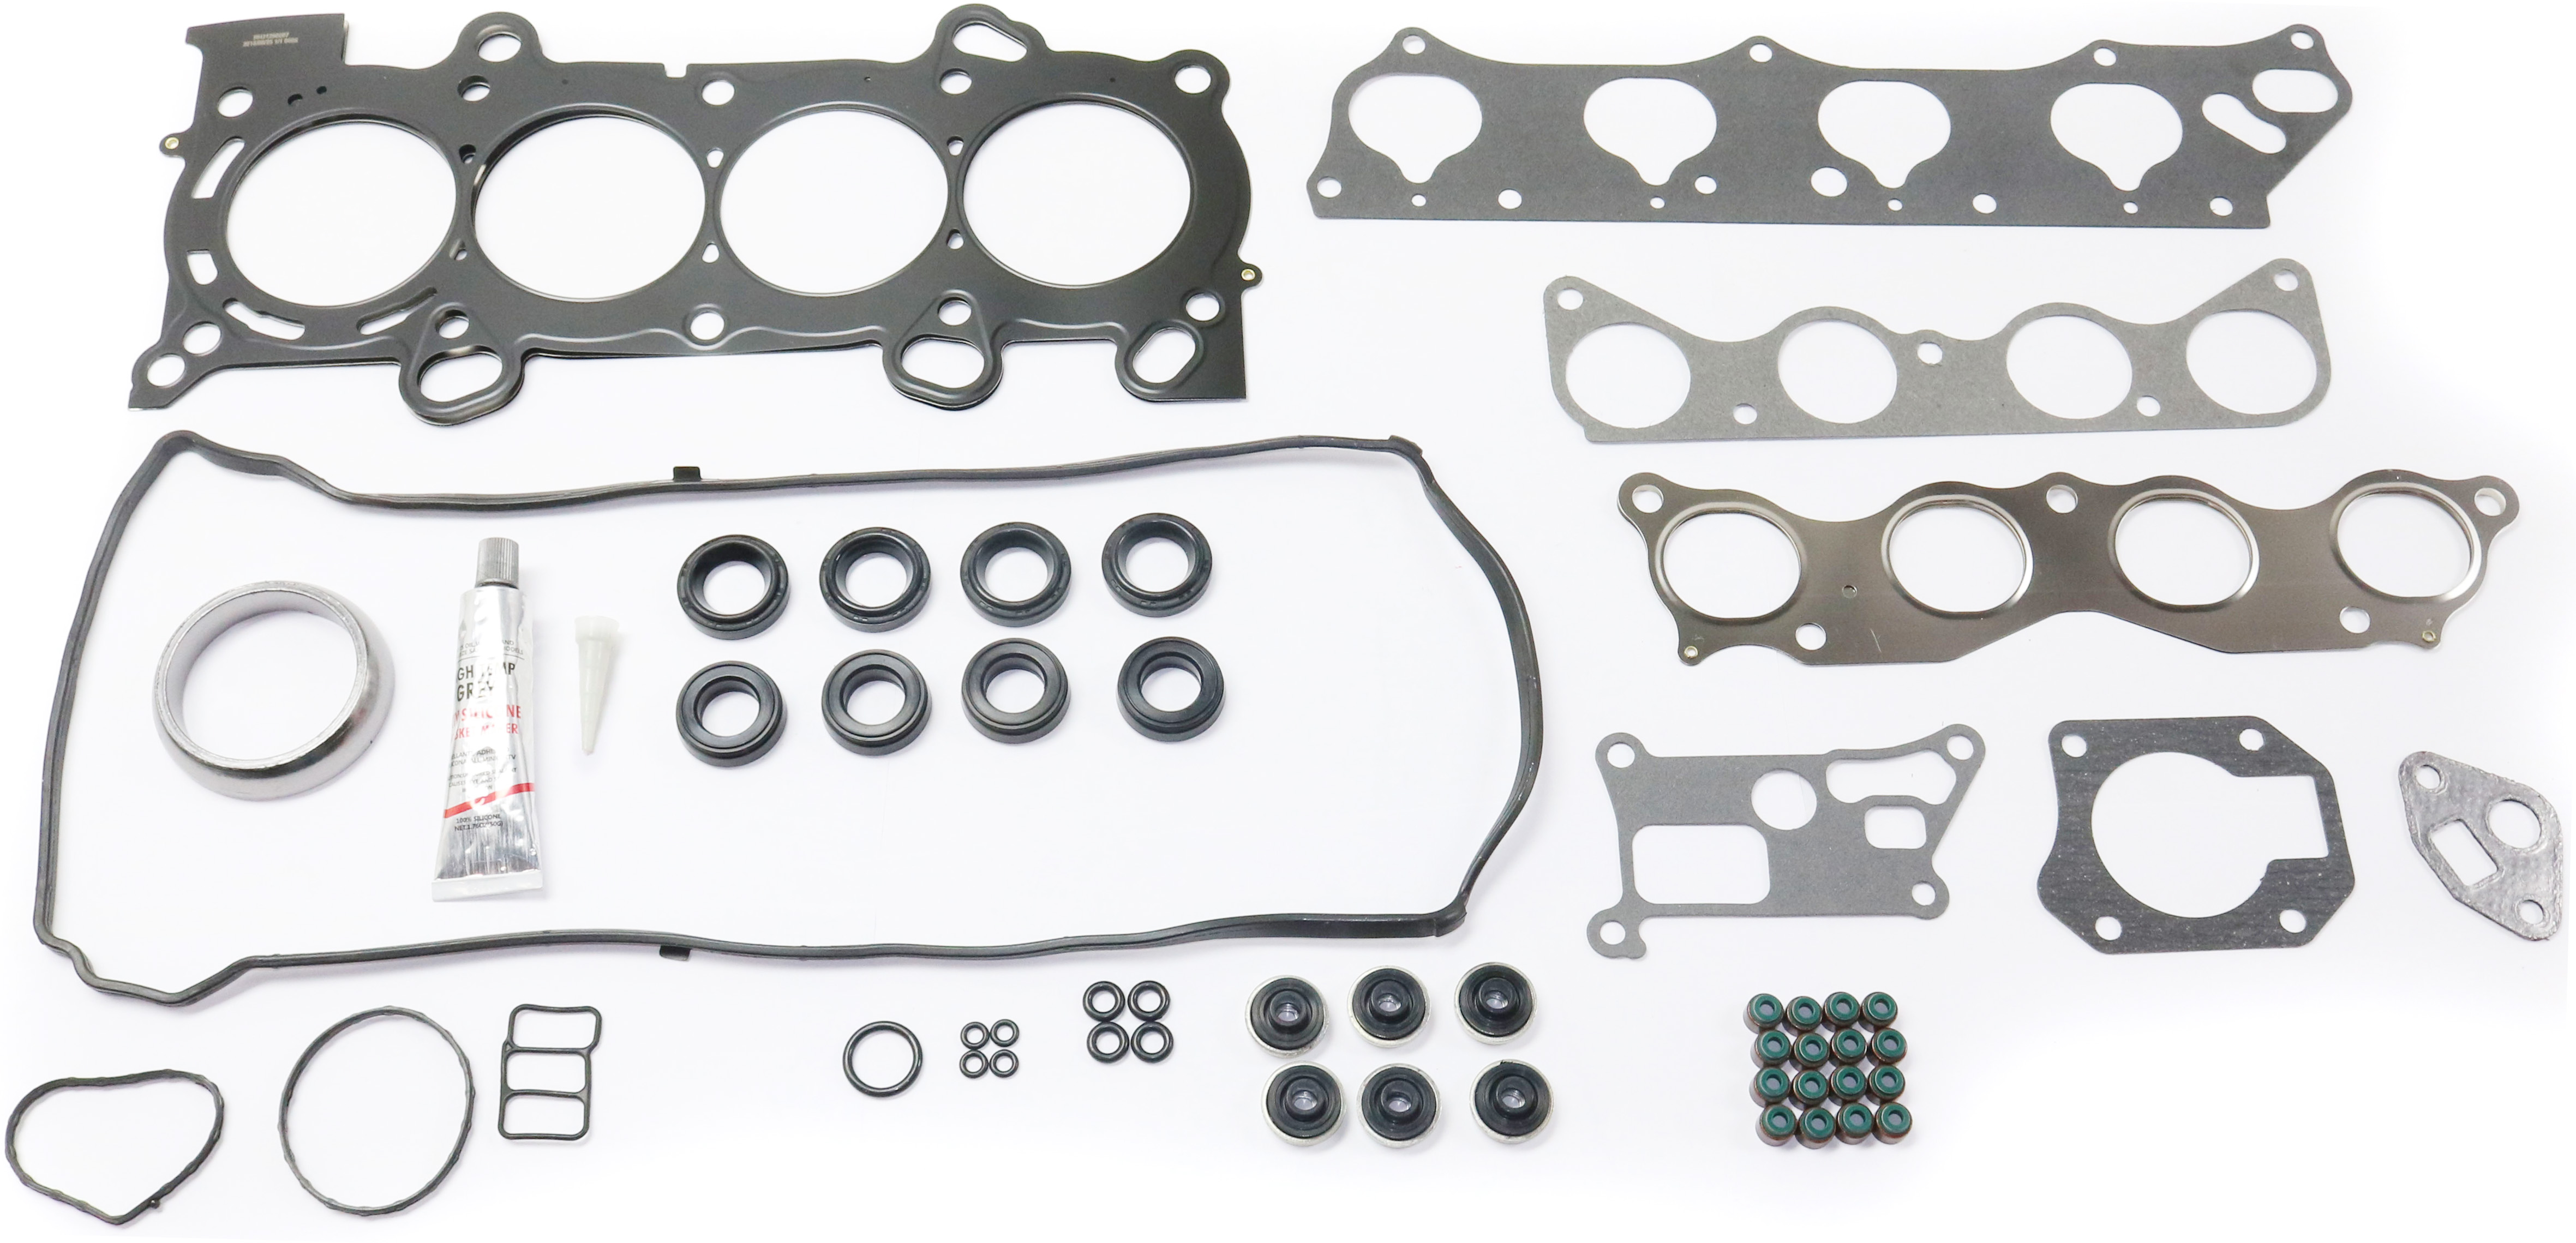
And of course, the star of the show: the new head gasket. Make sure you get the right one for your 2006 Accord, it's like ordering the right pizza topping, nobody wants pepperoni on their veggie supreme.
Draining the Fluids (Like a Patient Vampire)
Before you start wrenching, you gotta drain the fluids. That means coolant and oil. Think of it like prepping a canvas before you paint a masterpiece.
Find the drain plugs for both, usually located on the bottom of the engine and radiator. Have a container ready, because these fluids aren't exactly…delicious.
Be patient and let them drain completely. This helps prevent a messy explosion of coolant and oil later. Trust me, nobody wants to bathe in that stuff.
Disassembling the Engine (Piece by Piece)
Now comes the fun part: taking things apart! Start by disconnecting the battery. Safety first, always!

Then, remove the intake manifold. It's like taking off the engine's air filter.
Next, disconnect the exhaust manifold. This is often bolted directly to the cylinder head.
Carefully remove the valve cover, exposing the valve train. It's like peeling back the layers of an onion, revealing the inner workings.
Loosen and remove the cylinder head bolts. These are usually tightened to a specific torque, so make sure you know the correct sequence and torque specifications.
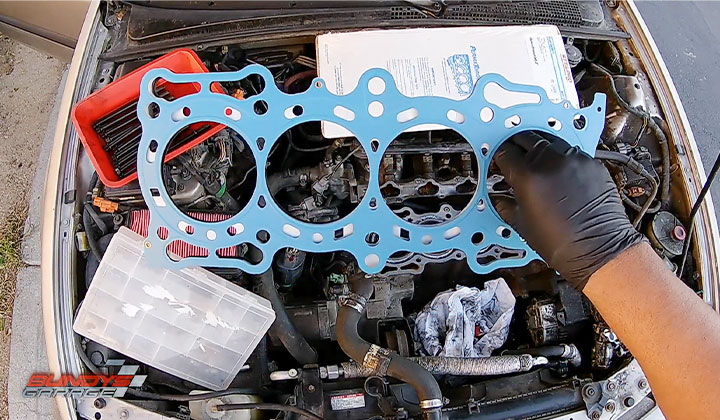
With all the bolts out, gently lift the cylinder head off the engine block. If it's stuck, don't force it! A little persuasion with a rubber mallet might be needed.
Inspecting and Cleaning (A Little TLC)
Once the head is off, take a good look at the surfaces. You're looking for any signs of damage or warping.
Clean the cylinder head and engine block mating surfaces. Use a scraper or a wire brush to remove any old gasket material.
Make sure these surfaces are clean and smooth. A perfectly smooth surface is crucial for the new head gasket to seal properly.

Installing the New Head Gasket (The Big Moment!)
Now for the grand finale: installing the new head gasket! This is where precision and care are key.
Carefully position the new head gasket onto the engine block. Make sure it lines up perfectly with the bolt holes and coolant passages.
Gently lower the cylinder head onto the head gasket and engine block. Again, make sure everything aligns properly.
Install the cylinder head bolts. Tighten them in the correct sequence and to the specified torque. This is absolutely crucial, so don't skip this step!
A torque wrench is your best friend here, ensuring each bolt is tightened to the exact specification. Think of it as a delicate dance of precision.
Reassembling Everything (Like Putting a Puzzle Back Together)
Now comes the reverse process of disassembly. Reinstall the valve cover, intake manifold, exhaust manifold, and all other components you removed.
Reconnect all the hoses and wires. Double-check everything to make sure nothing is left undone. Nobody wants extra parts left over!
Refill the coolant and oil. Make sure you use the correct type and amount of fluids.

Reconnect the battery. Cross your fingers and prepare for the moment of truth.
Starting the Engine (Fingers Crossed!)
Turn the key and start the engine. Listen carefully for any unusual noises.
Let the engine idle for a few minutes and check for leaks. Keep a close eye on the temperature gauge to make sure the engine doesn't overheat.
If everything sounds and looks good, congratulations! You've successfully replaced the head gasket on your 2006 Honda Accord.
Important Considerations (Don't Skip This!)
Before you embark on this adventure, it's wise to consider a few things. Replacing a head gasket can be a complex job.
If you're not comfortable working on engines, it's best to leave it to a professional. A mistake could lead to serious engine damage.
And remember, always consult your car's repair manual for specific instructions and torque specifications. Every engine is a little different.
When to Say "Uncle" and Call a Pro (Know Your Limits!)
Sometimes, you just gotta know when to throw in the towel. If you're feeling overwhelmed or encountering problems you can't solve, don't hesitate to call a professional mechanic. It's better to be safe than sorry.
A mechanic has the experience and tools to diagnose and repair any issues that may arise. Think of them as the engine whisperers.
And remember, there's no shame in asking for help. Even the most seasoned mechanics sometimes need a second opinion.
The Joy of DIY (Bragging Rights Included!)
But if you're successful in replacing the head gasket yourself, you'll gain a huge sense of accomplishment. Plus, you'll save a bunch of money on labor costs.
You'll also have a deeper understanding of how your car's engine works. You'll be able to impress your friends with your newfound mechanical knowledge.
And you can proudly say, "I fixed that myself!" Bragging rights are definitely included.
Final Thoughts (Go Forth and Conquer!)
Replacing a head gasket on a 2006 Honda Accord is a challenging but rewarding task. With the right tools, knowledge, and a little bit of patience, you can do it!
Just remember to take your time, follow the instructions carefully, and don't be afraid to ask for help if you need it. You got this!
So, go forth and conquer that engine! Your 2006 Honda Accord will thank you for it.