Replace Batteries In Nest Thermostat
Alright, superstar! Gather 'round because we're about to embark on a tiny, triumphant quest that will make you feel like the coolest tech wizard on the block. We're talking about giving your fabulous, smart, and sometimes just a smidge dramatic Nest Thermostat a little boost. Think of it as a spa day for your home's brain, a quick pick-me-up that keeps everything humming along perfectly, effortlessly maintaining your perfect comfort zone.
You know that feeling when your TV remote starts acting a little sluggish, or your favorite toy needs a jolt of energy? Your Nest is a bit like that, only way more stylish and in charge of your entire home's climate. It’s got a secret energy stash, a little power pack that keeps its brain whirring. And guess what? You, my friend, are about to become its superhero, its personal energy supplier, its very own battery whisperer!
The "Tools" of Your Trade (Spoiler: They're Super Simple!)
Forget complex manuals and intimidating wires! For this adventure, your toolkit is delightfully sparse. You'll need two, yes, just two, fresh, zippy, power-packed AAA batteries. Make sure they’re good quality; we're giving our Nest the VIP treatment here. And maybe, just maybe, a tiny flathead screwdriver or even a fingernail for a super gentle pry, but honestly, you might not even need it. That's it! No heavy lifting, no complicated diagrams, just you, your positive attitude, and a couple of those tiny titans of power.
Must Read
You’re not just changing batteries; you’re unleashing a wave of comfort and control back into your life!
Your Mission, Should You Choose to Accept It... (You Totally Should!)
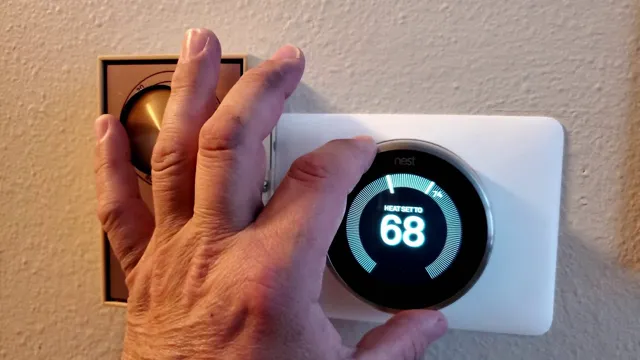
Okay, stand before your magnificent Nest Thermostat. It's probably glowing with its usual intelligent charm, perhaps even showing you the outdoor temperature or a gentle leaf icon. Give it a nod of respect, because you're about to perform a vital, yet incredibly simple, service.
The magic begins with the display unit itself – that gorgeous, circular part you interact with daily. Don't be shy! Grab the outer ring of your Nest firmly but gently. Now, here's the fun part: you're going to twist it ever so slightly counter-clockwise. Just a little nudge, like opening a fancy jar. You might feel a tiny click or give, and then... drumroll please... it will pull right off its base! Voilà! You’ve just liberated the brain of your thermostat, revealing its secrets.
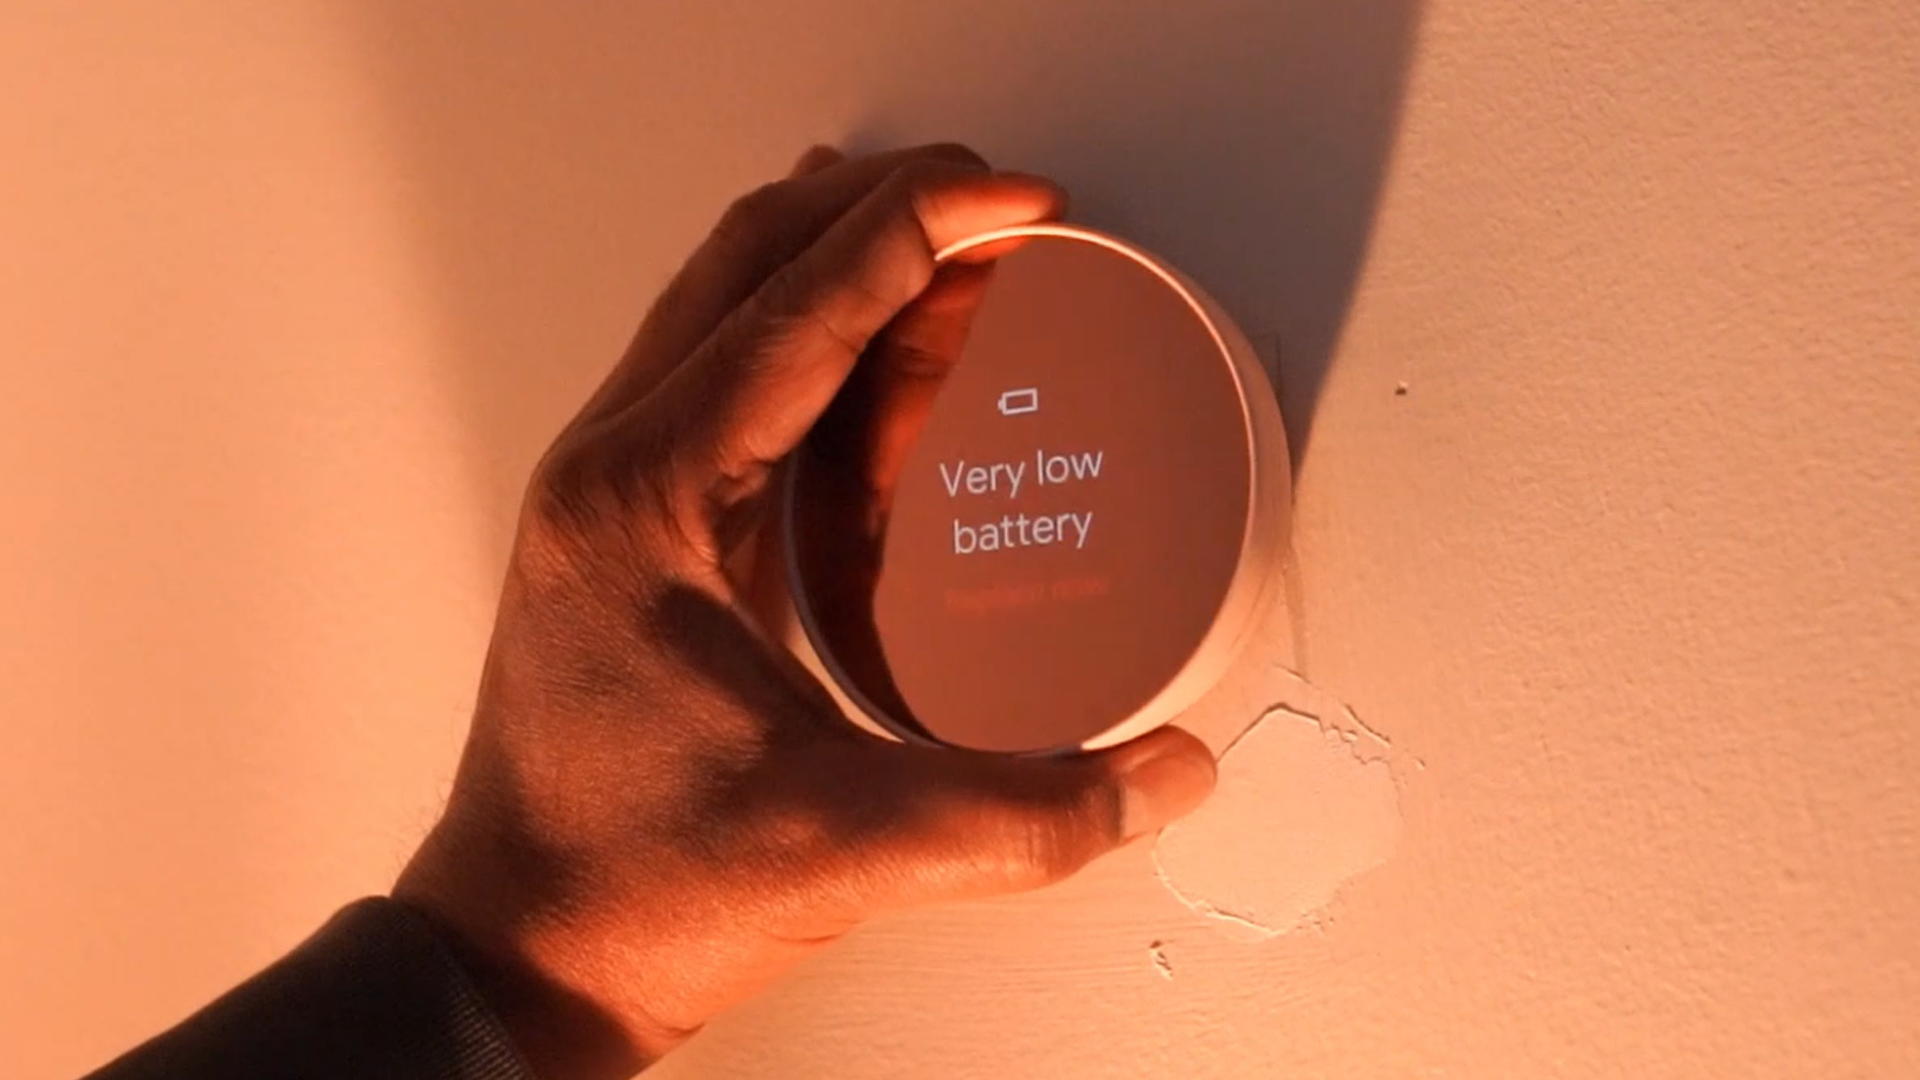
The Big Reveal: Powering Up Your Pal
Once you’ve got that sleek display unit in your hand, flip it over. Look at that! You’ll see a little compartment, often with a subtle label, holding two AAA batteries. They're probably looking a bit tired, like they've been working overtime keeping your home cozy or cool. Give them a mental high-five for their service.
Now, with a tiny, triumphant flourish, pop those old batteries out. They usually just slide right out. See how easy that was? No wrestling matches, no cryptic puzzles. Just a quick release. Toss those old-timers into your recycling bin (because we're eco-friendly superheroes, too!).

The Grand Insertion: New Life, New Power!
This is where the real magic happens! Grab your two fresh AAA batteries. Notice the little plus (+) and minus (-) symbols inside the battery compartment? They're your friendly guides! Carefully align your new batteries with these symbols. Slide them in with a satisfying little click. Feel that? That's the sound of fresh, invigorating power coursing through your Nest, ready to tackle another season of perfect temperatures.
It's like giving your favorite gadget a double espresso shot – instant energy, instant readiness! Your Nest is now primed and pumped, ready to execute your every comfort command with renewed vigor. You've literally given it a new lease on life, all with just two tiny batteries and a few simple movements.

The Triumphant Return (and the Sweet Reward)
With its new power source securely tucked away, it's time to reunite your Nest display with its base. Line up the tabs on the back of the display unit with the slots on the wall plate. Gently push it back into place, and then twist it clockwise until you feel that familiar, reassuring click. It’s like locking a treasure chest, but instead of gold, you’re securing glorious climate control!
And just like that, you’re done! Your Nest Thermostat will probably light up, perhaps even go through a quick little startup sequence, acknowledging its fresh new power. It might display the time, the temperature, or a happy little welcome message. You did it! You’ve successfully navigated the thrilling world of Nest Thermostat battery replacement, and made it look utterly effortless.
So, take a bow! You’ve not only kept your smart home humming along beautifully, but you’ve also proven that even the smallest, seemingly technical tasks can be incredibly fun, easy, and deeply satisfying. Enjoy the uninterrupted comfort and the smug satisfaction of a job expertly done. Your home (and your perfectly regulated indoor climate) thanks you!
