How To Take Nest Thermostat Off Wall

Alright, so you're ready to tackle your Nest thermostat, huh? Maybe you're painting that accent wall you've been eyeing, or perhaps you're just curious how that clever little disk actually works its magic. Or, hey, maybe you’re upgrading to a newer model – good for you! Whatever the reason, taking your Nest off the wall isn't nearly as intimidating as it might seem. Think of it as a little puzzle, but one with a super easy solution. And I'm here to walk you through it, cup of metaphorical coffee in hand.
First things first, and this isn't just a friendly suggestion, it's a non-negotiable. We're talking about electricity here, folks. And while a Nest thermostat runs on low voltage, nobody wants a surprise tingle, right? Plus, it's just good practice. So, before you even think about touching that sleek device, you need to...
Kill the Power! (Seriously)
Head straight to your circuit breaker panel. You know, that big metal box that looks like it's guarding all the secrets of your house? Find the breaker that controls your HVAC system or furnace. It might be labeled "Furnace," "AC," or "HVAC." If you're not sure, you can always flip the main breaker for a few seconds – just make sure you've saved anything important on your computer first! The goal here is to ensure there's no juice flowing to your thermostat. No power, no problem. Trust me on this one. It's the ultimate "better safe than sorry" move.
Must Read
Once you've done that, give it a moment. Maybe hum a little tune. Go grab a snack. Just make sure the system is definitely off before moving on.
Pop Off the Display (The Easy Part!)
Okay, power's off, snacks are acquired. Now for the fun part that requires zero tools. Your Nest thermostat's display — that beautiful, round screen — isn't actually screwed into anything. It's held on by magnets or a clever little clip mechanism, depending on your model. It's designed to be super user-friendly.

Simply grasp the outer ring of the display and give it a gentle, but firm, twist counter-clockwise. Think of it like opening a jar of pickles, but way less strenuous. It should click or snap free. Once it feels loose, just pull it straight off the wall. Voila! You'll be holding the brain of your thermostat in your hand. Pretty neat, huh?
What you're left with on the wall is the "base plate." This is the less glamorous, but equally important, part where all the wires are connected. Don't worry, it's not as scary as it sounds. It's just a plastic plate with some terminals.
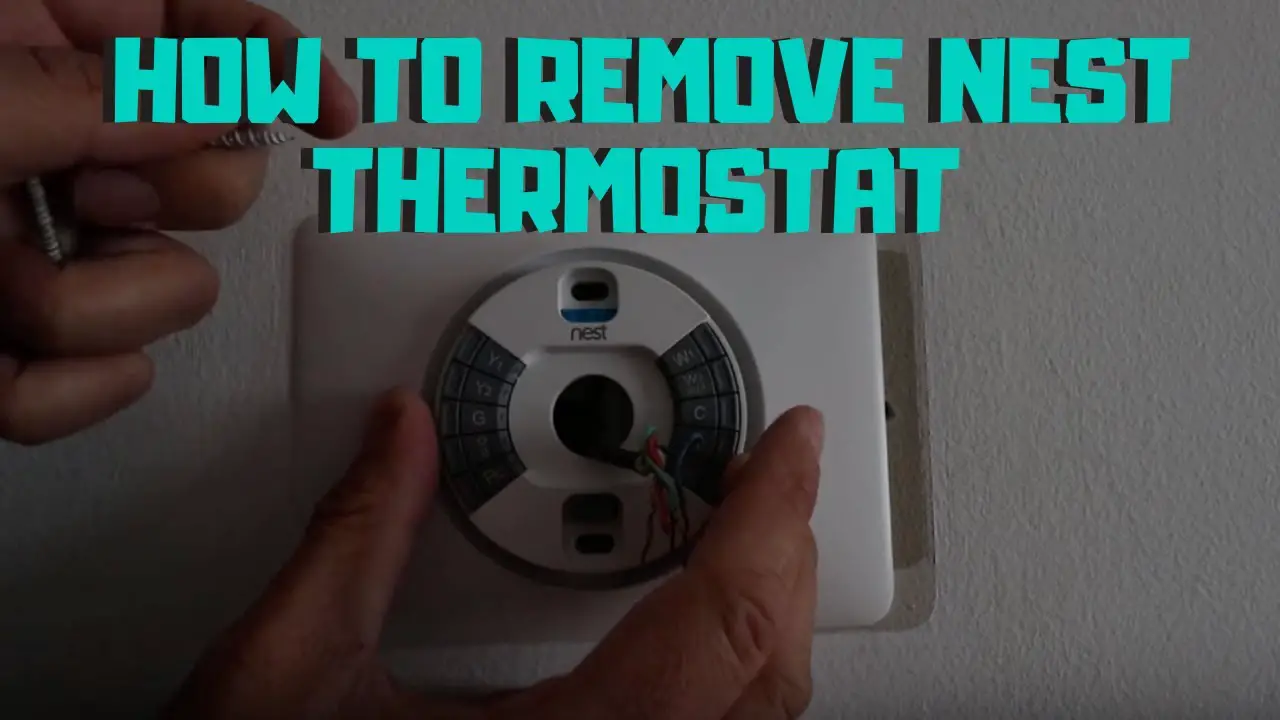
Tackling the Base Plate (Wired for Success)
Now, this is where a little bit of foresight goes a long way. Before you touch any wires, I want you to do something crucial. Seriously, lean in, because this is the most important tip I can give you for any thermostat removal:
Label your wires!
Yes, I'm shouting (in a friendly, helpful way, of course). Each wire connected to your Nest's base plate will be attached to a specific terminal, usually marked with a letter (like R, C, Y, G, W, etc.). Take a photo with your phone! Take several photos! Use masking tape and a marker to label each wire with its corresponding letter before you disconnect it. Future you will thank present you profusely. Imagine trying to figure out which wire goes where later? Nightmare fuel!

Got your labels? Good. Now, look closely at the base plate. You'll see two small screws, typically located at the top and bottom (or sometimes on the sides) that are holding the base plate to the wall. Grab a screwdriver – usually a Phillips head, but sometimes a flathead – and carefully unscrew these. Keep those screws handy; they like to roll away and play hide-and-seek.
Disconnecting the Wires (Gently, Gently)
With the screws out, the base plate will likely still be clinging to the wall by the wires. Time to free them! Each wire terminal on the Nest base plate has a small, spring-loaded button or lever next to it. To release a wire, simply push down on that button/lever and gently pull the wire out. Do this one by one, double-checking your labels as you go.

Once all the wires are disconnected, the base plate is completely free! You'll probably be left with a small hole in your wall and a bundle of wires peeking out. And maybe, just maybe, a little bit of dust or discolored paint behind where the thermostat used to live. Ah, the hidden secrets of home ownership!
You Did It! What Now?
Congratulations! Your Nest thermostat is officially off the wall. Give yourself a pat on the back. You're practically a DIY superhero. Now, depending on your original mission, you can patch and paint, install your new thermostat, or simply admire the blank space. Just remember to reverse the steps (and connect those wires back to their correct labels!) when you're ready to put things back together. And always, always make sure the power is off before reconnecting anything.
See? Told you it wasn't so bad. Now, about that coffee refill...