How To Replace Thermostat Battery Honeywell

Ever had your thermostat screen go blank, or notice a little flashing battery icon staring accusingly at you? Don't panic! This isn't a job for an expensive HVAC technician. Replacing the battery in your Honeywell thermostat is one of those wonderfully simple home maintenance tasks that feels incredibly satisfying. It's like a tiny magic trick where you bring your home's brain back to life, ensuring your living space stays perfectly comfy. It's useful, it's easy, and it gives you that satisfying "I did it myself!" feeling. Plus, who doesn't love saving a few bucks on a service call for something so straightforward?
This little DIY win offers benefits for just about everyone. For beginners in the world of home upkeep, it's a fantastic entry point – a low-stakes task that builds confidence for future projects. Families will love the peace of mind knowing their heating or cooling won't unexpectedly quit, avoiding those awkward moments of too-hot or too-cold chaos. It also teaches a great lesson in proactive maintenance. Even hobbyists or smart home enthusiasts appreciate keeping all their systems running smoothly, and a functional thermostat is the beating heart of a comfortable home environment. It’s a small detail, but a crucial one for everyday comfort and energy efficiency.
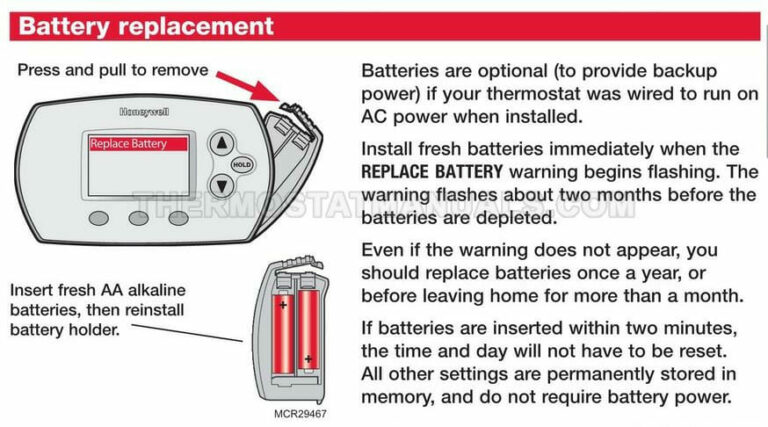
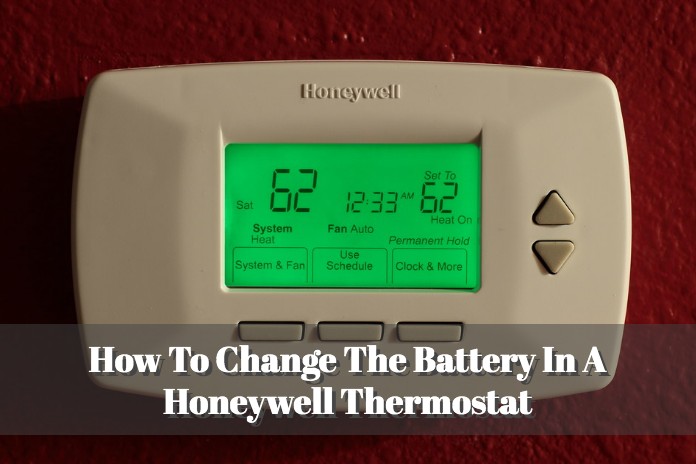
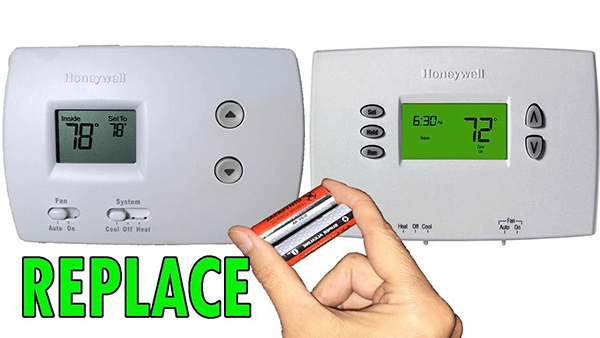
Honeywell makes a wide variety of thermostats, but the good news is that battery replacement is remarkably similar across most models. Whether you have a simple non-programmable unit or a fancier touch-screen model, the core process is the same. Most common are those that take AA or AAA batteries, though a few might use C batteries. You'll know it's time when you see a flashing low-battery icon, a completely blank screen, or sometimes your system just stops responding. Some models have a pull-down door on the front, others might have a side compartment, and for a few, you might gently pull the entire front panel away from the wall plate. Don't worry, they're designed for this! Understanding these slight variations means you're always prepared, no matter your specific Honeywell model.
Must Read
Ready to get started? Here are some simple, practical tips. First, identify your thermostat model – a quick glance at the back or underside of the unit (or your user manual) can often tell you. Next, gather your supplies: typically just a couple of fresh AA or AAA batteries, and maybe a small screwdriver if your compartment is secured. Locate the battery compartment. For many Honeywell models, it's a small tab on the bottom or side that you can gently pull or press to open a door. If not immediately obvious, try gently pulling the main body of the thermostat straight off the wall plate – the batteries are often housed behind it. Once open, carefully remove the old batteries and note the correct polarity (+ and - signs) before inserting the new ones. This is crucial! Close the compartment, and you should see the screen light up almost immediately. Test it by adjusting the temperature to ensure everything is working correctly. As an extra safety measure, consider turning off the power to your HVAC system at the breaker before you start, just to be extra cautious, although for simple battery replacement it's usually not strictly necessary since it's low voltage. Oh, and don't forget to recycle those old batteries responsibly!
See? That wasn't so bad, was it? Replacing your Honeywell thermostat battery is a quick, easy, and incredibly rewarding task. It's a small act of home maintenance that yields big results: consistent comfort, energy savings, and the satisfaction of knowing you've kept your home running smoothly. Embrace the power of the DIY!