How To Replace Fan In Hp Envy X360
Alright, let's talk tech. Specifically, that slightly-too-loud whirring sound coming from your beloved HP Envy x360. It's the fan, and it’s probably seen better days. Don't panic! Swapping it out is surprisingly doable, even if you’re not exactly a computer whisperer. Think of it as a mini-DIY project, a chance to bond with your machine, and a serious upgrade to your overall chill-factor. No more distracting fan noise during that crucial Zoom call, or while trying to binge-watch the latest season of "The Crown." We're here to help you get your Envy back to its quiet, cool self.
First Things First: Gathering Your Gear (and Your Zen)
Before you dive in, it's crucial to gather your tools. Think of it like prepping for a culinary masterpiece – you wouldn't start baking without flour, would you? You'll need:
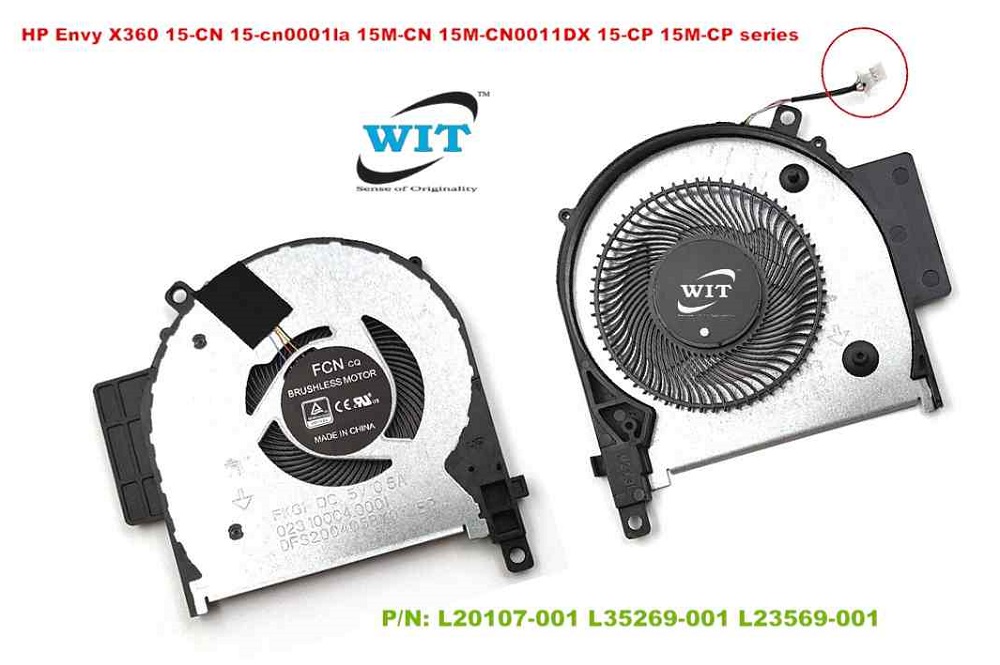
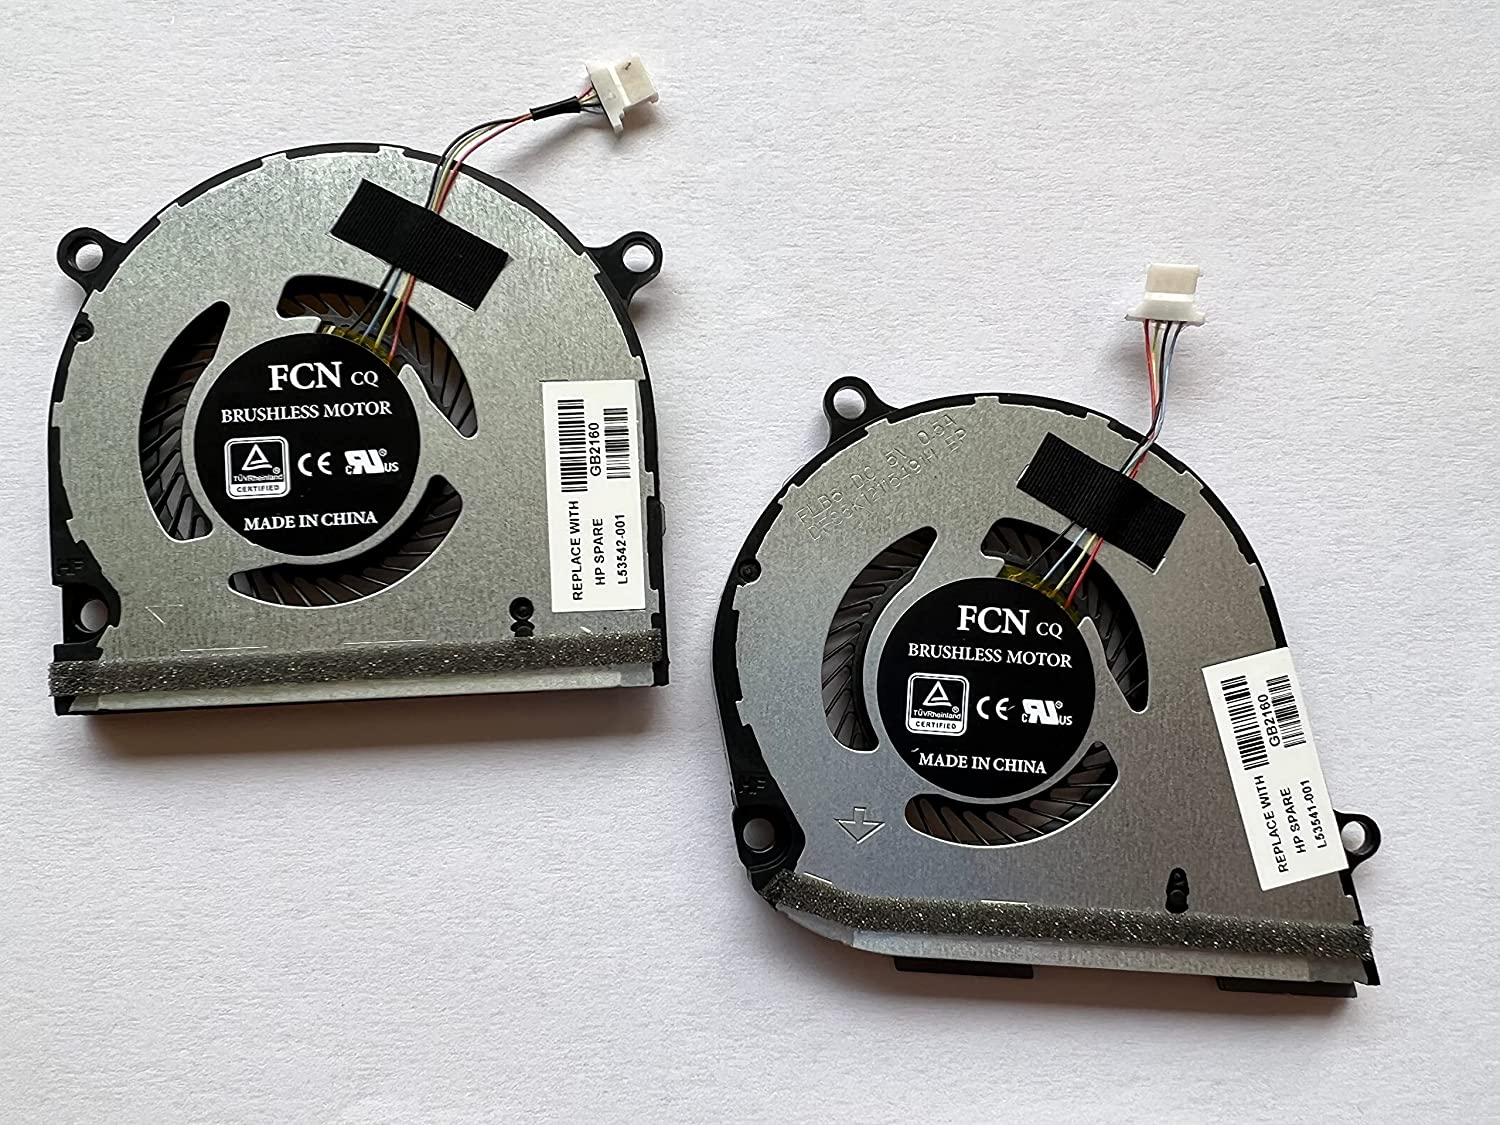
- A replacement fan specifically designed for your HP Envy x360 model. Check the model number on the bottom of your laptop!
- A small Phillips head screwdriver – magnetic is a plus!
- A spudger or plastic opening tool (a guitar pick can work in a pinch).
- An anti-static wrist strap (highly recommended to prevent electrical damage).
- A clean, well-lit workspace.
- Patience. Seriously, lots of patience.
Why the anti-static wrist strap? Imagine accidentally frying your motherboard. Nightmare fuel, right? This little gadget is your best defense against static electricity, which can be surprisingly damaging to delicate electronics. It's like wearing a tiny superhero cape for your computer.
Must Read
The Disassembly Dance: A Step-by-Step Guide
Okay, deep breath. Let's get started. Remember to power down your laptop and unplug it from the charger before you begin! This is not a drill. Safety first, always.
- Flip It Over: Place your HP Envy x360 upside down on your workspace.
- Remove the Bottom Cover: This is often the trickiest part. Use your screwdriver to remove all the screws securing the bottom cover. Keep them organized – a small container or a piece of tape with labeled sections can be a lifesaver. Once the screws are out, gently use your spudger or plastic opening tool to pry the cover open. Start at a corner and work your way around. Be gentle! You don’t want to break any clips. Think of it like opening a particularly stubborn clam shell – persistence, not brute force.
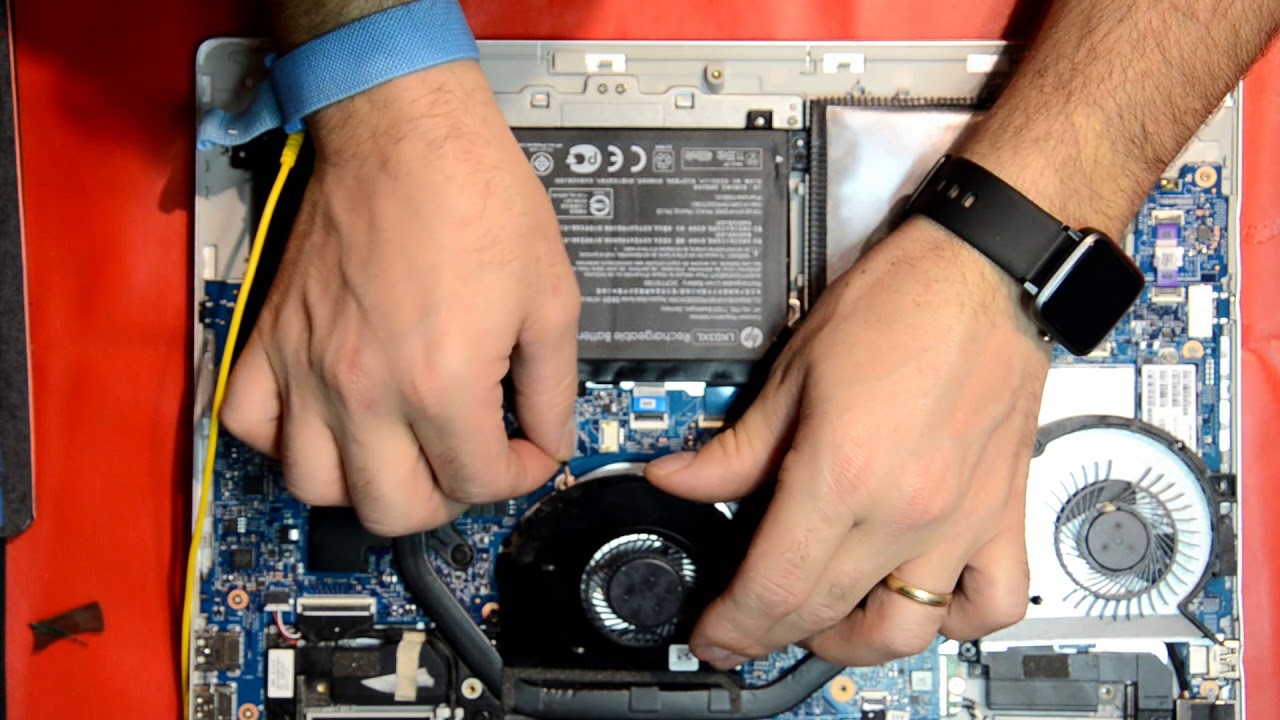
- Locate the Fan: The fan is usually near the CPU and will have a heat sink attached to it.
- Disconnect the Fan Connector: Carefully disconnect the fan's power connector from the motherboard. This is usually a small, delicate connector, so be gentle. A pair of tweezers can help, but be extra careful not to damage anything.
- Remove the Fan: Unscrew the screws holding the fan in place. Again, keep them organized! Lift the fan out of the laptop.
Think of this as a choreographed dance. Each step needs to be precise and deliberate. Rushing will only lead to missteps (and potentially broken components). So, put on some chill music (maybe some lo-fi beats?) and take your time.
The Reassembly Rhapsody: Putting It All Back Together
Now for the fun part: putting everything back together. This is where your careful organization pays off.
- Install the New Fan: Place the new fan in the same position as the old one. Screw it in securely.
- Reconnect the Fan Connector: Carefully reconnect the fan's power connector to the motherboard. Make sure it clicks into place.
- Reattach the Bottom Cover: Align the bottom cover with the laptop and gently press it into place. Make sure all the clips are secured.
- Replace the Screws: Screw the screws back in, making sure they are snug but not overtightened.
Congratulations! You’ve just successfully replaced the fan in your HP Envy x360. Now, power it on and listen for that sweet, sweet silence (or at least a much quieter hum).

The Post-Op Checkup
Once you’ve put everything back together, boot up your laptop and monitor the temperature. There are several free programs you can download to track your CPU and GPU temperatures. If the temperatures seem unusually high, double-check that the fan is properly connected and that the heat sink is making good contact with the CPU.
Pro Tip: While you have your laptop open, consider giving it a good cleaning. Use a can of compressed air to remove any dust bunnies that may have accumulated inside. A clean laptop is a happy laptop!
A Quiet Reflection
Replacing a fan might seem like a small thing, but it’s a reminder that we have the power to fix things, to improve our everyday experiences. Just like we can optimize our digital spaces, we can also optimize our physical ones, creating environments that support our focus and well-being. So, enjoy the silence, the cool breeze emanating from your Envy, and the satisfaction of a job well done. Now, go forth and conquer your to-do list – in peace and quiet.