How To Replace Elastic Webbing On Outdoor Furniture
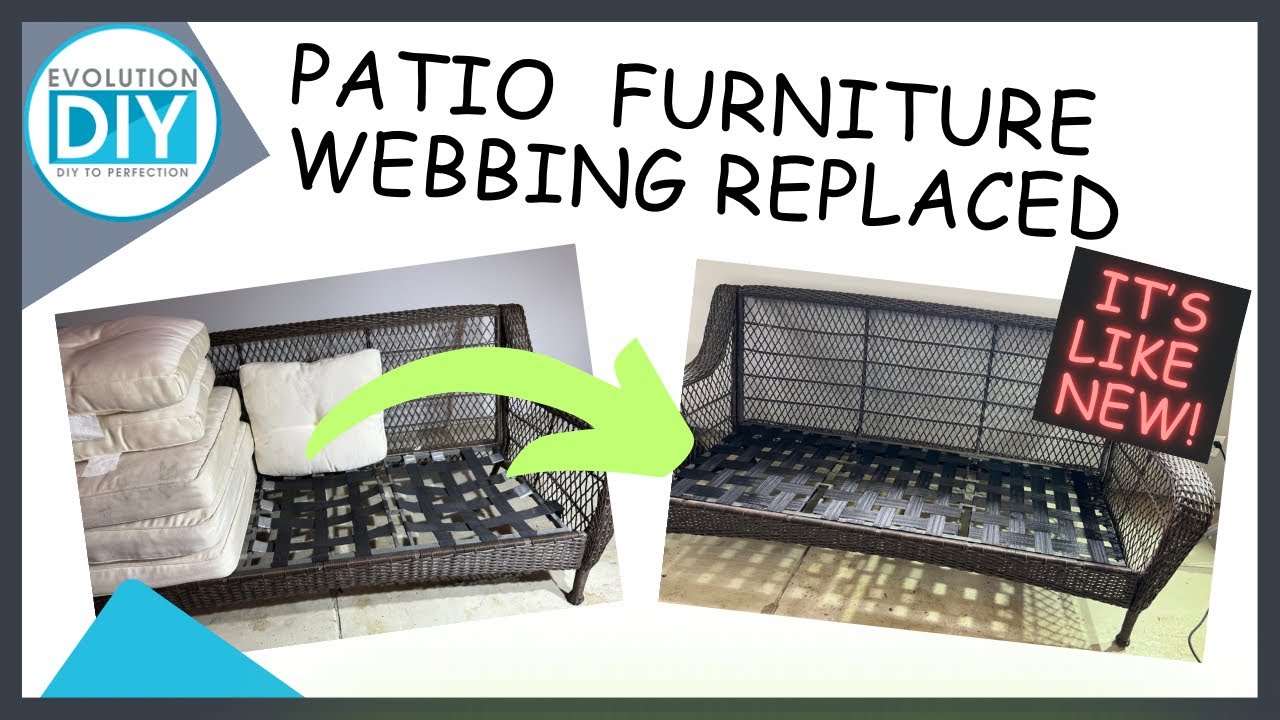
Hey there, fellow relaxers and sun-seekers! Ever notice your favorite outdoor chair starting to… sag a little? Like a well-loved hammock that's seen one too many afternoons? Chances are, your elastic webbing is giving up the ghost. But fear not! This isn't a furniture fatality. We're about to embark on a surprisingly rewarding DIY adventure: replacing that webbing!
Why bother, you ask? Well, aside from saving a perfectly good piece of furniture (and some serious cash!), there's something deeply satisfying about bringing something back to life with your own two hands. It's like being a furniture doctor, only instead of a stethoscope, you get a staple gun. Cool, right?
What's the Big Deal with Elastic Webbing Anyway?
Think of elastic webbing as the unsung hero of comfy outdoor furniture. It's the bouncy, supportive network that makes those chairs and loungers so darn inviting. It's the trampoline for your tush! It stretches and conforms, providing that perfect balance of give and support. But, just like a rubber band left in the sun, elastic webbing eventually loses its elasticity. UV rays, moisture, and good old-fashioned wear and tear take their toll.
Must Read
So, what happens when it goes bad? Saggy seats, uncomfortable pressure points, and a general feeling that you're sinking into the abyss. Not exactly the relaxing oasis you were hoping for, is it?
Gear Up for Webbing Glory!
Okay, time to gather your tools. Don't worry, you don't need a fancy workshop or a PhD in upholstery. This is a beginner-friendly project, I promise. Here's what you'll need:

- New elastic webbing: Measure the old webbing before you buy. You can usually find this at fabric stores or online. Choose a UV-resistant variety designed for outdoor use.
- Staple gun: A heavy-duty staple gun is your best friend here. Make sure you have the correct size staples for your gun and the thickness of the frame.
- Staples: Buy a box of stainless-steel staples. You don’t want rust to ruin your hard work later.
- Staple remover: Trust me, you'll need this. Removing old staples can be a pain, but this tool makes it much easier.
- Scissors or utility knife: For cutting the webbing to size.
- Measuring tape: Accuracy is key!
- Pliers (optional): For stubborn staples.
- Gloves: Protect those precious hands!
Let the Webbing Replacement Commence!
Alright, let’s get our hands dirty. Here’s a breakdown of the process, designed to be as painless as possible.
- Remove the old webbing: This is probably the most tedious part, but stick with it! Use your staple remover (and pliers if needed) to carefully pull out all the old staples. Be sure to remove all the old staples!
- Measure and cut the new webbing: Measure the distance between the frame rails where the webbing will be attached. Add a few extra inches to each end for overlap and securing. It's better to have too much than not enough. Cut your webbing accordingly.
- Attach the first end: Fold over the end of the webbing about an inch or two. Place it against the frame and use your staple gun to secure it in place. Use plenty of staples for a secure hold. You want this to last.
- Stretch and attach the other end: This is where the magic happens! Pull the webbing taut across the frame. You want it to be nice and tight, but not so tight that you break the frame. Fold over the end and staple it securely. A helper is useful here.
- Repeat: Continue adding webbing strips, overlapping them slightly, until the entire frame is covered. Try to weave them to make a strong pattern.
- Trim excess webbing: Once all the webbing is in place, trim any excess material with your scissors or utility knife.
Tips and Tricks for Webbing Success
Here are a few extra pointers to make your webbing adventure even smoother:

- Wear safety glasses: Protect your eyes from flying staples! Seriously, it’s not worth the risk.
- Use a scrap piece of wood: Place a scrap piece of wood behind the frame when stapling to prevent blowouts.
- Don't be afraid to experiment: If you're not happy with the tension, adjust it! This is a forgiving process.
- Watch YouTube tutorials: Visual learners, rejoice! There are tons of helpful videos online.
Reap the Rewards of Your Labor
And there you have it! You've successfully replaced the elastic webbing on your outdoor furniture. Now, step back, admire your handiwork, and then… sink into that newly refreshed seat and enjoy the comfort! You earned it. It's like giving your favorite chair a brand new lease on life. Plus, you’ve got bragging rights. You are officially a furniture whisperer!
So, next time your outdoor furniture starts to sag, don't despair. Embrace the DIY spirit, grab your staple gun, and get ready to transform your tired furniture into a comfy oasis. Happy relaxing!

