How To Replace A Wired Smoke Detector

Time to Banish the Beeps (or the Silence!)
Alright, friend, let's talk smoke detectors. That little guardian angel in your ceiling has been quietly (or maybe very loudly, judging by that mysterious chirping) standing guard over your home. But even heroes need a retirement plan, and sometimes, it’s time to swap out the old wired smoke detector for a shiny new one. Don’t sweat it; this isn't rocket science, it's more like a fun, slightly electrifying puzzle!
Whether your old detector is ancient, prone to false alarms during your epic cooking adventures, or has just gone mysteriously silent (which is arguably scarier than constant beeping!), replacing it is a fantastic idea. And guess what? You absolutely, positively, 100% can do this yourself. Consider me your cheerleading coach, ready to guide you through!
Safety First, Fun Second (Seriously, Though)
Before we even think about touching wires, there’s one golden rule: power down! This isn't just a suggestion; it's the sacred commandment of home DIY. You don't want to get a surprise zap that makes your hair stand on end – unless you're going for a retro '80s look, which I'm pretty sure you're not.
Must Read
Head to your electrical panel and find the breaker that controls your smoke detectors. It might be labeled "Smoke Detectors," "Lighting," or "General Circuits." If you're not sure, you can always flip the main breaker for the whole house. Sure, it'll plunge you into temporary darkness (perfect for a quick hide-and-seek game, maybe?), but it guarantees safety.
Once you think it's off, give a light switch in the same area a flick. If nothing happens, you're golden. If lights still come on, go back to the panel, because we're not playing chicken with electricity!
Your DIY Tool Kit (No Fancy Gadgets Required!)
Good news! You won't need to mortgage your house for a bunch of specialized tools. Here's what you'll want to gather:

- A new wired smoke detector (make sure it's compatible with your current wiring system if possible – check the brand or instructions!)
- A Phillips head screwdriver (or whatever matches your current detector’s screws)
- A step stool or ladder (unless you're secretly a giant, in which case, high five!)
- Needle-nose pliers or wire strippers (might not be needed, but good to have just in case)
- Electrical tape (just for good measure, or if you need to tidy up a connection)
- Maybe a tiny flashlight, for seeing into those shadowy nooks.
- Your favorite upbeat playlist, because DIY is better with a soundtrack!
Let's Get This Party Started! (The Actual How-To)
Okay, power's off, tools are ready. Let's do this!
Step 1: Disconnect the Old Guard
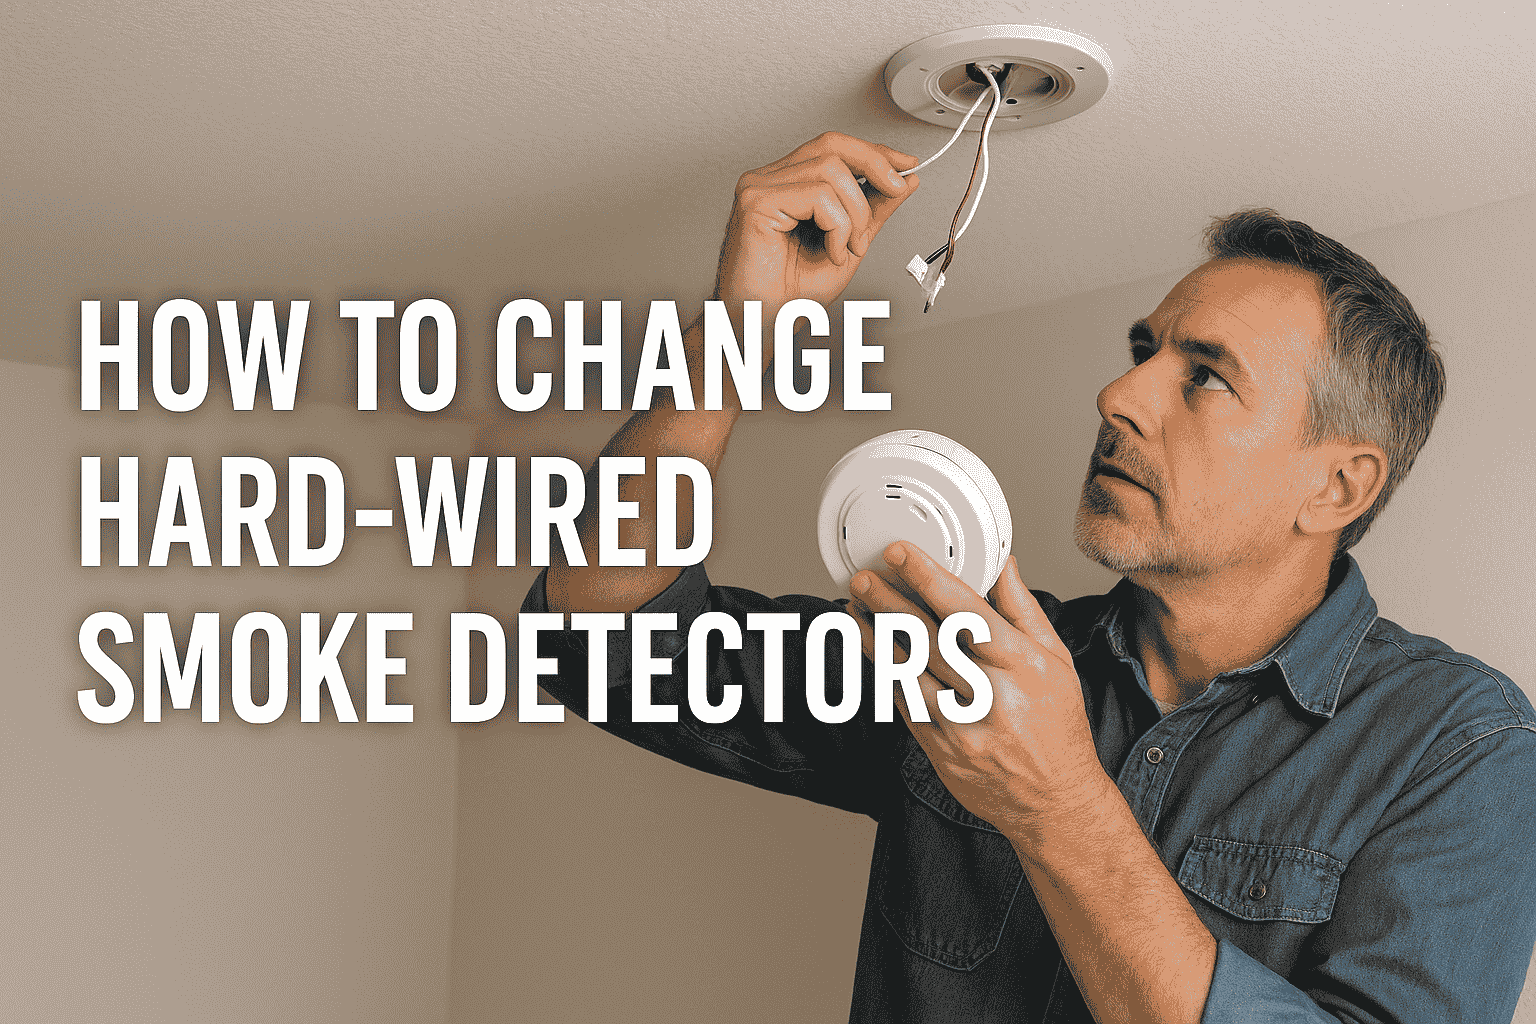
Reach up and gently twist the old smoke detector counter-clockwise. It usually detaches from its mounting bracket with about a quarter turn, much like opening a child-proof bottle (but hopefully less frustrating). Once it's off the bracket, you'll see the wiring harness.
There's often a quick-connect plug that links the detector to your home's wiring. Squeeze the sides of the plug (or whatever release mechanism it has) and pull to disconnect the detector. Ta-da! The old unit is free.
Step 2: Unwire the Old Harness (If Needed)
Sometimes, your new smoke detector comes with its own wiring harness that connects to your home's existing wires. If your old one has a different harness, you’ll need to disconnect it. You'll typically see three wires:

- Black: Hot wire (the live one, but not right now because the power is off!)
- White: Neutral wire
- Red or Orange: Interconnect wire (this is how your smoke detectors chat with each other!)
These wires are usually secured with wire nuts. Twist these nuts counter-clockwise to remove them. Gently separate the wires.
Step 3: Mount the New Bracket (If Different)
Your new smoke detector might have a slightly different mounting bracket than the old one. If so, simply unscrew the old bracket from the ceiling (careful not to drop screws into your eyeballs!) and replace it with the new one. Make sure it's snugly attached to the electrical box in the ceiling.
Step 4: Connect the New Wires
Now for the exciting part! Grab your new detector's wiring harness (if it came with one) or the wires from the detector itself. It's almost always a color-to-color match:
Match black to black, white to white, and red/orange to red/orange.

Twist the corresponding wires together clockwise, making a secure connection, and then cap them off with new wire nuts (your new detector usually comes with these). Give each wire a little tug to make sure it's firmly connected and won't wiggle loose. If your new detector just plugs into the existing harness, even easier!
Step 5: Attach the New Detector
Carefully tuck all the wires back into the electrical box in the ceiling. Then, connect the quick-connect plug (if applicable) from the new detector to the wiring harness.
Align the new smoke detector with its mounting bracket and twist it clockwise until it clicks securely into place. It should feel stable and not wobble.
Step 6: Power Up and Test!
The moment of truth! Head back to your electrical panel and flip that breaker back on. Your new smoke detector might let out a little chirrup or flash a light to indicate it's getting power.
Finally, press and hold the "Test" button on the front of the detector. Prepare for a loud, glorious, ear-splitting beep! This means it’s working. If you have interconnected detectors, they should all go off, confirming they're still talking to each other.
If nothing happens, don't panic! Go back, check your wiring connections, ensure the power is definitely on, and try again. Most issues are just a loose connection.
High Five, You Did It!
See? I told you you could do it! You've successfully replaced your wired smoke detector, ensuring your home (and precious pets, if you have them!) stays safe and sound. You've not only saved some cash but also gained some serious DIY street cred.
So go ahead, puff out your chest a little, and enjoy the peace of mind knowing your home is protected by your own two capable hands. Now, about that celebratory snack you deserve...