How To Replace A Battery In Honeywell Thermostat

Ever walked into your perfectly cozy home, only to be met with a sudden, inexplicable chill? Or perhaps you’ve been basking in the warmth, then inexplicably started to sweat, all while your thermostat display stares back at you with a blank, lifeless gaze? Oh, the drama! Before you start imagining ghosts in the machine or preparing for a costly service call, let me tell you a little secret: your Honeywell thermostat might just be a tiny bit peckish. It’s probably just hungry for some fresh batteries!
That’s right! That little digital brain controlling your home’s comfort isn’t powered by magic (sadly), but by good old-fashioned batteries. And when they run low, your thermostat throws a silent tantrum, leaving you wondering if you’ve somehow offended the HVAC gods. But fear not, my friend, because replacing those batteries is not just easy; it’s an opportunity for a mini-victory in your day!
Why should you care about this seemingly mundane task? Because it’s about empowerment! It’s about taking control of your home environment, understanding how things tick (or don't tick!), and gaining a tiny but significant boost in confidence. Think of it as your first step towards becoming a true home maintenance maestro. Plus, imagine the satisfaction of fixing something yourself, saving time and money, and getting your comfort back on track with a simple, quick maneuver. It’s like a superpower, really.
Must Read
Your Mission, Should You Choose to Accept It: Gather Your Tools!
No need for a utility belt, a laser gun, or even a hard hat. Your tool kit for this particular mission is gloriously simple:
- A couple of fresh AA or AAA batteries. (Always check your specific Honeywell model's manual or the compartment itself – it'll tell you!)
- Possibly a small flathead screwdriver (sometimes needed to gently pry open a compartment).
- A dash of can-do attitude. (Crucial for any DIY adventure!)
Seriously, that’s it! You probably have everything you need right now, stashed away in a kitchen drawer or a forgotten junk cupboard. Go on, embrace the quest!

The Great Battery Swap: A Step-by-Step Guide to Glory!
Ready to transform from thermostat-confused to thermostat-conqueror? Let’s do this!
Step 1: Locate Your Honeywell Thermostat
Okay, okay, this one's a bit obvious, but hey, we're thorough! Is it a sleek, modern touch screen? A classic rectangular box with buttons? No matter the model, the principles are remarkably similar.
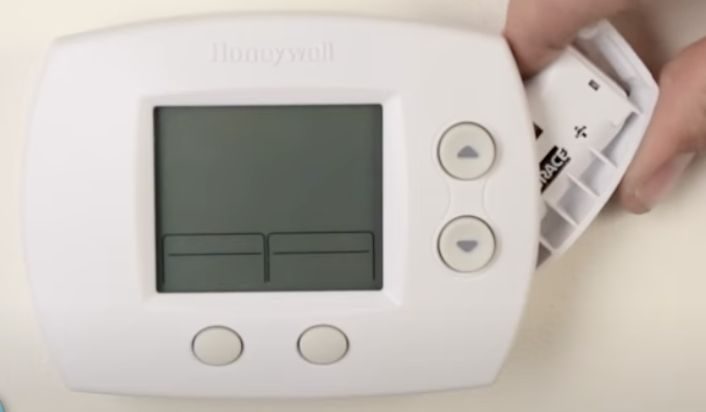
Step 2: Find the Battery Compartment
This is often the trickiest (and most rewarding) part of the puzzle. Honeywell thermostats are clever little devils, and their battery compartments can be in a few common places:

- Pull-Out Tray: Many models have a small tab or indentation on the side or bottom of the unit. A gentle pull will slide out a tray holding the batteries.
- Front Panel Pop-Off: Sometimes, the entire front face of the thermostat unit will gently pop off or hinge open. Look for small clips or a subtle seam.
- Behind the Main Unit: In some cases, you might need to gently pull the entire thermostat unit off its wall plate to reveal the batteries on the back. Don't worry, the wires will stay attached to the wall plate, so you won't be messing with any electrical spaghetti!
Give it a good look! A slight nudge, a careful feel around the edges. You'll find it, I promise. It's like a tiny treasure hunt!
Step 3: Open 'Er Up!
Once you’ve located the compartment, open it up. If it’s a pull-out tray, slide it. If it’s a pop-off panel, gently unclip it. If it’s the whole unit, pull it straight out from the wall. Don't be timid, but don't use brute force either. A firm, confident hand is all you need.
Step 4: The Big Swap!
You’re almost there! Remove the old, depleted batteries. Now, here’s the super important part: when inserting the new ones, pay attention to the polarity! Batteries have a little '+' (positive) and '-' (negative) sign. Make sure they match the indicators in the compartment. Getting this wrong is like putting your socks on the wrong feet – it just doesn't work!
Step 5: Close 'Er Back Up!
Once the fresh batteries are snugly in place, simply reverse the process. Slide the tray back in, snap the panel shut, or reattach the unit to its wall plate. You might hear a satisfying click or feel it seat firmly.
Step 6: The Moment of Truth: Test It!
Does the display light up? Does it greet you with a friendly glow? Try adjusting the temperature up or down. Hear that little click, indicating it’s responding? You did it! Give yourself a pat on the back, a small cheer, or perhaps a triumphant fist pump. You've brought your thermostat back to life!
What If It Still Doesn't Work? (Spoiler: It Probably Will!)
In the rare event that your thermostat is still giving you the cold shoulder (pun intended!), double-check your battery polarity. Try a different set of fresh batteries, just to rule out a faulty pack. Most of the time, this simple swap solves 99% of "dead thermostat" issues. But even if it doesn't, you've successfully eliminated the most common cause, making any professional diagnosis much simpler and potentially cheaper. You’re already ahead of the game!

The Deeper Meaning: You Are a Fixer!
See that? You just fixed something important in your home. Something that directly impacts your comfort and well-being. This isn't just about batteries; it's about unlocking a tiny bit of your inner handyman or handywoman. Every small DIY success like this builds confidence. It teaches you that many of the "mysteries" of your home are actually quite simple to solve with a little curiosity and a willingness to try.
Think of this as your stepping stone. What else in your home might just need a little you-touch? A loose cabinet knob? A squeaky door? A flickering light fixture? Don't be afraid to poke, prod, and learn. The internet is brimming with helpful guides, and every successful fix makes your home more yours, more understood, and truly, more comfortable.
So, go forth! Embrace the small fixes. Conquer those minor home maintenance quests. Because when you do, you're not just replacing batteries; you're building a more capable, confident you, ready to tackle whatever comes next. The world of DIY is waiting for you, one small, satisfying project at a time!