How To Put Screen Record On Control Center
Ever found yourself trying to explain something super specific on your phone to a friend or family member, only to resort to a series of confusing screenshots and "then you tap the little button that looks like a cloud... no, not that cloud!" messages? We’ve all been there. It’s like trying to describe a dream – you know exactly what you mean, but translating it into words is a whole other story. Well, what if we told you there’s a simple, elegant solution hiding right under your digital nose? Enter: Screen Recording, an absolute game-changer for your iPhone, and making it accessible is easier than brewing your morning coffee.
Think of screen recording as your phone's built-in VCR, but for your screen. Remember those clunky machines that let you record your favorite TV shows? This is way cooler, way smoother, and fits in your pocket. From creating quick tutorials for your tech-challenged loved ones to capturing that epic gaming moment, saving a fleeting Instagram Story, or even documenting a bug to send to customer support, its uses are as varied as your daily digital adventures. It’s a bit like having a tiny documentary crew for your phone, ready at a moment's notice.
Unlock Your Control Center Superpower
Your Control Center is already a hub of quick actions – flashlight, calculator, Wi-Fi toggles – basically, your phone's utility belt. Adding screen recording here is like giving Batman a new gadget. Here’s how you get that awesome feature into your quick-access arsenal:
Must Read
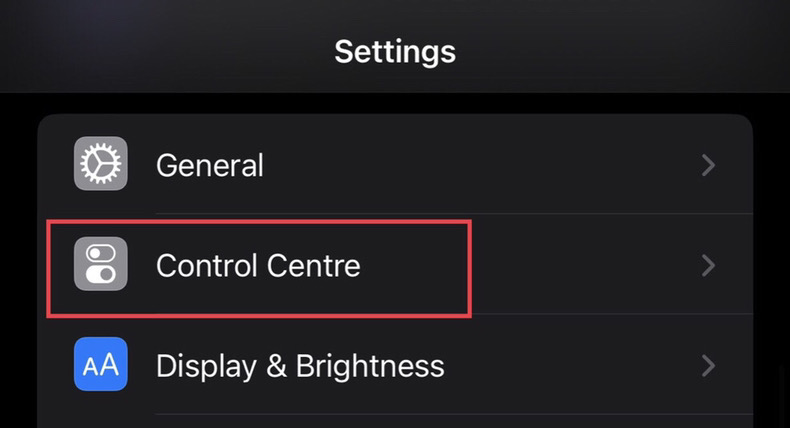
- First things first, tap on the familiar Settings app. It’s that sleek grey icon with the gears, a gateway to all your iPhone's customisations.
- Scroll down a bit until you spot Control Center. Give it a tap. This is where you decide what appears when you swipe down (or up, depending on your iPhone model).
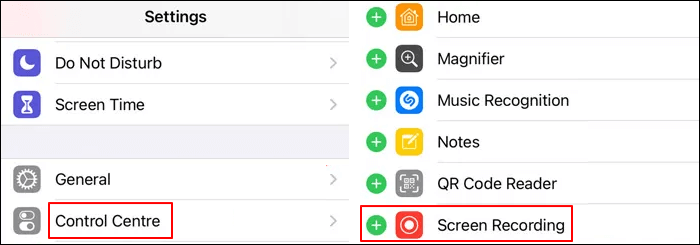
- Now, look for the "More Controls" section. This is where all the hidden gems live, waiting to be brought into the spotlight.
- Scan through the list until you find Screen Recording. It usually has a distinct circular icon, often with a smaller circle inside. You can't miss it!
- See that little green plus sign (+) next to it? Tap it! Instantly, Screen Recording will zoom up to your "Included Controls" list, meaning it's now part of your daily swipe-and-tap routine. Voilà! Mission accomplished.
Time to Record: Your Screen, Your Story
Now that Screen Recording is chilling in your Control Center, using it is incredibly intuitive. Here's the lowdown:
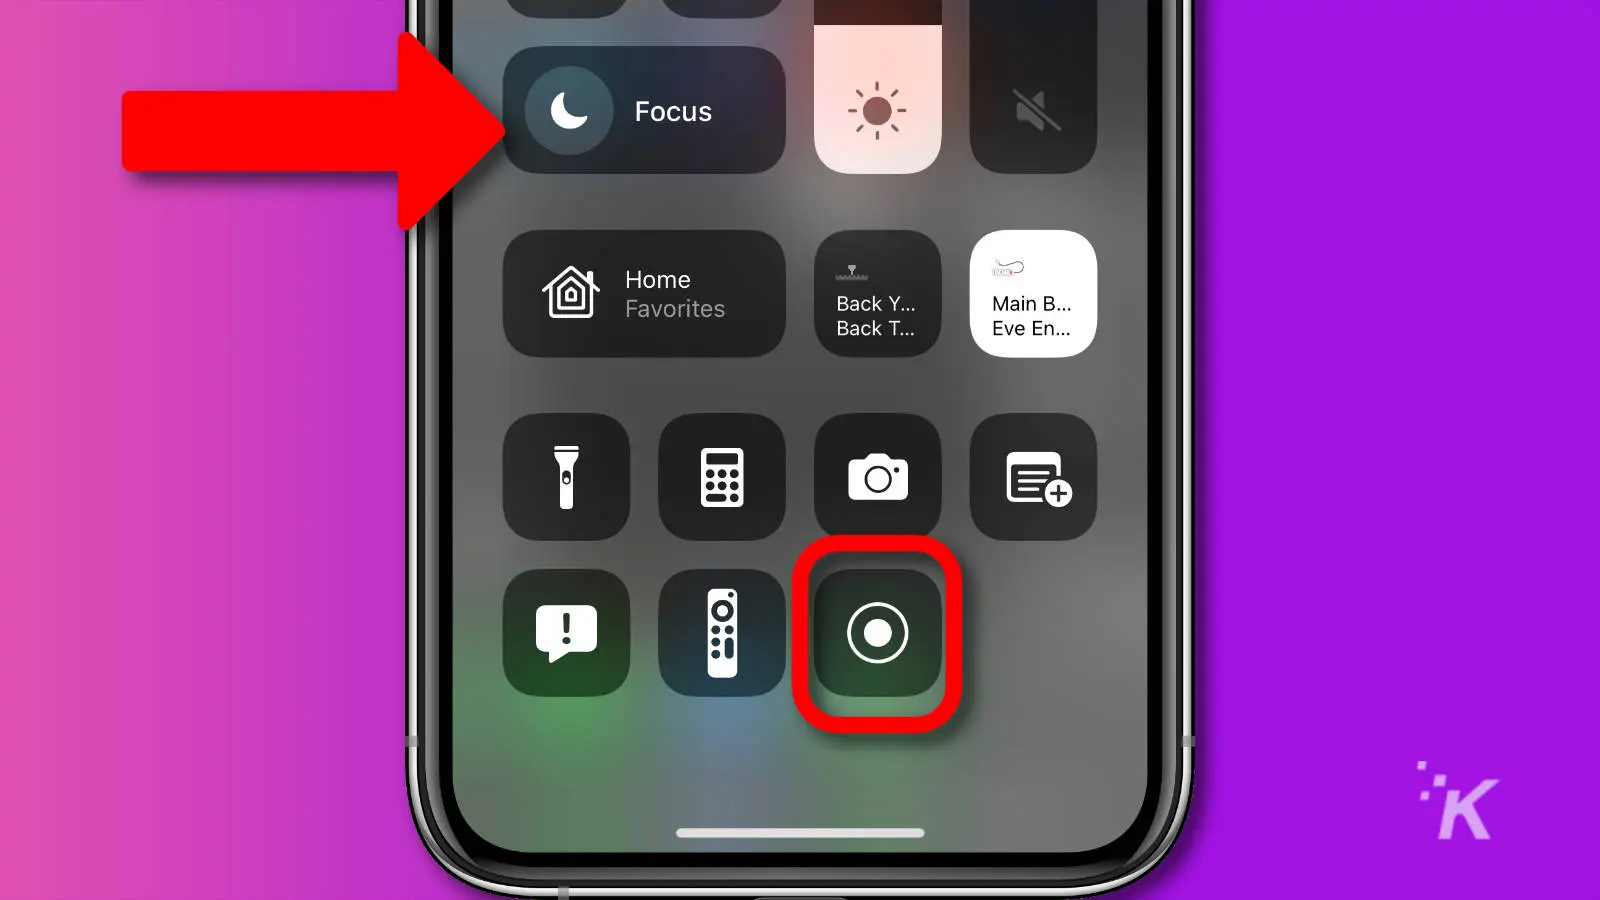
- To access your Control Center, simply swipe down from the top-right corner of your screen (for iPhones with Face ID) or swipe up from the bottom edge (for iPhones with a Home button).
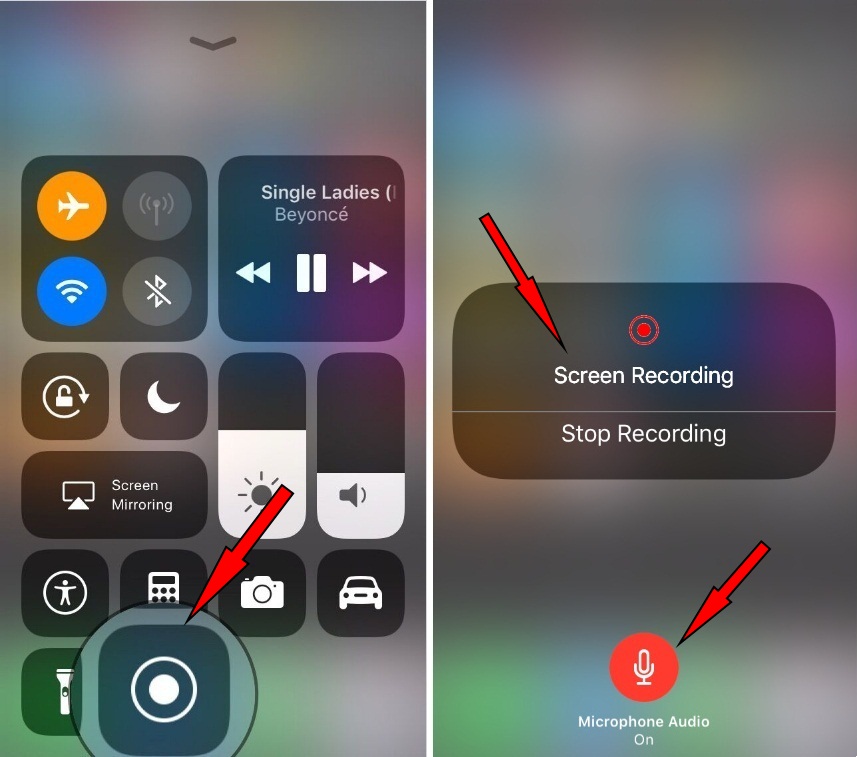
- Spot the Screen Recording icon – it’s that solid circle we talked about earlier.
- Give it a tap! You'll see a quick 3-second countdown, giving you a moment to get your screen ready. Once it starts, the icon will glow red, and a red pill or bar will appear at the very top of your screen, indicating that you're actively recording.
- When you're done capturing your digital masterpiece, simply tap that red bar or pill at the top of your screen, then select "Stop." Alternatively, you can open Control Center again and tap the now-red Screen Recording icon.
- Your recording will automatically save to your Photos app, ready for you to review, edit, or share!
Pro Tips for Your Recording Adventures
You’ve got the basics down, but let’s elevate your screen-recording game with a few insider tricks:
Mic Check, One Two: Want to add your own commentary, maybe explain a tricky step in a tutorial, or react to an awesome game play? Before you tap the recording icon to start, long-press (or 3D Touch) on it. A menu will pop up, offering you the option to turn your Microphone Audio on or off. Tap it to switch it on (it'll glow red), and your voice will be recorded along with your screen activity. Perfect for future Twitch streamers or TikTok DIY gurus!
Privacy First: A friendly reminder – anything visible on your screen will be recorded. So, be mindful of sensitive information like passwords, banking details, or private messages. Treat your screen recording like you would a public presentation; only show what you're comfortable with others seeing.
Trim and Share: Most recordings might have a few awkward seconds at the beginning or end as you start and stop. No problem! Head over to your Photos app, select your video, and tap "Edit." You can easily trim the start and end points to make your recording look polished and professional. Then, share it away – to your group chat, your social media, or even your grandma who finally wants to learn how to use FaceTime.
Storage Savvy: Screen recordings, especially longer ones, can take up a fair bit of storage space. Keep an eye on your iPhone's available storage, just like you'd manage your physical clutter. A quick trim or a transfer to cloud storage can keep things running smoothly.
So there you have it! Adding Screen Recording to your Control Center is a small tweak that offers a huge boost in convenience and capability. It’s not just a tech trick; it’s about making your digital interactions smoother, your explanations clearer, and your ability to capture and share moments more dynamic. In a world full of digital noise, having the power to precisely show, not just tell, is truly empowering. Go forth and record, you magnificent digital storyteller!