How To Make A Rain Guard For A Bird Feeder

Hey there, bird lovers! Ever watch your feathered friends huddled miserably under a soggy bird feeder during a downpour, their precious seeds turning into a mushy mess? Yeah, me too. It's a bummer! But guess what? We can fix that! We're going to build a super simple, super effective rain guard. Trust me, it's easier than you think!
Why bother, you ask? Well, besides the obvious (keeping your birds dry and happy!), a rain guard prevents seed spoilage. Nobody wants moldy seeds, right? That can make our little buddies sick. Plus, dry seeds mean fewer trips to refill the feeder! Think of all that extra time you'll have for, oh, I don't know...bird watching!
Gather Your Supplies
Alright, let's get down to business. You won't need a ton of fancy tools or materials for this project. In fact, you probably have most of this stuff lying around the house. Isn't that the best kind of DIY?
Must Read
Here's your shopping list (which, again, you might already have!):
- A large, shallow plastic or metal dish. Think of a plant saucer, a serving tray, or even the lid of a large storage container. Bigger is usually better, providing more coverage. (Just make sure it's not too heavy for your feeder!)
- Strong cord or wire. Something weatherproof is ideal, like nylon cord or coated wire.
- Drill (optional). If your dish doesn't already have holes.
- Scissors or wire cutters. For cutting the cord or wire.
- Measuring tape or ruler. Just to make sure things are even. (Because nobody wants a lopsided rain guard!)
Let's Get Building!
Okay, deep breath. This is the fun part! We're going to transform that boring dish into a stylish and functional rain shield. Ready?
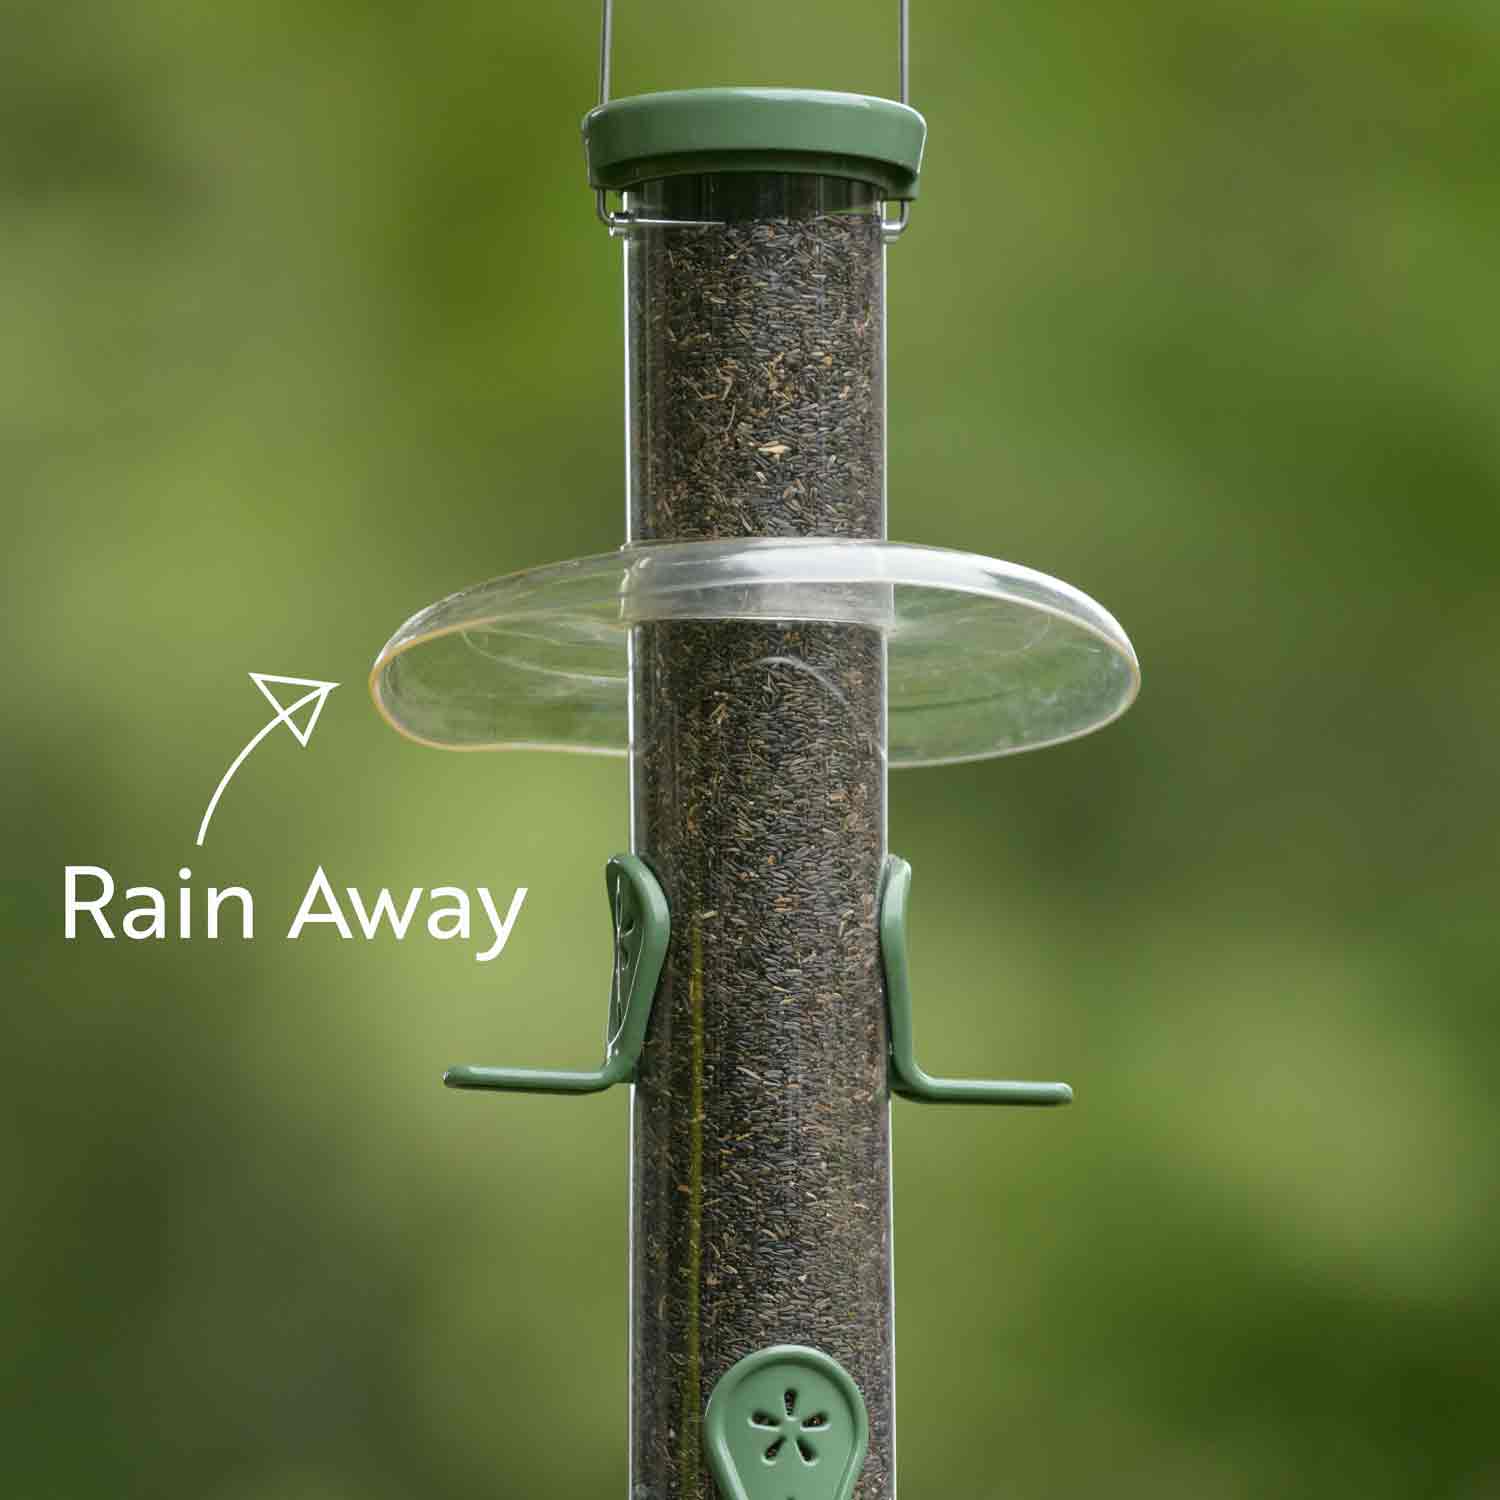
Step 1: Drill (if needed). If your chosen dish doesn't have holes near the rim, you'll need to create them. Evenly space three or four holes around the edge. Be careful when drilling! And maybe wear some safety glasses. Just sayin'.
Step 2: Cut the cord or wire. Cut three or four equal lengths of cord or wire. Make them long enough to hang the dish above your bird feeder, leaving plenty of space for the birds to fly in and out. Err on the side of too long; you can always trim them later.

Step 3: Attach the cords/wires. Thread one end of each cord/wire through a hole in the dish. Secure it with a knot, a crimp (if using wire), or by twisting it around itself. Make sure it's nice and secure! You don't want your rain guard crashing down mid-storm!
Step 4: Hang it up! Now, carefully gather the other ends of the cords/wires and attach them to the top of your bird feeder or to the branch it's hanging from. Make sure the dish hangs level and that it's positioned high enough above the feeder so the birds have plenty of room to access the seeds.
Step 5: Adjust and Admire! Step back and admire your handiwork! Make any necessary adjustments to ensure the rain guard is providing adequate coverage. Is it tilting? Shorten one or two of the cords. Does it need to be higher? Lengthen them all. Tweak it until it's perfect!
Troubleshooting Tips & Tricks
Sometimes things don't go exactly as planned. That's okay! Here are a few potential problems and solutions:
- Rain guard is too wobbly: Use thicker cord or wire. You can also add more strands for extra stability.
- Birds are afraid of the rain guard: Sometimes birds are wary of new things in their environment. Give them a few days to get used to it. You could also try decorating the rain guard with natural elements like leaves or twigs to make it blend in better.
- Water is pooling on the dish: Drill a few small drainage holes in the center of the dish. (Carefully, of course!)
Beyond the Basics: Get Creative!
Once you've mastered the basic rain guard, why not get creative? You could paint the dish, decorate it with mosaics, or even add some small plants around the edge (just make sure they're not poisonous to birds!). Let your imagination run wild!

Think about using recycled materials! An old pie tin, a plastic container lid, even a section of an old umbrella could be repurposed into a fantastic rain guard. Reduce, reuse, recycle, and protect our feathered friends – it's a win-win!
Happy Birds, Happy You!
And there you have it! You've successfully built a rain guard for your bird feeder. Now you can sit back, relax, and watch your birds enjoy their dry, delicious seeds, even when it's pouring outside. You're a bird-feeding hero!
This is just the beginning of your bird-loving adventure. There's so much more to learn about attracting and caring for these amazing creatures. From choosing the right seeds to building birdhouses, the possibilities are endless. So go forth, explore, and discover the joy of connecting with nature, one happy bird at a time. Who knows what other amazing things you'll discover about the avian world – and about yourself – along the way?