How To Install Nest Thermostat Gen 4

Ever felt that gentle nudge to elevate your living space, to make it not just a house, but a home that truly understands your needs? Or perhaps you're a budding DIY enthusiast looking for a project that delivers both satisfaction and tangible benefits? Installing a Nest Thermostat Gen 4 isn't just about upgrading a device; it’s about embracing a smarter, more comfortable, and energy-efficient way of life. It’s a bit like adding a new, highly functional brushstroke to the masterpiece that is your personal sanctuary.
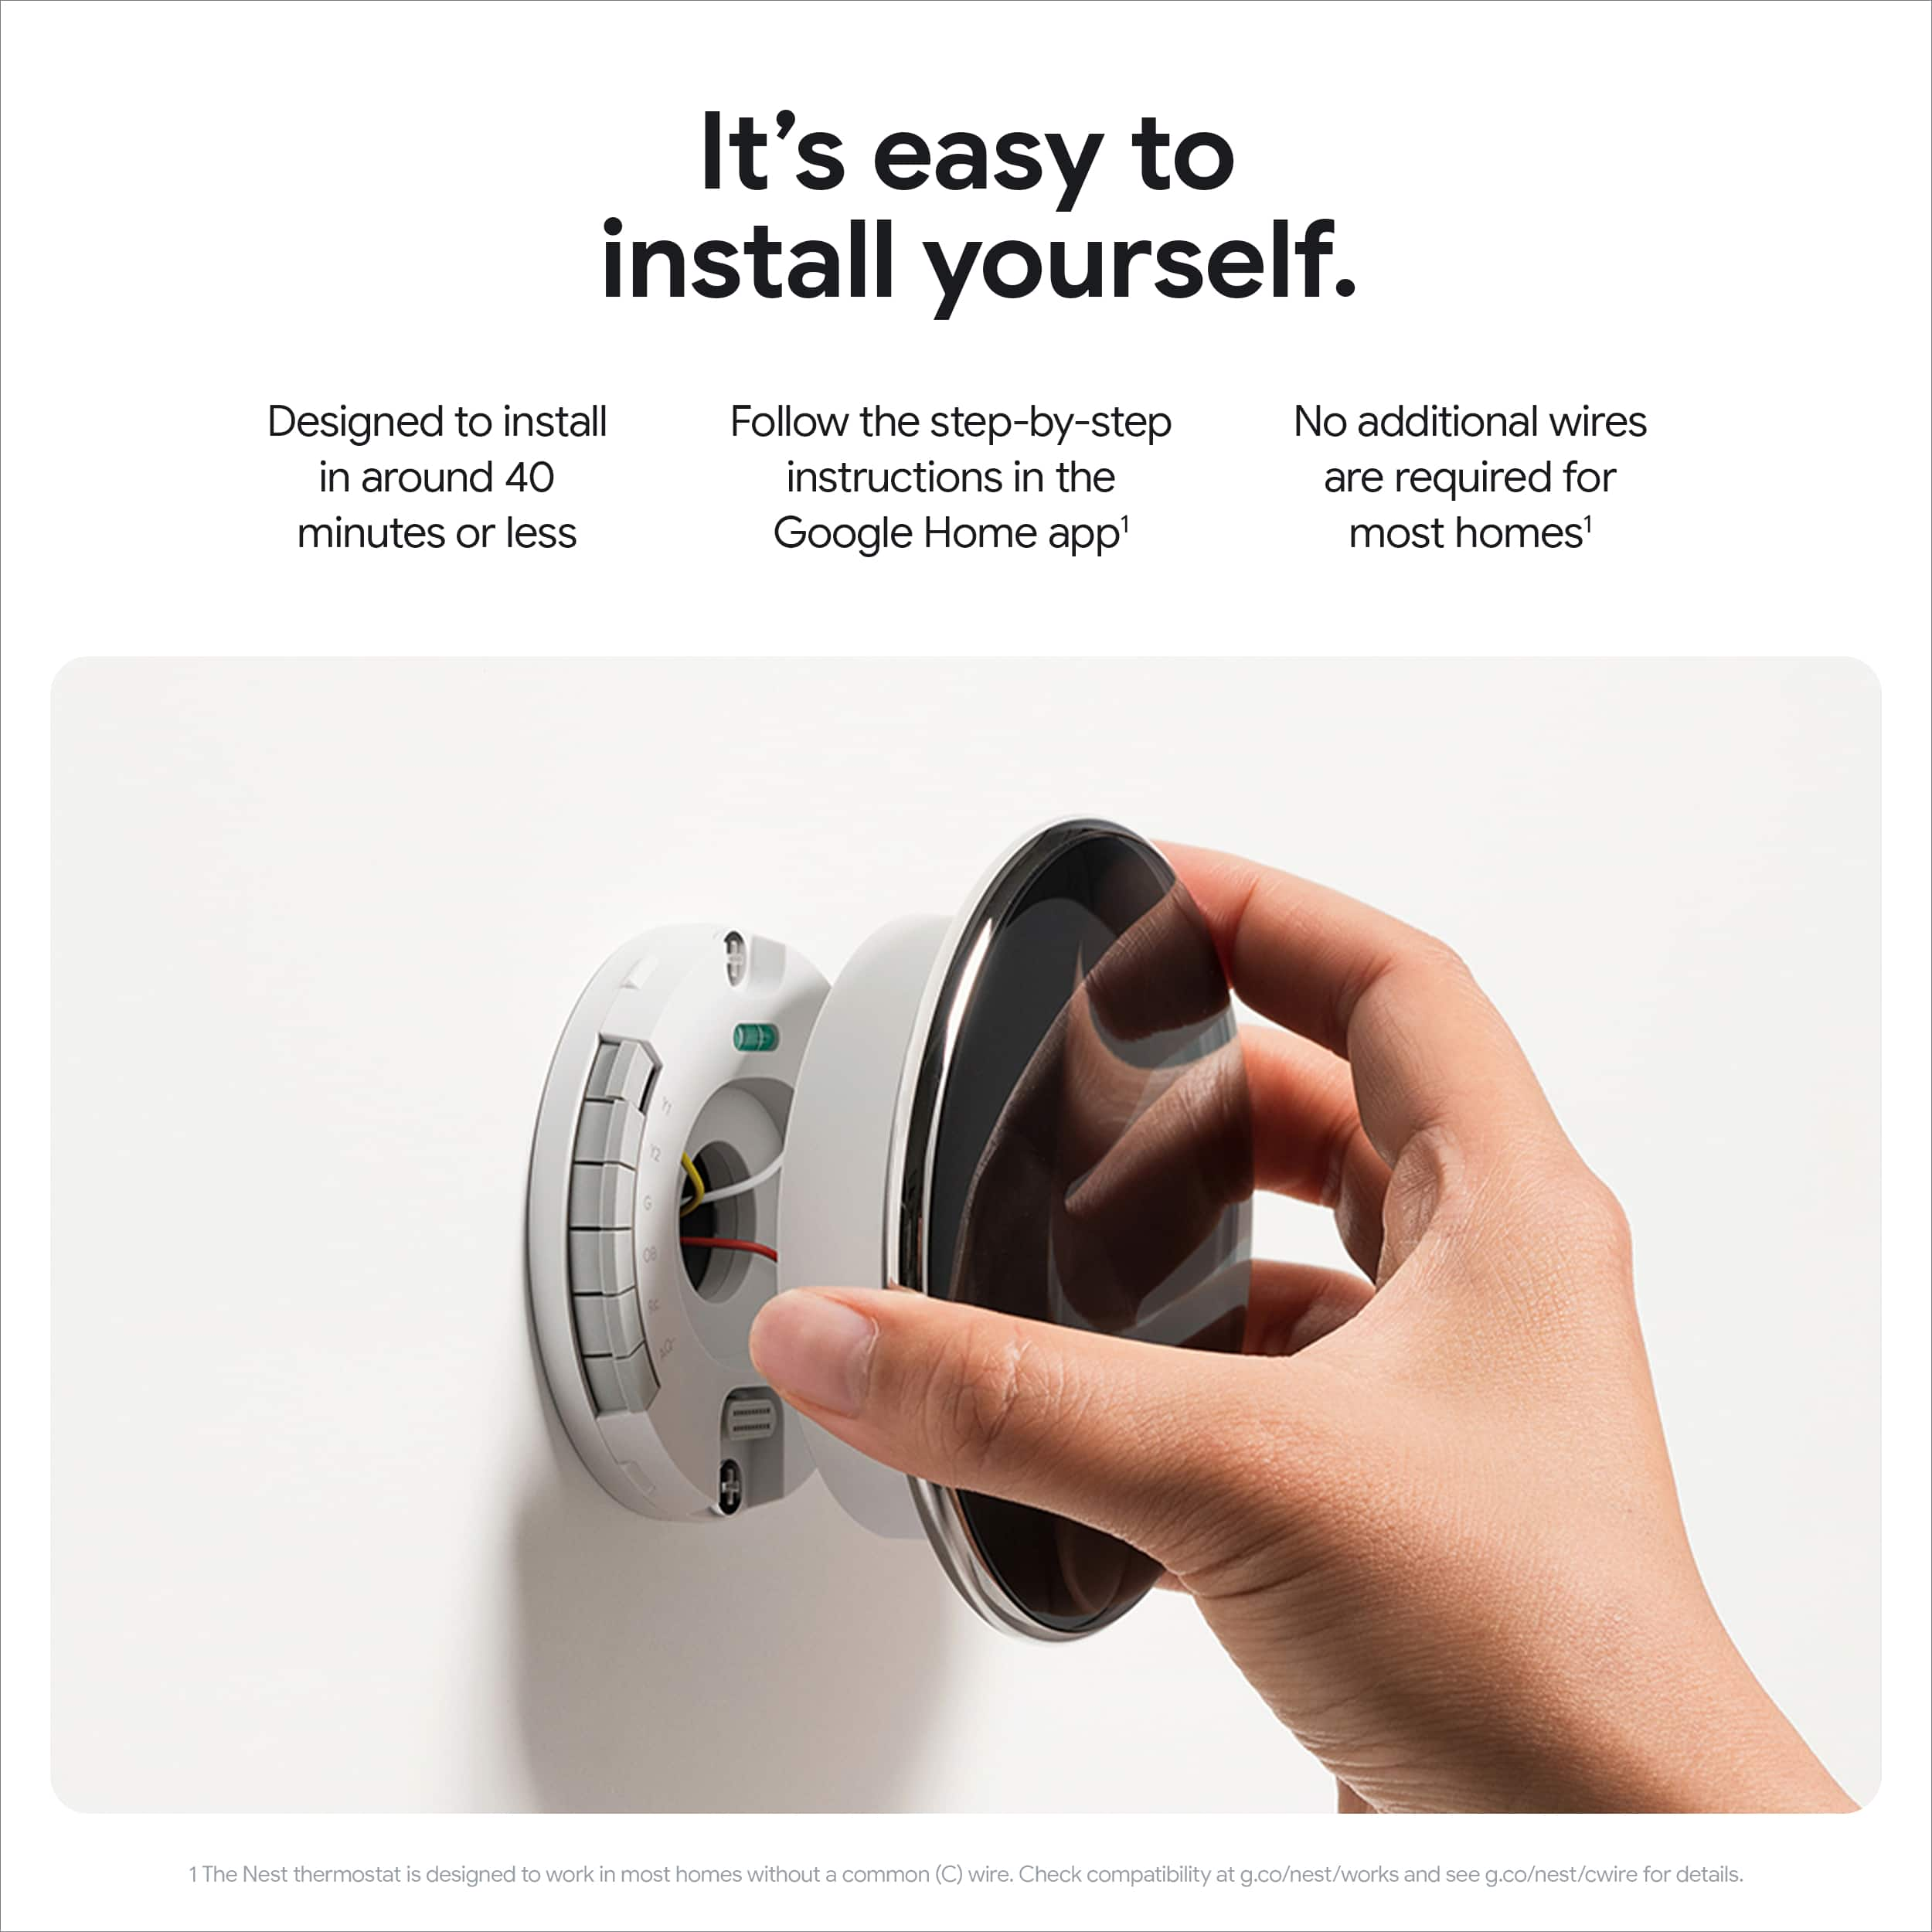
For anyone who loves the idea of a home that works smarter, not harder, the Nest Thermostat Gen 4 is a fantastic entry point into the world of smart home technology. You don't need to be an electrical engineer or a seasoned contractor to tackle this project. It's perfectly suited for curious hobbyists, savvy homeowners, and even casual learners eager to gain a new skill. The beauty here lies in the empowerment: the feeling of taking control of your home's climate and making a meaningful difference in your energy consumption. It’s a tangible act of self-reliance that yields daily dividends in comfort and savings. Imagine a cooler home greeting you after a hot day, or knowing you're doing your part for the planet, all because you decided to take an hour or two to enhance your abode.
So, who can benefit from this delightful DIY endeavor? Well, there's the eco-conscious individual who revels in seeing those energy savings stack up, knowing they're reducing their carbon footprint. Then there’s the comfort seeker, someone who loves the convenience of adjusting their home's temperature from their phone, whether they're on the couch or halfway across town. Consider the budget-minded family, who appreciate how Nest learns their routine and optimizes heating and cooling to keep bills in check. And let's not forget the tech-curious explorer, who simply loves the satisfaction of integrating new gadgets into their home ecosystem. No matter your motivation, the journey of installing a Nest Thermostat is surprisingly rewarding, transforming a functional necessity into a smart, responsive amenity.
Must Read
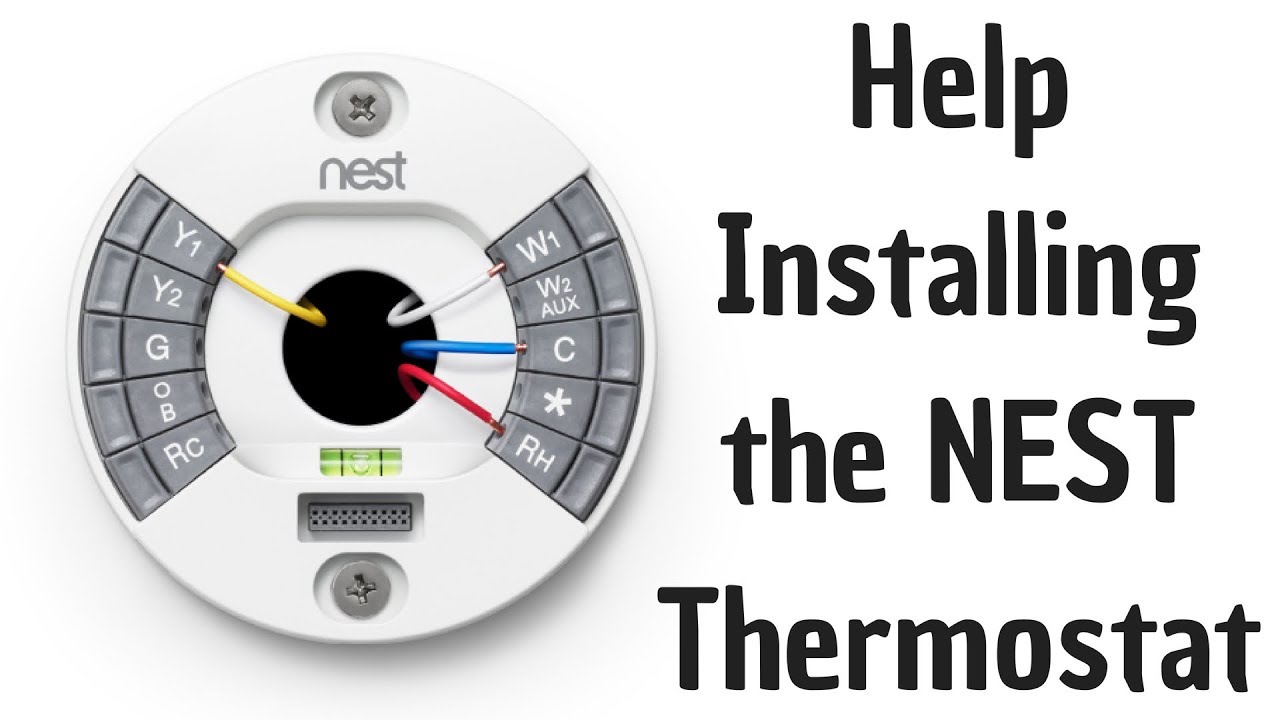
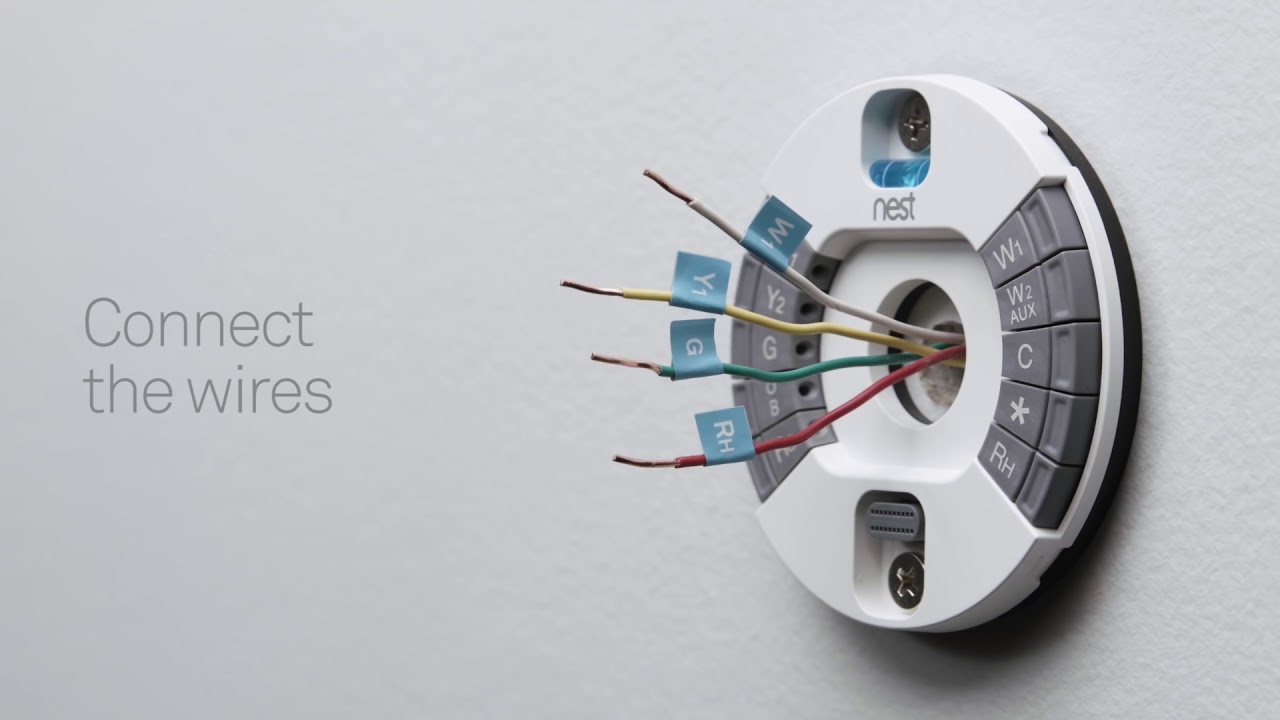
Ready to give it a try? Here are a few friendly tips to make your installation journey smooth and enjoyable. First and foremost, safety is key! Always remember to turn off the power to your HVAC system at the breaker box before touching any wires. This isn't just a recommendation; it's a golden rule. Next, take a moment to label your existing thermostat wires before disconnecting them – Nest provides handy labels, but even a piece of tape and a marker will do wonders for clarity. The Nest app itself is a fantastic guide, offering clear, step-by-step instructions tailored to your specific wiring. Don't rush; take your time with each step. And if you ever feel unsure, Google offers a wealth of helpful videos and support articles. Most importantly, remember that this is a project to enjoy, so approach it with a sense of adventure!
Ultimately, installing a Nest Thermostat Gen 4 is more than just a home improvement task; it’s an act of personal empowerment. There's an undeniable satisfaction in seeing that sleek, smart device light up, knowing you put it there. It's the joy of effortlessly controlling your climate, saving energy without even thinking about it, and having a smarter home that anticipates your needs. It's a small change with a big impact, making your home a more comfortable, efficient, and wonderfully intelligent place to live.