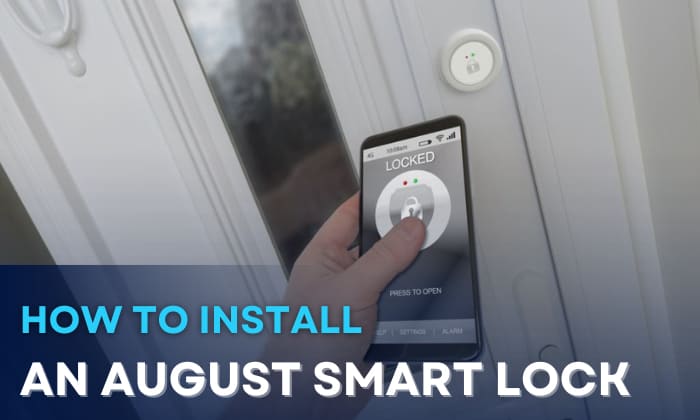
How To Install August Lock

Ever thought about giving your front door a brain upgrade? No, really! We're talking about smart locks, specifically the super cool, super sleek August Lock. If the thought of ditching keys makes your tech-loving heart do a little happy dance, then you're in for a treat. Installing one of these beauties might sound like a job for a seasoned handyman, but guess what? It’s surprisingly simple, ridiculously rewarding, and honestly, a bit of a blast!
Forget the scary images of tangled wires or complicated diagrams. Installing an August Lock is less about advanced engineering and more about a few simple twists and clicks. Think of it as adult LEGO, but for your house. Ready to dive into the wonderful world of keyless entry? Let’s get playful with power tools (well, a screwdriver) and transform your entryway!
First Things First: Gather Your Crew (and Tools!)
Before we embark on this high-tech adventure, let’s get our ducks in a row. What do you need? Not much, actually! Grab your August Smart Lock, of course. You'll also need a Phillips head screwdriver. That’s it! No drills, no saws, no elaborate toolbox necessary. You might also want your smartphone handy for the app setup later, and perhaps a celebratory beverage of choice. A cup of coffee? A sparkling water? This journey deserves a little reward!
Must Read
Seriously, the minimalism of the required tools is one of August's secret charms. It's like they knew you didn't want to spend an entire afternoon rummaging through a dusty garage. This is about efficiency, baby!
Step 1: Say Goodbye to Your Old Thumb Latch
Okay, this is where your door's old personality gets a little makeover. Peer inside your door. See that little twisty knob on your deadbolt? That’s your thumb latch. It’s been a loyal servant, but its time has come. Don't worry, we're not touching the exterior part of your deadbolt (the keyhole bit), just the interior. Find the two screws holding the thumb latch in place.
Grab your trusty Phillips head screwdriver. Give those screws a gentle turn, counter-clockwise. They might put up a tiny fight, but they’ll give in. Once unscrewed, the thumb latch and its backplate should come right off. Set them aside; you won't need them for the August install, but maybe keep them for a rainy day or if you ever decide to go old-school again. You just performed your first act of smart home rebellion! High five!
This part always feels a bit like dismantling a mystery box, doesn't it? Just two screws and poof – the old tech is out! It’s surprisingly satisfying, almost like popping bubble wrap, but with more purpose.
Step 2: Install the Mounting Plate – The August Foundation
Now for the August Lock's sturdy new home! You'll find a sleek little mounting plate in your August box. This plate is the bridge between your existing deadbolt and the new smart lock. It’s designed to fit snugly over the two exposed screw holes where your old thumb latch used to be.
Here’s the trick: there’s a little tailpiece (the flat metal bit) sticking out of your deadbolt mechanism. The August mounting plate has a small vertical slot. You'll want to make sure this tailpiece slides perfectly into that slot. Once aligned, use the new screws provided by August to secure the mounting plate. Give them a good, firm twist, but don’t overtighten. You want it snug, not Hulk-smashed.
This is where your door really starts to feel the smart transformation. It’s like giving it a sturdy, metallic backbone for all the intelligence that’s about to come. Plus, seeing that plate perfectly aligned? Chef's kiss! It's those little moments of triumph that make DIY so utterly delightful.
Step 3: Attach the August Smart Lock – The Grand Reveal!
The moment of truth! Grab your August Smart Lock. Notice the two "wings" or clamps on the back of the lock. These are what will hug your door and hold the lock in place. Align the August Lock with the mounting plate, making sure the tailpiece from your deadbolt slides into the August’s rotating slot. It’s a bit like fitting a key into a lock, but on a grander, smarter scale.
Once it’s properly seated, those wings on the August Lock will open up. Push the clamps down to secure the lock tightly onto the mounting plate. You’ll hear a satisfying click as they lock into place. Boom! Your door now has a brainy new companion. It looks incredibly futuristic, doesn't it? Go ahead, admire your handiwork for a moment. You’ve just performed a minor miracle in smart home integration!
There's something truly magical about this step. It's like watching a transformer assemble itself, right there on your door. That click? Oh, that's the sound of success, my friend. The sound of a simpler, keyless future greeting you with open… well, locked arms, but in a good way!

Step 4: Batteries & Cover – Powering Up the Future
The August Lock needs power, naturally! It runs on four AA batteries, which usually come included. Pop open the battery cover on the front of the August Lock (it often just slides off or has a simple button to release it). Insert the batteries, paying attention to the positive and negative terminals. Close the cover, making sure it snaps securely back into place.
You might hear a little whir or click as the lock powers on. This is its way of saying, "Hello world, I'm ready to protect your home!" It's like giving a superhero their first jolt of power. And just like that, the hardware part of your installation is complete. Give yourself a pat on the back, maybe even a little dance. You are officially a smart lock installation wizard!
These little batteries are the unsung heroes, aren't they? They're the tiny powerhouses making all that clever keyless magic happen. And seeing the August come to life after you insert them? Pure gadget joy.
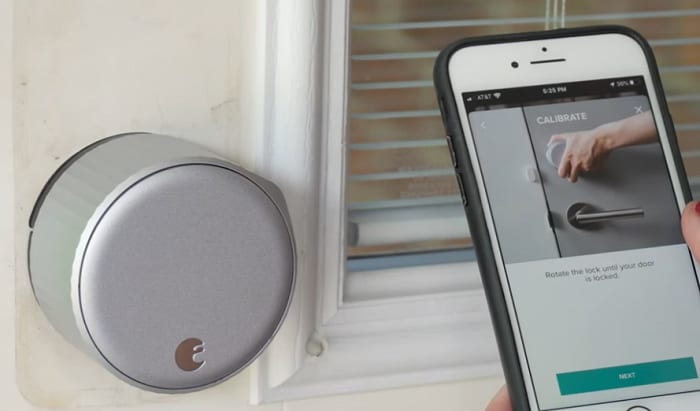
Step 5: The App Setup – Where the Real Magic Happens
Now for the digital dexterity! Grab your smartphone and download the August app. Follow the on-screen instructions to create an account and set up your new lock. The app will walk you through calibrating the lock, which basically teaches it your door's open and closed positions. This is super important for accurate locking and unlocking.

The app setup is where you name your lock (because every smart device deserves a cool name, right?), invite family members or friends with virtual keys, and customize your settings. Want it to auto-unlock as you approach? Or auto-lock after a certain time? This is where you make it happen. It’s intuitive, user-friendly, and frankly, a ton of fun to play around with.
This is the brainiest part of the operation. It's like teaching your new pet a trick, but instead of "sit," it's "unlock when I get home!" The August app is brilliantly designed to make smart home tech feel less intimidating and more like a playful partner in crime against forgotten keys.
And Voila! You’re a Keyless Champion!
You did it! You've successfully installed an August Smart Lock. No more fumbling for keys in the rain. No more hiding a spare under a suspicious-looking rock. Just smooth, secure, and incredibly convenient access to your home. Take a moment to appreciate the sleek design, the satisfying thunk of it locking, and the sheer coolness of controlling your door from anywhere.
Who knew a deadbolt could be so engaging? It's a reminder that sometimes, the simplest upgrades can bring the biggest smiles. So, go forth, enjoy your newfound keyless freedom, and inspire your friends to join the smart lock revolution. Because let's be honest, transforming your home into a futuristic haven is just plain fun.