How To Change Carbon Monoxide Battery

Ever feel a little surge of accomplishment after tackling a small but important task around the house? It’s a great feeling, isn’t it? Today, we're going to dive into something incredibly vital yet often overlooked: the humble carbon monoxide (CO) detector, and specifically, the simple art of changing its battery. Far from being a chore, thinking about this little device is like giving your home a secret superpower – one that silently protects you and your loved ones. It’s a fantastic way to feel more connected to your living space and empowered by a bit of practical know-how!
So, why is this unassuming gadget so important? Well, carbon monoxide is often called the "silent killer" for a very good reason. It's an invisible, odorless, and tasteless gas produced when fuels like gas, oil, coal, and wood don't burn completely. Think of furnaces, gas stoves, fireplaces, and even car exhaust. Without a CO detector, you wouldn’t know it was there until it started making you sick – often mimicking flu-like symptoms. That’s where our little hero comes in. Its sole purpose is to detect this insidious gas before it becomes dangerous, giving you an early warning to get fresh air and call for help. The benefit? Pure, unadulterated peace of mind and, potentially, the prevention of serious illness or even saving lives.
In our daily lives, maintaining a CO detector is a fundamental aspect of home safety. It's not just a fancy gadget; it's a non-negotiable safety feature, much like a smoke alarm. For families, it means ensuring the air you breathe while sleeping or relaxing is safe. If you’re a landlord, it’s a crucial part of providing a safe environment for your tenants. Even in educational settings, while not a classroom topic itself, understanding home safety devices like CO detectors is a brilliant lesson in practical responsibility and basic science – learning about incomplete combustion and the dangers of certain gases. It’s about cultivating an awareness of your surroundings and taking proactive steps for well-being.
Must Read
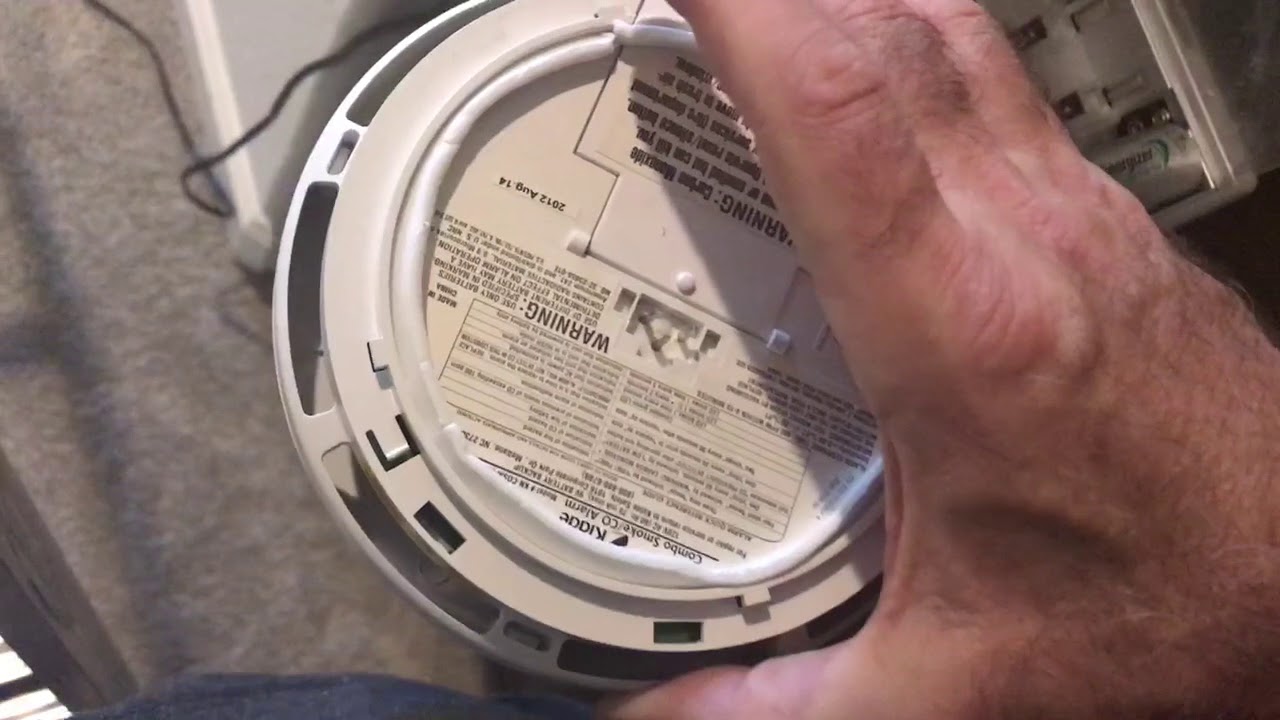
Now, for the fun part: how to actually change that battery! It's surprisingly straightforward. First, identify your CO detector. They’re usually small, white units mounted on walls or ceilings. Most models will have a simple battery compartment, often a small door you slide open or a panel you twist off. Pay attention to the battery type – commonly a 9-volt, AA, or AAA. Once you’ve removed the old battery, pop in a fresh, brand-new one. It’s always a good idea to write the date you changed it on the battery itself with a marker, so you know when it’s due next. After installing, press the "test" button; you should hear a loud, piercing alarm – that’s how you know it’s working! For a bit of exploration, grab the detector’s manual (or find it online by model number) to understand its specific features and maintenance schedule. Also, take a moment to locate all your detectors – CO and smoke alarms – and note their expiration dates (yes, they expire!). Making this a routine, perhaps twice a year with daylight saving time changes, is a simple act of genius that keeps your household safe and sound.
For the "test" button; you should hear a loud, piercing alarm – that’s how you know it’s working! For a bit of exploration, grab the detector’s manual (or find it online by model number) to understand its specific features and maintenance schedule. Also, take a moment to locate all your detectors – CO and smoke alarms – and note their expiration dates (yes, they expire!). Making this a routine, perhaps twice a year with daylight saving time changes, is a simple act of genius that keeps your household safe and sound.