How To Change Batteries On Yale Lock

Welcome, fearless home hero, to the dazzling world of battery swapping! You're about to embark on a quest so vital, so electrifying, that it might just make your day a little brighter. Forget dragons and ancient scrolls; today, we're tackling the mighty Yale lock battery change!
Get ready to unleash your inner tech wizard, because this isn't just about power; it's about empowerment. You're not just changing batteries; you're infusing your loyal lock with a fresh burst of pure, unadulterated energy! Let's dive in, shall we?
Gather Your Mighty Tools!
First things first, let's assemble our superhero toolkit. You won't need a cape, but a good mood is definitely a bonus! Your primary weapon against the darkness of dead batteries will be a set of brand-new, glorious AA alkaline batteries.
Must Read
Always go for the good stuff, the fresh ones straight from the pack. Think of them as tiny, energetic power potions, ready to revitalize your Yale lock with vigor. We're talking fresh-out-of-the-wrapper energy, folks!
Depending on your specific Yale lock model, you might also need a tiny screwdriver. Sometimes, a sneaky little screw stands guard over the battery compartment, but don't worry, it's easily persuaded to move aside. A standard Phillips head screwdriver is usually the champion for this job.
Make sure you have a clear, well-lit space. Think of it as your high-tech operating theater, where precision and a little bit of fun are key. Clear away any clutter, maybe put on some upbeat music – we're going for a positive vibe here!
Locate the Power Core!
Alright, secret agent, your next mission is to locate the power core, also known as the battery cover. This little panel is usually chilling on the inside part of your Yale lock, the part that lives inside your cozy home, not out braving the elements.
It's designed to be discreet, but trust me, it's there. Run your hand over the interior assembly of your lock. You'll likely feel a distinct panel that looks like it could slide or pop off. It's not trying to play hide-and-seek forever.
For many Yale locks, you'll find it on the top edge of the interior unit, perhaps a small, textured piece. Other times, it might be the entire backplate of the lock that slides upwards.
Take a moment, scan your lock with the discerning eye of a seasoned treasure hunter. You're looking for the access point, the gateway to renewed power. It's usually pretty intuitive once you spot it.
Unveiling the Treasure!
Once your eagle eyes have spotted the battery cover, it's time for the reveal! This is where that tiny screwdriver might come into play if there's a guard screw. If so, gently unscrew it, placing the tiny screw somewhere safe – like a small bowl or a magnetic dish.
No screw? Fantastic! Then it's often a simple slide-and-lift motion. Many Yale locks have covers that slide upwards or downwards with a satisfying click. Give it a gentle but firm push in the direction that feels natural.
Sometimes, there might be a small tab to press or a latch to release. Don't force it like you're trying to win an arm-wrestling contest! A smooth, confident motion is all it takes.
When it gives way, you'll feel a sense of accomplishment. The cover will pop right off, revealing the glorious battery compartment beneath, ready for its transformation!

"You've just peeled back the curtain, revealing the engine room of your digital guardian!"
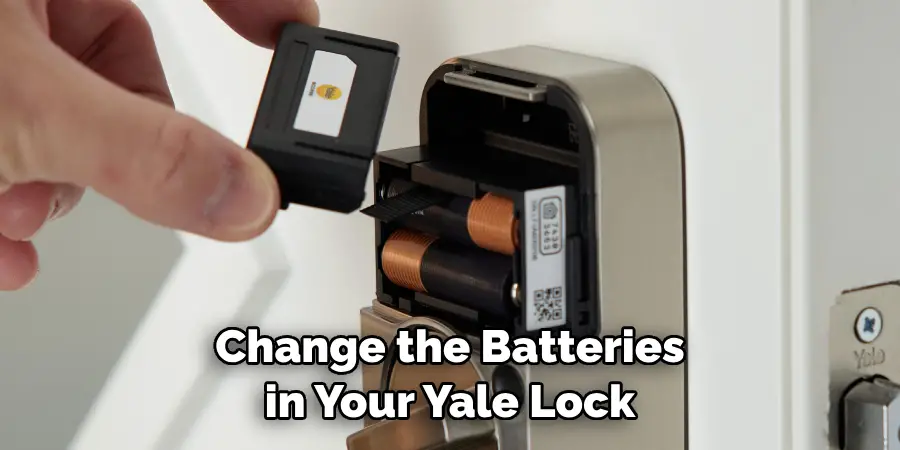
The Great Battery Eviction!
Now that the compartment is open, you'll see the old batteries, probably looking a little weary and perhaps even a bit sad. They've served their purpose valiantly, and now it's time for their well-deserved retirement.
Gently remove the old batteries. Most compartments have little ribbons or springs that help you pop them out with ease. Just lift them out one by one.
Be sure to note how they were positioned before you take them all out! Pay attention to the little plus (+) and minus (-) symbols. This is super important, like remembering which shoe goes on which foot.
These old batteries have given their all, so let's treat them with respect. Dispose of them responsibly, according to your local guidelines. High five for being environmentally conscious!
The Power Infusion!
Here comes the exciting part: injecting fresh life into your Yale lock! Grab those gleaming new AA alkaline batteries, the ones we talked about earlier.
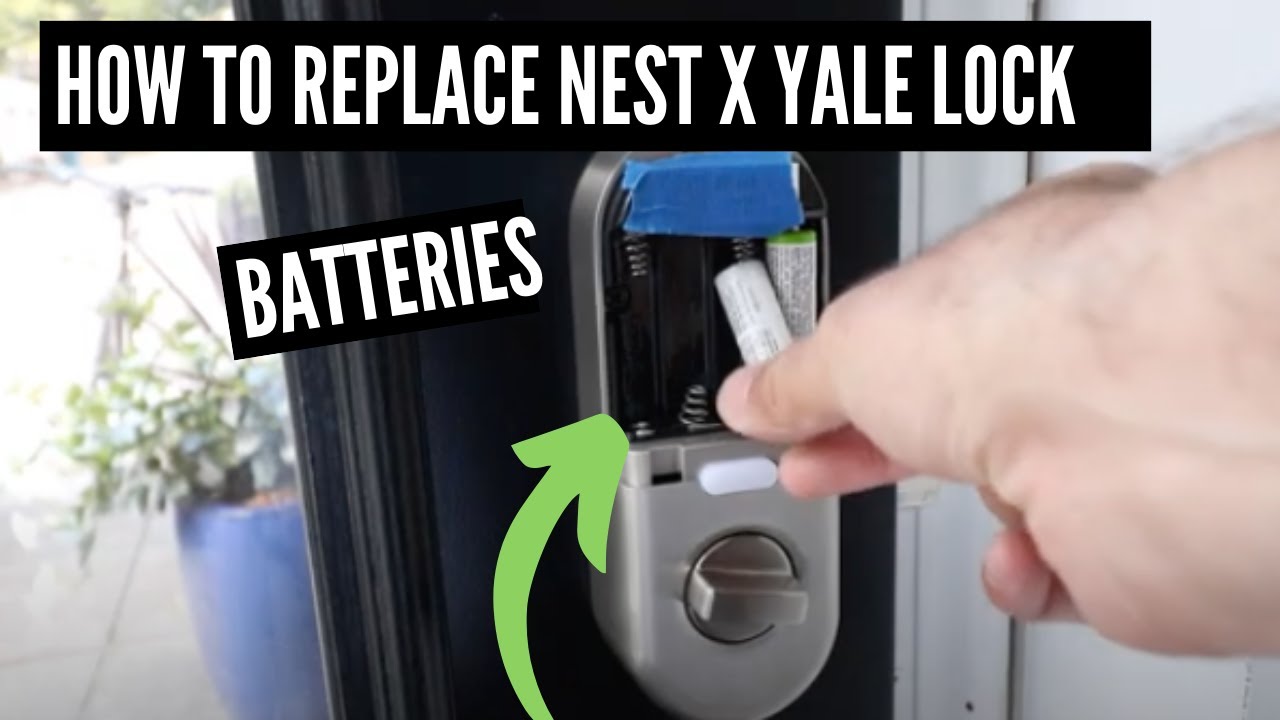
Remember those plus (+) and minus (-) symbols you carefully observed? Now's their moment to shine! Match the positive end of each new battery to the positive terminal in the compartment, and the negative to the negative. It's like a perfectly choreographed dance!
They should click right into place with satisfying ease. Don't push too hard; if it doesn't fit, double-check your alignment. It's rarely a battle of strength, more a test of careful observation.
As you insert each one, imagine the surge of power flowing through your lock, waking up its internal circuits. It’s like giving your trusty steed a super energy drink!
With all the fresh batteries snugly in their new homes, you might even hear a little beep or see a light flash on your Yale lock. That's its way of saying, "Hello, world, I'm back and better than ever!"
The Grand Reassembly!
With the new power source securely in place, it’s time to close up shop. Take your battery cover, the one you so expertly removed earlier, and align it back into position.
Slide it back on the way it came off, or snap it into place. You'll often hear a satisfying click or feel it seat perfectly. This is the sound of victory, the feel of a job well done!
If you had a tiny guard screw, now's the time to gently screw it back in. Just snug, not overtight – we don't want to hurt our lock! It’s all about a gentle touch.
"You've sealed the deal, secured the power, and completed your mission with flying colors!"
The Ultimate Test Drive!
The moment of truth! Now that your Yale lock is brimming with new energy, it's time to test its renewed vigor. Go ahead and try to operate it normally.
Punch in your code, or use your key card. Listen for the familiar whirring and clicking, the sounds of a fully operational digital guardian. It should respond instantly, no hesitation, no complaints!
If everything springs to life as expected, give yourself a huge pat on the back! You've successfully performed a vital home maintenance task with skill and finesse. You are a true champion of home security!
See? That wasn't so scary, was it? You faced the challenge, applied a little focus, and emerged victorious. Your Yale lock is now happier, healthier, and ready to protect your castle for many more months to come.
Keep this newfound confidence, because you've just proven you're perfectly capable of tackling those little household tasks that might seem daunting at first. You're awesome!