Flood Light Motion Sensor Adjustment
Ever notice those flood lights that magically flick on as you approach a driveway or backyard, then just as gracefully dim themselves after you've passed? It's not magic, it's the wonderful world of motion sensors! And the fun part? You can fine-tune them to work exactly how you want. This isn't just about security; it’s about ultimate convenience, saving energy, and even a little bit of home automation satisfaction. Think of it as giving your home a personal, watchful guardian that only speaks up when needed.
For beginners, understanding motion sensor adjustments means you no longer have to worry about fumbling for keys in the dark or leaving lights on all night. It’s about creating a safe, well-lit path when you need it most. Families will appreciate the peace of mind knowing that their kids can play safely in the yard after dusk, or that anyone approaching the house after dark will be illuminated, deterring unwanted visitors. It’s about safety without being overbearing. And for the more hands-on hobbyists, or just those who love to optimize their home, adjusting these sensors is a satisfying way to ensure your lights aren't triggered by a squirrel scampering by, but always by a person or car where it matters.
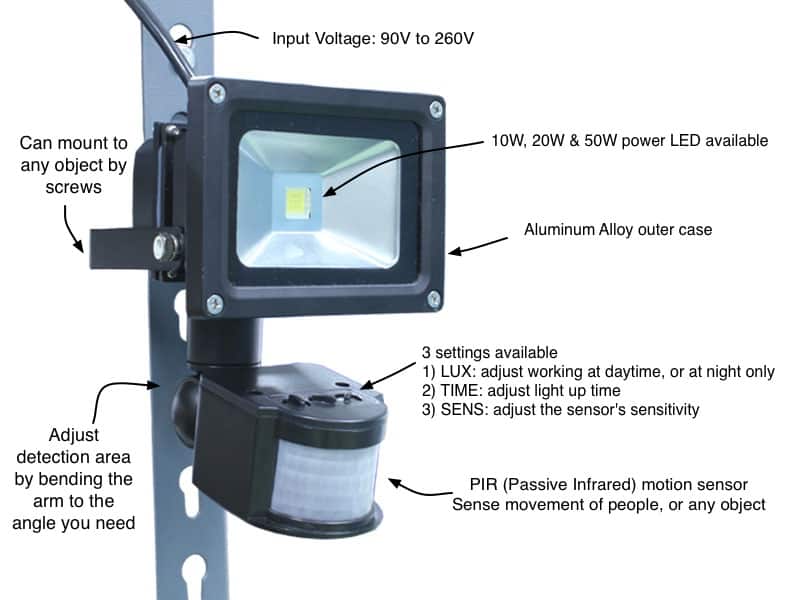
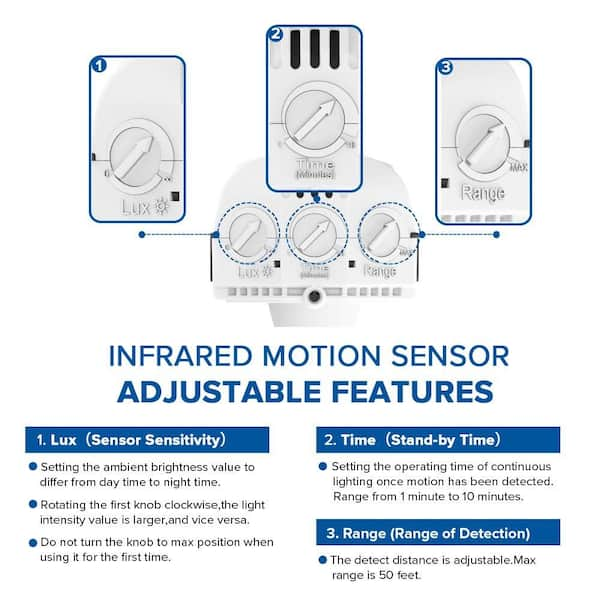
The beauty lies in the variations you can control. Most motion sensors come with a few key dials or settings. There's often a setting for sensitivity, which dictates how far away or how small a movement will trigger the light. Another common one is the time duration, letting you choose how long the light stays on after motion stops. Some even have a "lux" or "photocell" setting to determine how dark it needs to be before the sensor becomes active – preventing your lights from coming on during the day. Understanding these helps you dial in the perfect response, whether you want the light to stay on for 30 seconds for a quick trip to the garage or a few minutes for a longer outdoor activity.
Must Read
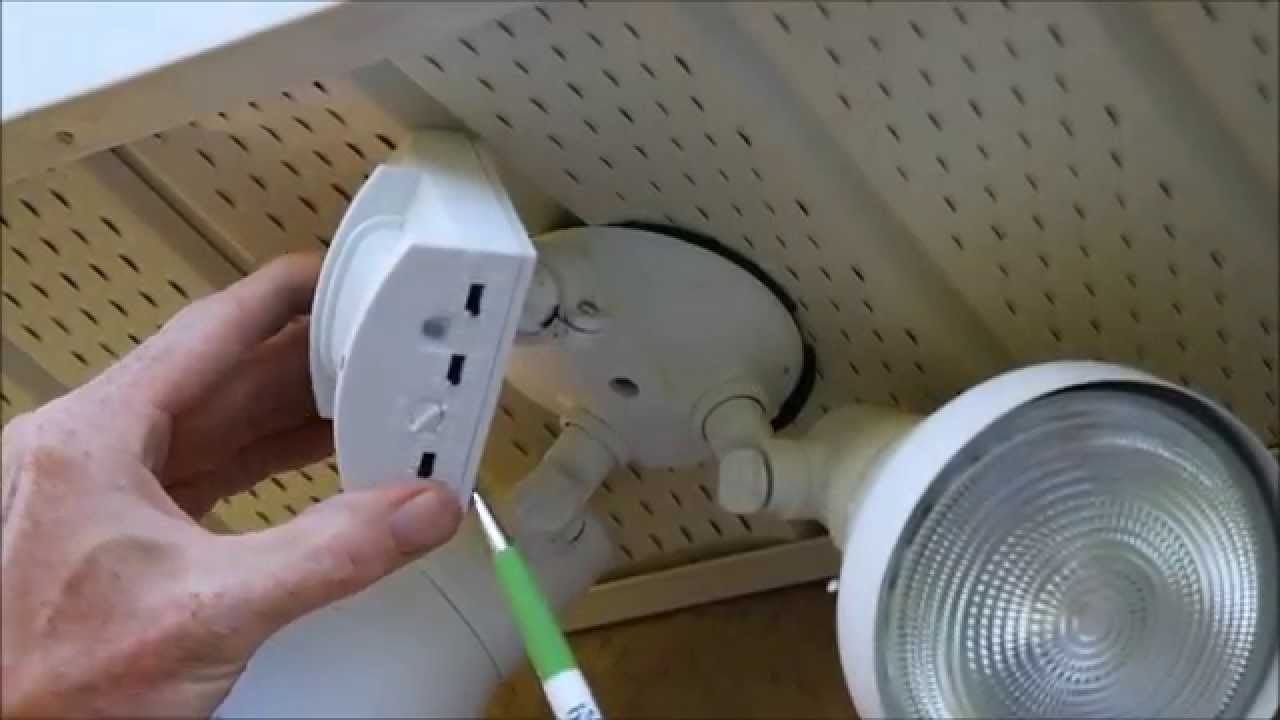
Ready to give it a try? Here are some simple, practical tips for getting started. First, always make sure the light switch powering your flood light is on! Many people forget this basic step. Next, locate the dials on your motion sensor – they're usually on the underside or front of the sensor head itself. You'll often see labels like "SENS," "TIME," and "LUX." It’s best to start with the settings in the middle or according to your manual’s recommendation. Wait until it's dark outside and then test it out. Walk around the detection zone. Is it too sensitive? Does it stay on too long? Adjust one setting at a time, making small tweaks, and retesting each time. You can also physically adjust the sensor head, tilting it up, down, or sideways to target specific areas and avoid nuisance triggers like passing cars on the street or tree branches waving in the wind. Patience is key, but the payoff is worth it!
Mastering your flood light motion sensor is a small but mighty step towards a smarter, more secure, and convenient home. There’s a real sense of accomplishment in knowing you've customized your environment to suit your exact needs, saving energy, and enhancing your sense of safety. So go ahead, give those dials a twist and enjoy the perfectly timed glow!