Do It Yourself Screen Printing Kit

Okay, picture this: You're walking down the street, and BAM! You see someone rocking a t-shirt that's just... wow. It's got this killer design, something totally unique, something that screams "I'm awesome and I made this myself!" That could be you. Seriously!
Forget mass-produced blah. We're talking about unleashing your inner artist, becoming a fashion revolutionary, and turning your kitchen table into a screen-printing powerhouse. All thanks to the magical world of DIY screen printing kits.
The Kit: Your Treasure Chest of Awesome
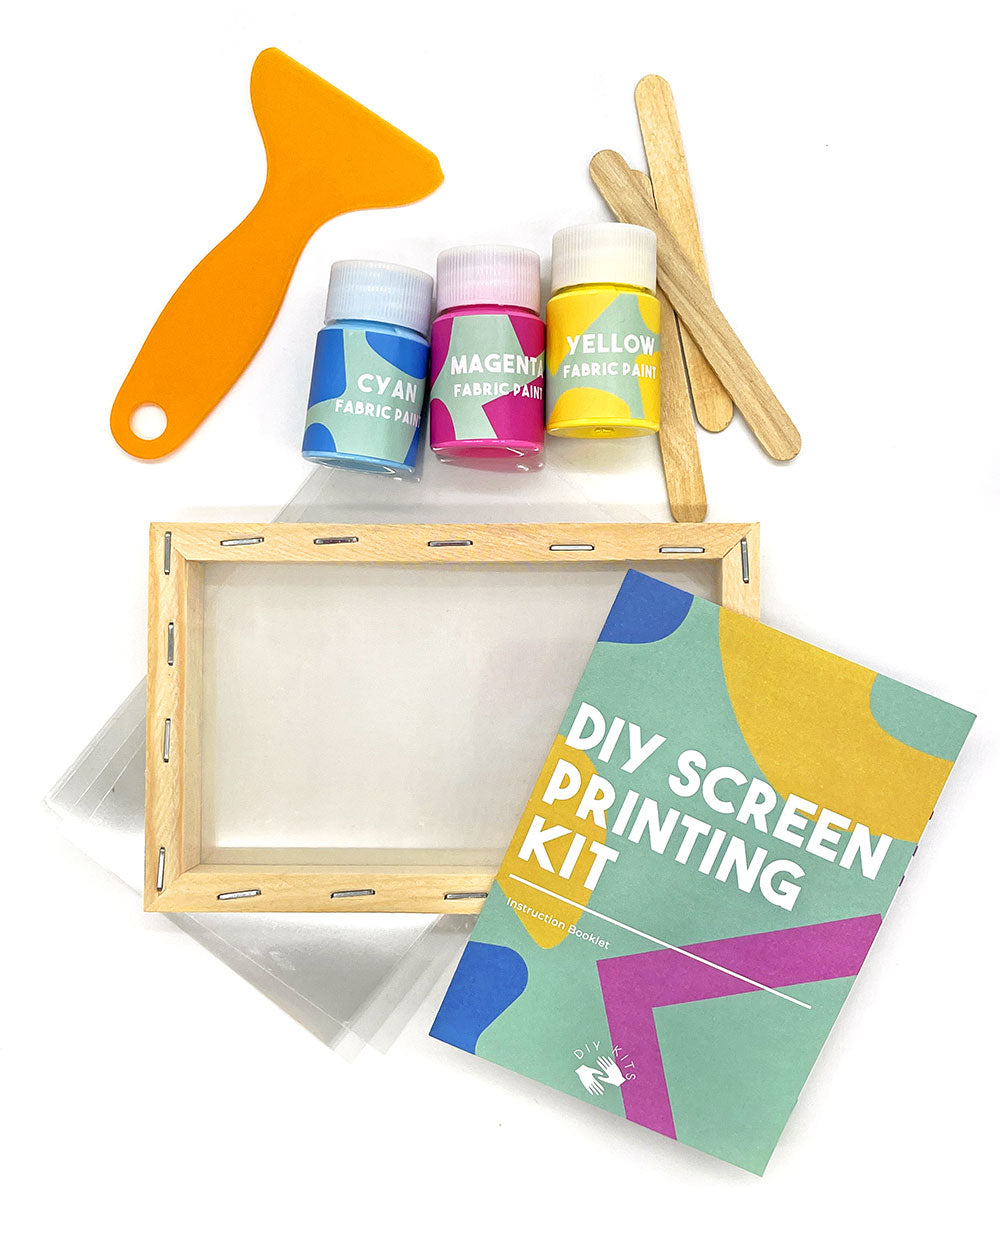
So, what's inside this mystical box of potential? Think of it like a superhero's utility belt, but for creativity. It's got (almost) everything you need to go from zero to "wow, you made that?" in an afternoon.
Must Read
Usually, you'll find a screen (the gatekeeper to your design dreams), a squeegee (your weapon of ink distribution), and some photo emulsion (the secret sauce for transferring your design). Plus, there's ink, of course! The lifeblood of your artistic venture.
Some kits are super basic, while others are like the deluxe edition, complete with extra colors, cleaning supplies, and maybe even a tiny unicorn that grants wishes (okay, maybe not the unicorn). But the core ingredients for screen-printing success are always there.
Unboxing and Setting Up: Preparing for Print-tastic Adventures
First things first: find a space. Not your grandma's antique china cabinet, though. A well-ventilated area is key, because, you know, ink fumes. The garage, the basement, even a spare bedroom (just cover the furniture!) will do.
Next, read the instructions! I know, I know, instructions are boring. But trust me, a quick skim will save you from accidentally turning your cat blue. (Unless that's your artistic vision, then go for it!).
Setting up the screen is usually pretty straightforward. Just make sure it's clean and free of any dust bunnies plotting to sabotage your masterpiece. A clean screen is a happy screen, and a happy screen makes for a happy you!

Creating Your Design: From Brainwave to Reality
Now for the fun part: the design! This is where your inner Picasso gets to shine. You can draw something by hand, use a computer program, or even find a cool image online. Just make sure it's something you're excited about.
Once you've got your design, you need to transfer it to a transparency. This is basically a clear sheet with your design printed in black ink. Think of it as the stencil that will guide the ink onto your shirt.
The photo emulsion is what makes the magic happen. You coat the screen with this stuff, let it dry in a dark room (or a closet, if you're feeling resourceful), and then expose it to light with your transparency on top. The light hardens the emulsion around your design, leaving the unexposed areas soft and washable.
Rinse away the soft emulsion, and BAM! You have a perfect stencil of your design on the screen. It's like a magic trick, but with less smoke and mirrors and more squeegeeing.
Printing Time: Unleash the Squeegee!
Okay, deep breaths. This is it. The moment of truth. Place your t-shirt (or tote bag, or pillowcase, or whatever you're printing on) onto a flat surface.

Position the screen over your shirt, making sure the design is where you want it. Now, grab your squeegee and a generous dollop of ink. Place the ink along the top edge of your design.
With firm and even pressure, pull the squeegee down across the screen. This forces the ink through the stencil and onto your shirt. It's like spreading peanut butter, but with more artistic flair.
Lift the screen, and behold! Your design, now immortalized on fabric. It's a beautiful thing, really. A testament to your creativity and your willingness to get a little messy.
Troubleshooting: When Things Go a Little… Wrong
Let's be honest, sometimes things don't go exactly as planned. Maybe your print is blurry, or the ink is smudged, or you accidentally printed your design upside down. Don't panic! It happens to the best of us.
Blurry prints can be caused by too much pressure on the squeegee, or not enough. Experiment a little to find the sweet spot. Smudges usually mean the screen wasn't properly secured to the fabric.

And printing upside down? Well, that's just a learning experience. Embrace the imperfection! It adds character. Think of it as your signature artistic statement.
The internet is your friend! There are tons of tutorials and forums dedicated to screen printing. Don't be afraid to ask for help. The screen-printing community is surprisingly supportive and full of helpful tips.
Cleaning Up: The Less Glamorous Side of Art
Okay, so maybe cleaning isn't the most exciting part. But it's essential for keeping your kit in tip-top shape. Clean your screen immediately after printing, before the ink has a chance to dry. Water-based inks are usually easy to clean with just water and a sponge. Solvent-based inks require special cleaners.
Don't let your squeegee get lonely! Wipe it down with a damp cloth to remove any excess ink. Store your screen in a safe place, away from dust and sunlight. And for goodness sake, don't leave a pile of inky rags lying around. You'll end up with ink on everything you own.
Beyond the Basics: Leveling Up Your Screen-Printing Game
Once you've mastered the basics, the possibilities are endless! Experiment with different colors, different fabrics, and different designs. Try layering multiple colors to create complex and eye-catching prints.
Explore the world of mixed media! Add glitter, flocking, or even embroidery to your screen prints. The only limit is your imagination (and maybe your budget).
Start your own online store and sell your creations! Become a screen-printing entrepreneur! The world is your oyster (or, you know, your blank t-shirt).
DIY screen printing kits are more than just a fun hobby. They're a gateway to creativity, a chance to express yourself, and a way to create something truly unique. So go forth, unleash your inner artist, and start printing! The world needs your designs.
Remember, the best part of DIY screen printing is the "DIY" part. It's all about experimenting, learning, and having fun. Don't be afraid to make mistakes. They're just learning opportunities in disguise.
So, grab a kit, get inspired, and start creating! Your next favorite t-shirt is waiting to be born.