Changing Battery Honeywell Home Thermostat

Alright, magnificent household wizard! Prepare to embark on a truly epic (and secretly super easy) adventure. Today, we're going to inject some vibrant new life into your Honeywell Home Thermostat, transforming it from a slightly sluggish sentinel into a beacon of comfort once more!
Think of it like a superhero origin story, but instead of radioactive spiders, we're dealing with… batteries! Yes, those tiny cylinders of concentrated power that make our modern lives so wonderfully convenient. You're about to become their champion.
The Sacred Hunt for Supplies
Before we begin our grand quest, we need to gather our essential artifacts. First, and most crucially, are the batteries themselves!
Must Read
Most Honeywell Home Thermostats are fueled by either AA or AAA batteries. Check the back of your current thermostat or its manual if you're unsure, but often it's a trusty pair of AAs.
Imagine these fresh batteries as pure, unadulterated energy, just waiting to spring into action. Find them, cherish them, and prepare them for their destiny!
The Rendezvous with the Regulator
Now, approach your thermostat. It sits there, quietly observing your domain, perhaps a little dim, a little less responsive than its usual vibrant self. This is your cue, hero!
No need for capes or dramatic music, just a calm and confident demeanor. You are about to perform a vital service for the very heart of your home's comfort system.
Give it a friendly nod; it senses your presence and your noble intentions. This is the moment before transformation.
The Grand Reveal: Opening the Gateway
This is where the excitement really begins! Depending on your specific Honeywell Home Thermostat model, there are a few delightfully simple ways it might reveal its inner workings.

Don't be shy, but do be gentle – we're performing surgery, not demolition! This is often the trickiest part, simply because you might feel like you're going to break it, but trust us, it's designed for this.
Method A: The Gentle Pull
Some thermostats have a front cover that simply pulls away. It's like opening a secret compartment with a soft, satisfying click!
Gently grip the bottom edge of the thermostat's faceplate with both hands. Now, with a smooth, even motion, pull the entire cover directly towards you. It should pivot open or detach cleanly.
It's like peeling an orange, but much less sticky and significantly more rewarding. You might hear a little pop, which is perfectly normal – it's just the clips letting go!
Marvel at the exposed circuitry and, most importantly, the waiting battery compartment.
Method B: The Stealthy Tab Press
Other thermostats prefer a more subtle approach, using small tabs to secure their cover. Look closely along the sides or bottom edges of your thermostat for tiny, recessed buttons or tabs.
You might need a very small screwdriver or even just your fingernail to gently press these tabs inward. Often, there are two tabs, one on each side.
As you press them, the faceplate will either tilt forward or release completely. It’s like discovering a hidden button in a spy movie – satisfyingly clever!
Once the tabs are disengaged, the cover will come free, revealing the precious power source within.
Method C: The Upward Lift
Finally, some Honeywell Home Thermostat models are designed to be lifted straight off their wall plate. This is perhaps the most straightforward maneuver of them all!
Place your hands on either side of the thermostat and, with a firm but controlled motion, lift the entire unit straight up. It should slide vertically off its mounting plate.
This method reveals the battery compartment usually on the backside of the main unit. It's like lifting a prized sculpture to admire its hidden base.
Operation Power Up: The Heart Transplant
Now that the interior of your thermostat is revealed, you'll see the battery compartment. It might be clearly labeled, or you might just see the tell-tale shape of the old, weary batteries.
These old batteries have served their purpose with honor, but their energy reserves are depleted. It's time for their well-deserved retirement!
The Old Guard Departs
Gently remove the old batteries from their slots. They might be nestled snugly, so a slight wiggle or a gentle push from one end might be needed.
Observe their faded glory one last time before setting them aside for proper recycling. You are freeing up space for new, vibrant energy!
This is a crucial step in preparing for the grand infusion of power. Make sure the compartment is entirely clear.
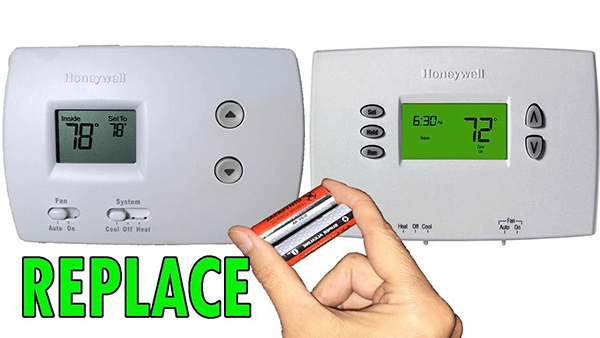
The New Power Arrives
Now, grab your sparkling new AA or AAA batteries. This is the moment of truth, the vital step in restoring comfort!
Carefully insert the new batteries into the compartment, paying very close attention to the polarity markings. You'll see little + and - symbols both on the batteries and inside the compartment.
It's incredibly important to match them up: plus to plus, and minus to minus! Getting this wrong is like trying to put a square peg in a round hole – it just won't work, and the thermostat won't power on.
Listen for that satisfying click as each battery settles into its new home. This is the sound of success, the hum of future warmth or cool!
The Grand Finale: Sealing the Deal
With the new batteries nestled safely inside, it’s time to seal up your magnificent handiwork. This is the moment you complete the ritual, a final flourish of your newfound expertise!

If you pulled the cover off, simply align the top or bottom edge and then gently snap it back into place. If you pressed tabs, align the cover and let those tabs secure it with a soft click.
If you lifted the unit off the wall, carefully lower it back down onto its mounting plate, ensuring it slides into place smoothly. Feel for it to seat firmly.
Give it a soft press around the edges to make sure everything is snug and secure. Your thermostat should now look exactly as it did before, but with a secret, powerful heart beating within.
The Moment of Triumph!
And now, the grand reveal! Watch closely as your Honeywell Home Thermostat awakens. The display should flicker to life, numbers and icons gloriously reappearing.
It might cycle through a quick startup sequence, or simply jump right back to displaying the current temperature. This is your moment of pure, unadulterated satisfaction!
You have done it! You have single-handedly brought your comfort system back from the brink of silence. A small task, perhaps, but one that ensures your home remains the haven it's meant to be.
You are a hero, a champion of consistent climate, a true master of home maintenance! Pat yourself on the back, you've earned it!