So, your dryer's gone cold, huh? Like that cup of coffee you forgot about this morning? Bummer. Chances are, the culprit is a busted heating element. But don't panic! Replacing it yourself is totally doable. I mean, if I can do it, you definitely can! (And trust me, that's saying something.)
First things first: Safety first! Seriously. We’re talking about electricity here, people! Unplug that bad boy from the wall. And maybe flip the circuit breaker for good measure. You wouldn’t want a little zap to ruin your day, right?
What You'll Need (aka The Arsenal)
Okay, time to gather our tools. This isn't exactly brain surgery, but you'll still need a few things. Think of it as your dryer-fixing survival kit. You'll need:
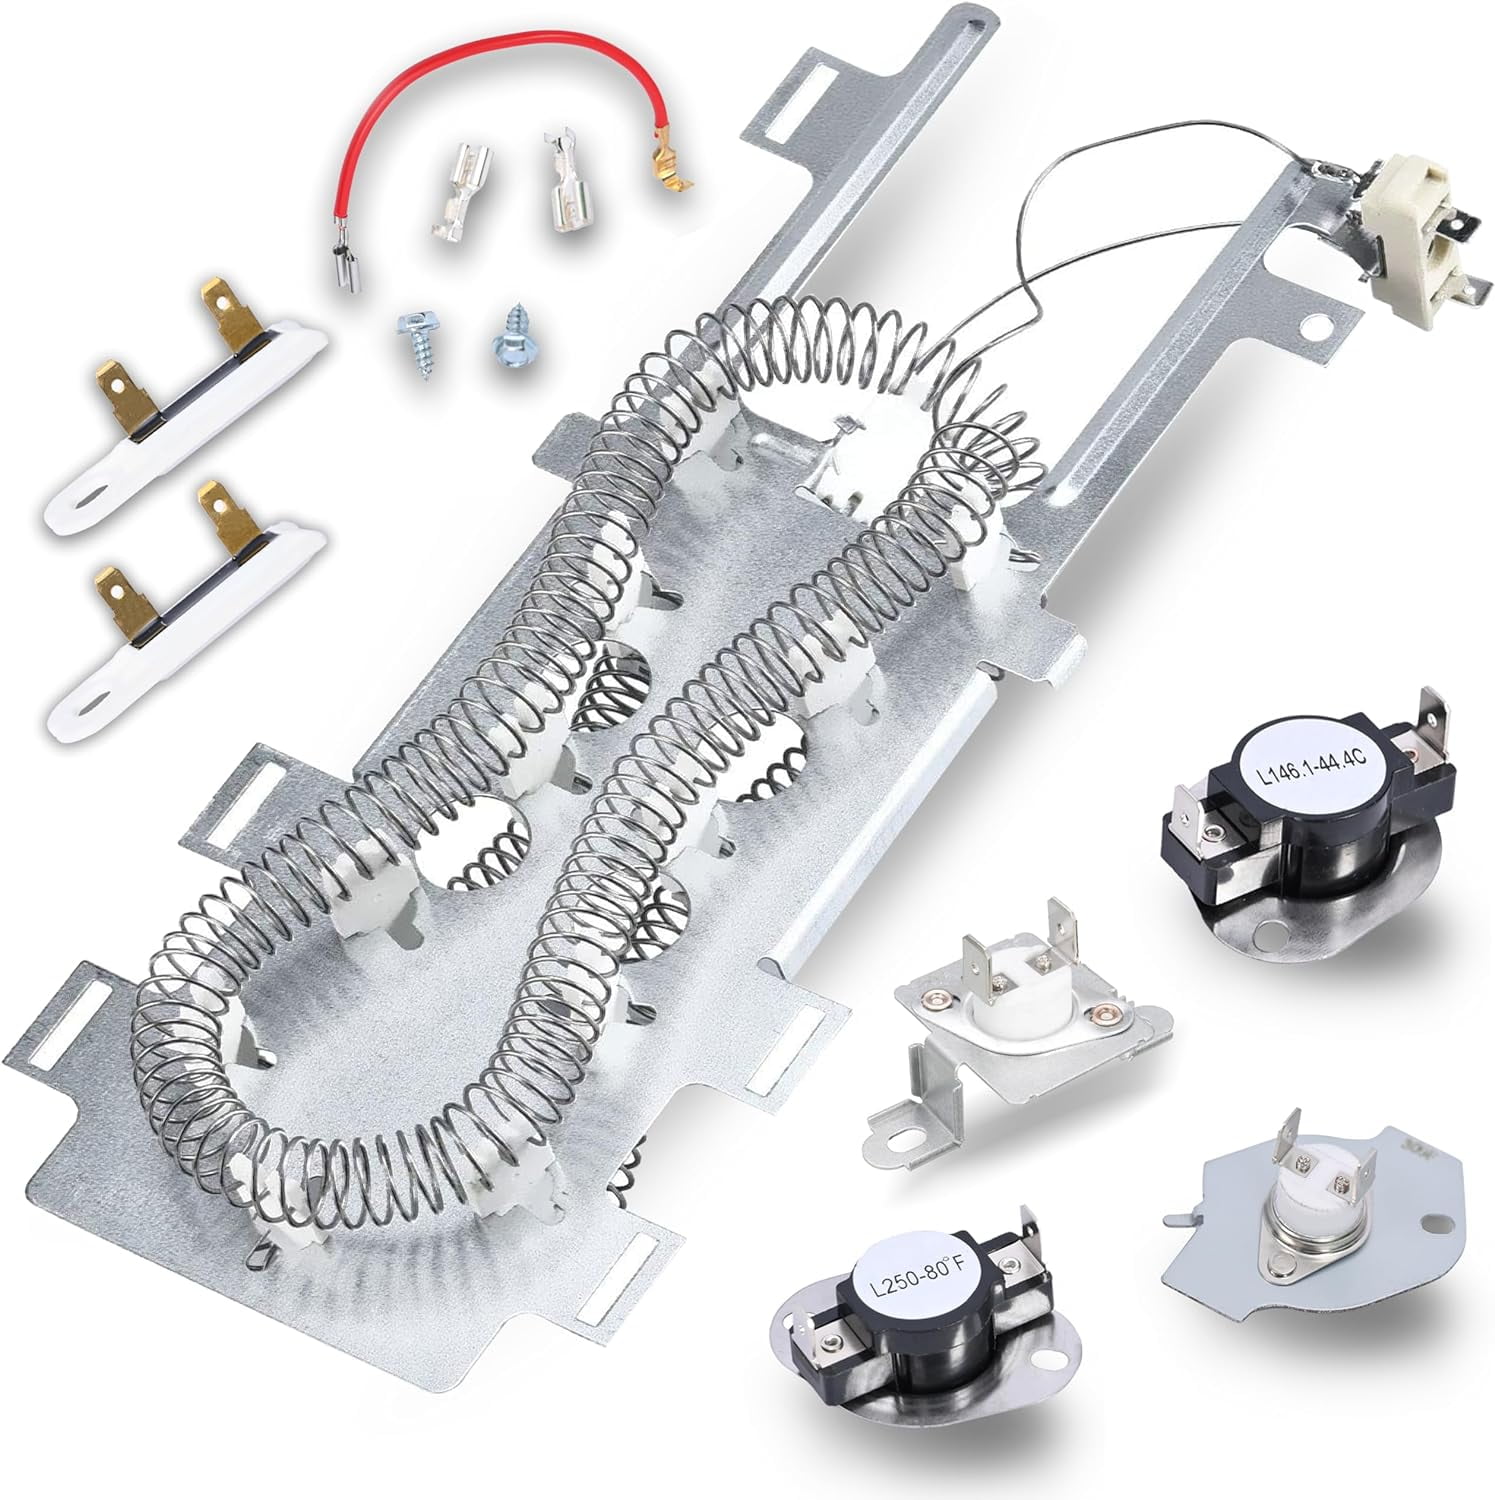
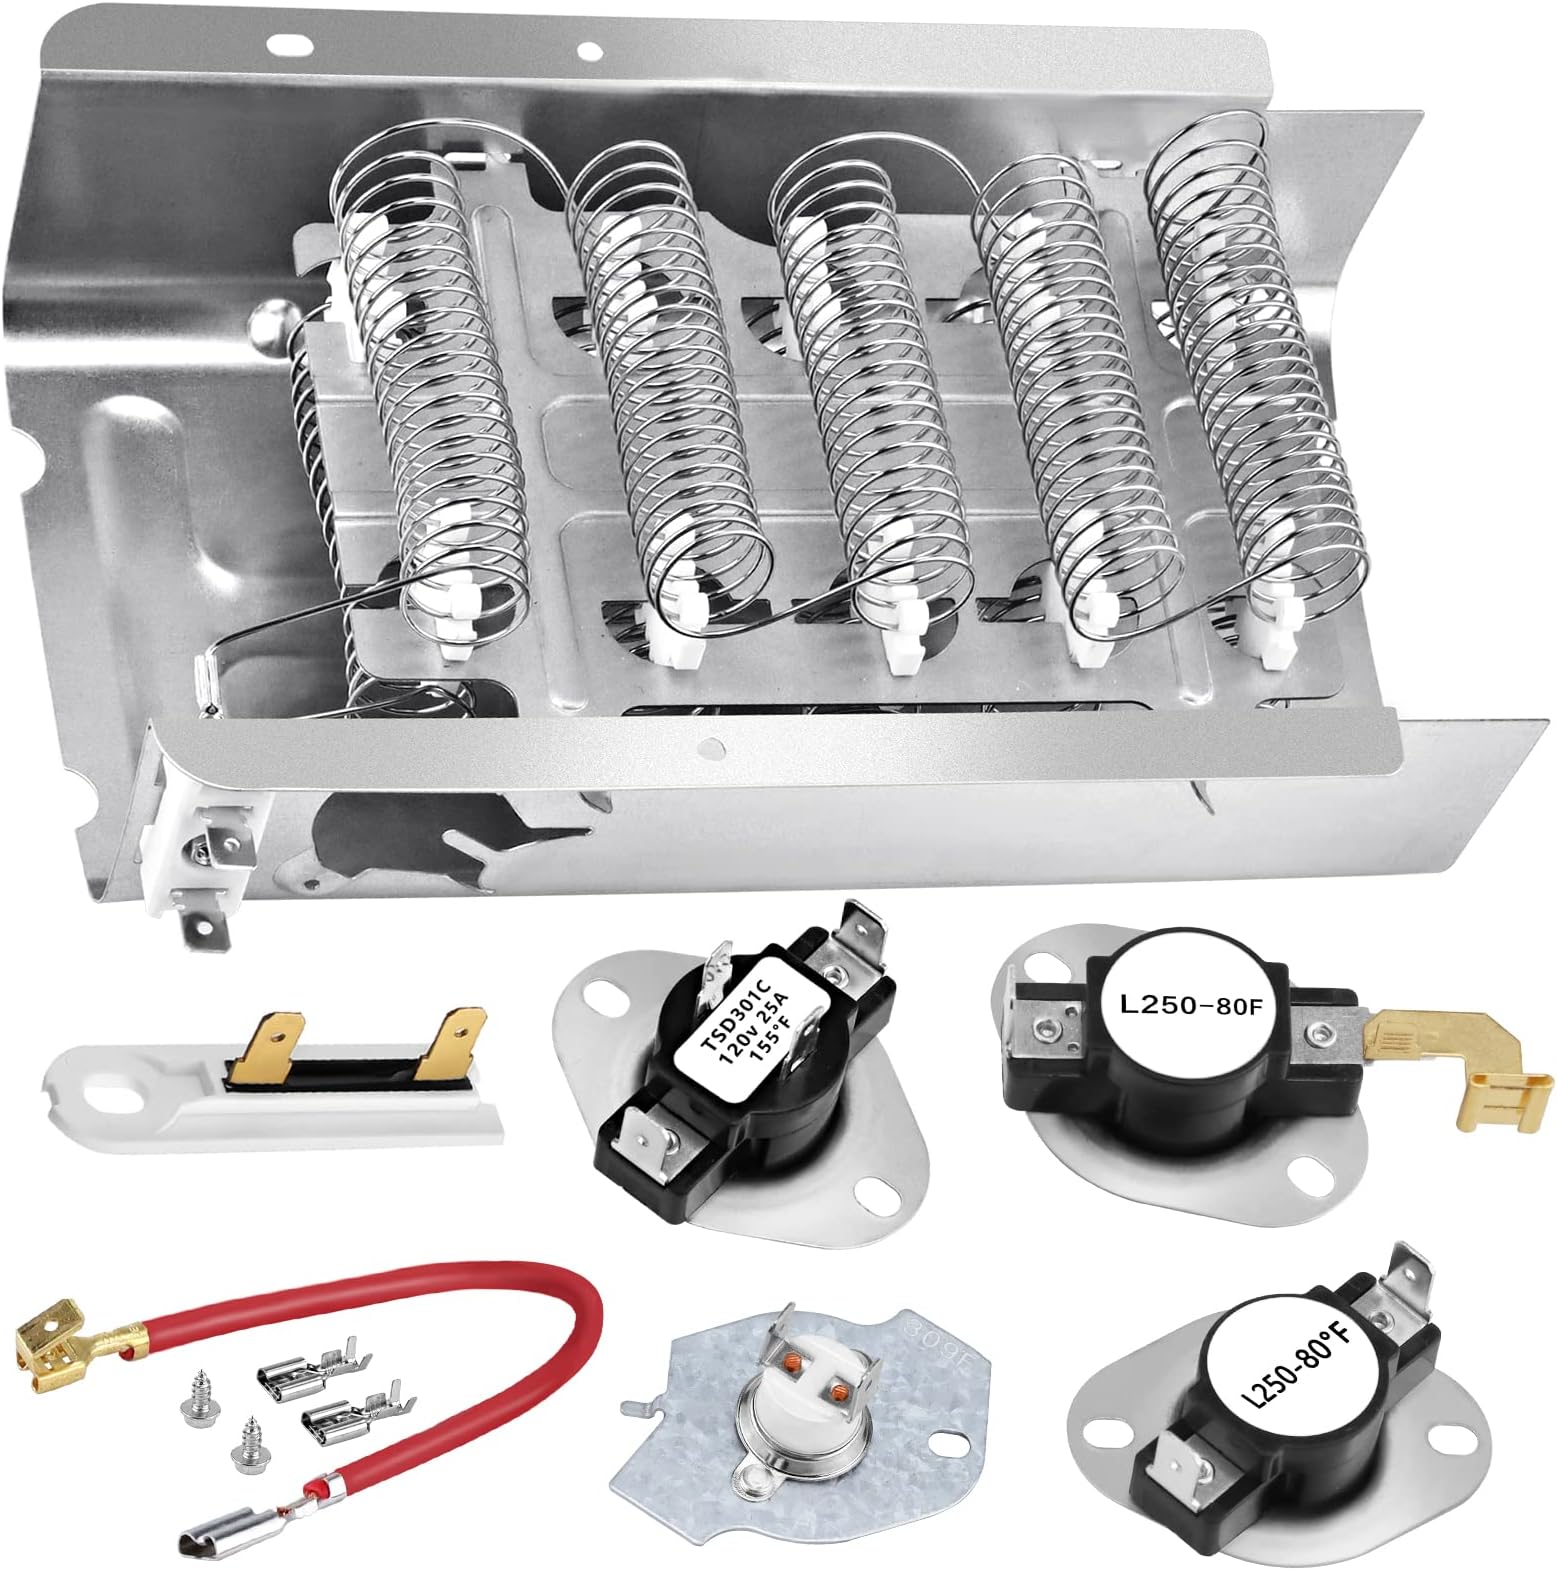
- A new heating element. (Duh!) Make sure it's the right one for your dryer model. Double-check!
- A screwdriver (probably a Phillips head). Maybe two, for good measure.
- A nut driver or socket set. Those pesky screws and bolts aren't going to loosen themselves!
- A pair of pliers. Just in case. You never know when those little guys will come in handy.
- A multimeter. Okay, okay, this one sounds fancy. But it’s super useful for testing the old element and the new one. Don't have one? You can usually borrow one from a friend or rent one.
- Optional, but highly recommended: Work gloves. Because nobody likes scraped knuckles. And maybe some safety glasses, because, you know, safety.
Got everything? Good! Let's get this show on the road!
Operation: Dryer Disassembly
Now, this is where things get a little…involved. But hey, think of it as a fun puzzle! Every dryer is a little different, but the basic steps are usually the same.
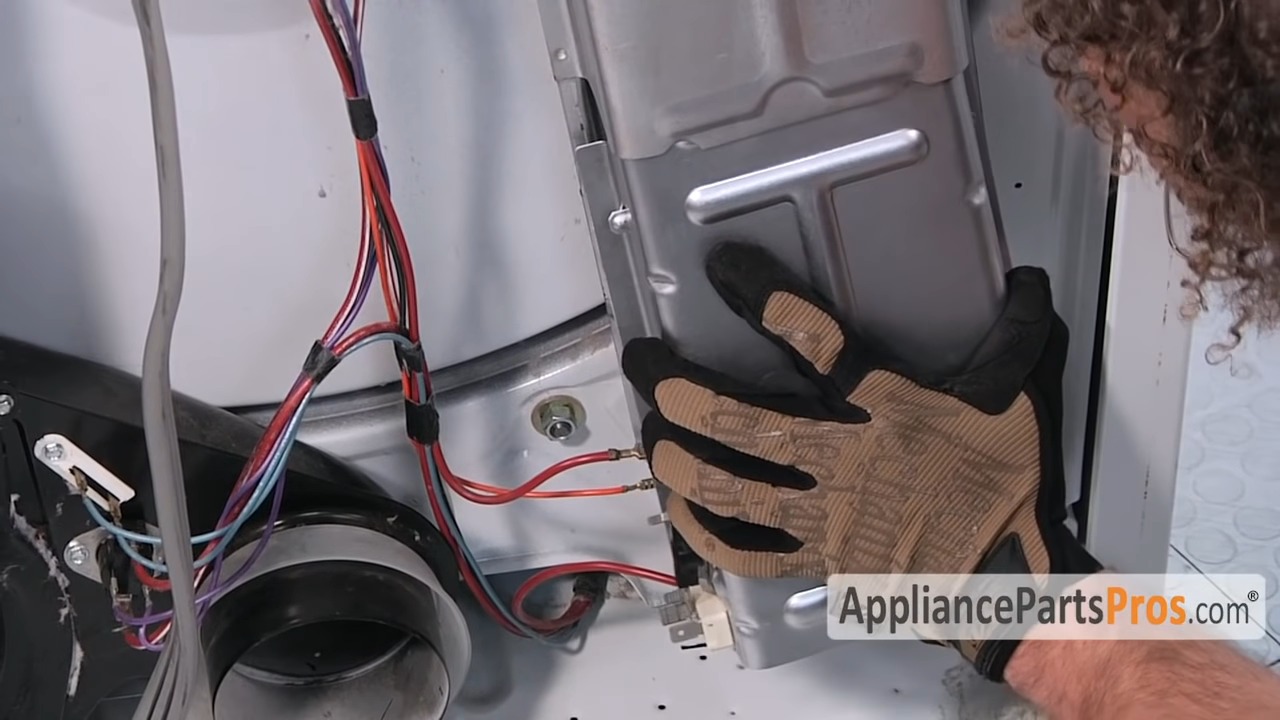
First, you gotta get to the heating element. This usually means removing the back panel of the dryer. Sometimes it’s the lower front panel. Consult your dryer's manual (if you can find it! If not, YouTube is your friend!). Just start unscrewing things! Don't worry too much, you can totally do it!
Pro Tip: Take pictures as you go! Seriously. Trust me on this one. When it’s time to put everything back together, you’ll thank your past self. It's like breadcrumbs leading you back home.
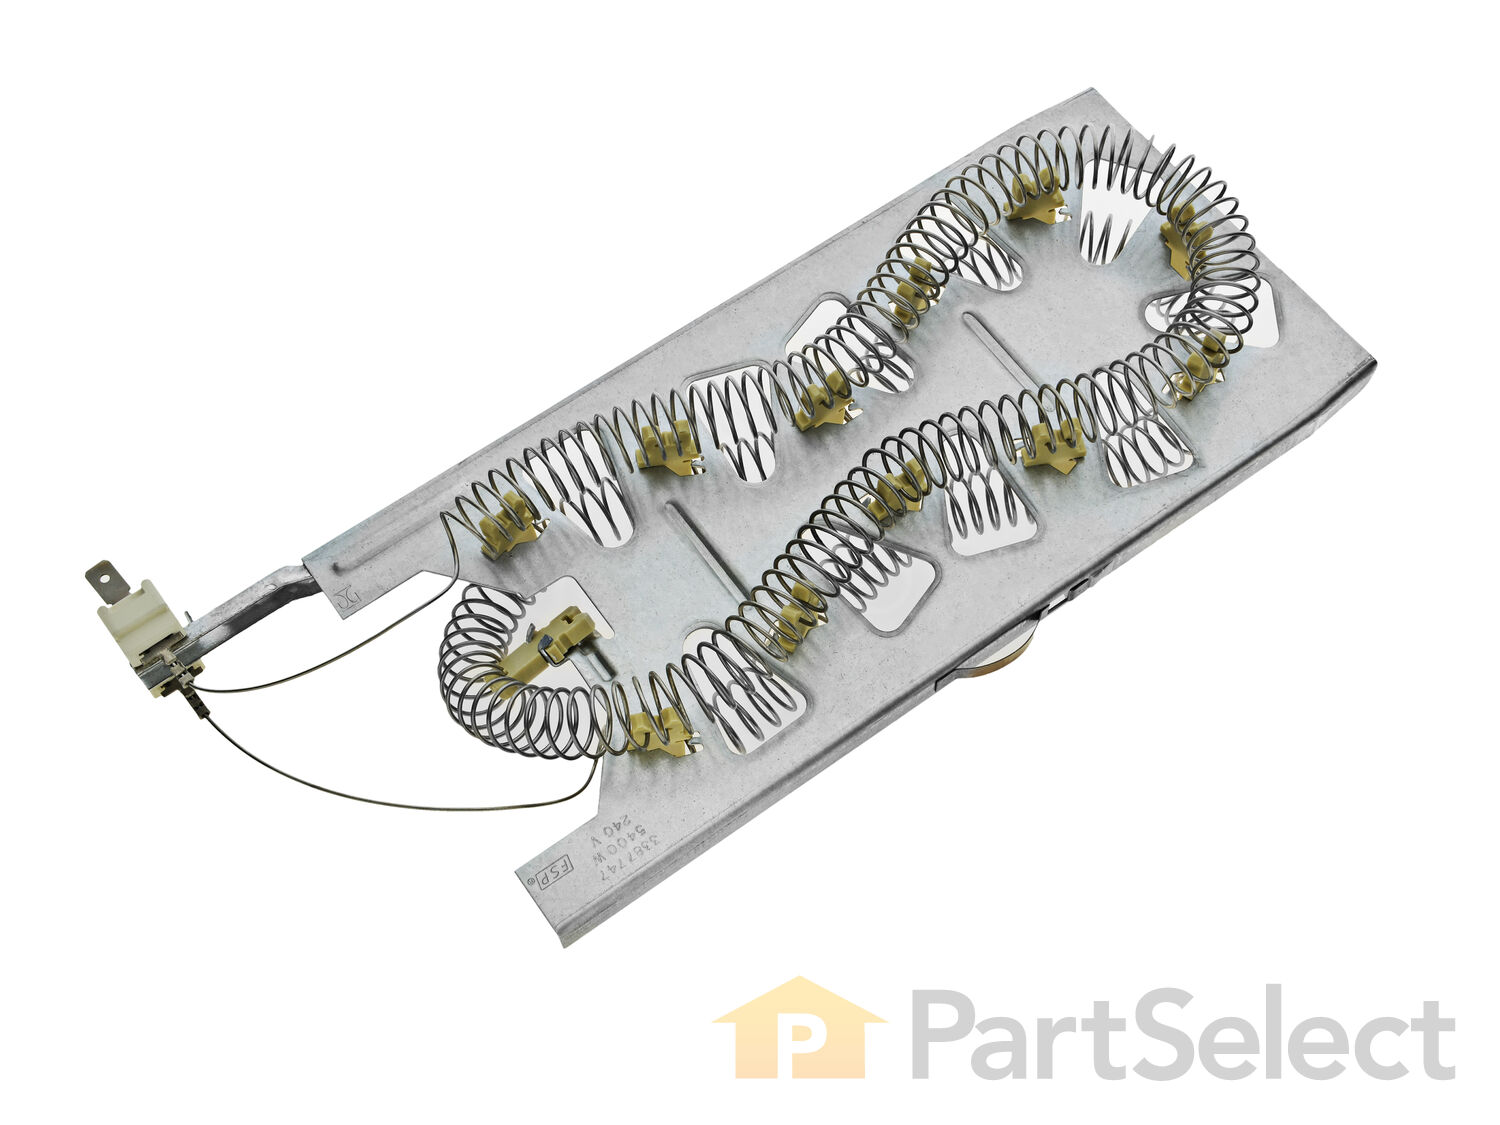
Once you've got the panel off, you should see the heating element. It's usually a coil of wire inside a metal housing. Kind of looks like a giant toaster oven element, doesn’t it?
The Moment of Truth: Removing the Old Element
Okay, time to disconnect the wires from the old heating element. Make sure you note where each wire goes! (More pictures, perhaps?) These wires are usually held on with screw terminals or push-on connectors.
Now, carefully remove the old heating element. It might be held in place with screws or clips. Don’t force anything! If it’s stuck, take a deep breath and reassess. You got this!
Important: Use your multimeter to test the old element. Set it to "Ohms" and check for continuity. If it reads "OL" or some crazy high number, it's definitely toast. Pun intended!
Installation Time: Bringing the Heat Back
Now, grab that shiny new heating element. Isn't it beautiful? Carefully install it in the same way the old one was installed. Make sure it's secure.
Reconnect the wires to the heating element. Remember those pictures you took? Now's their time to shine! Make sure the wires are connected tightly. A loose connection can cause all sorts of problems.
Double-check everything! Seriously. Make sure all the wires are connected correctly, and the heating element is securely in place.
Reassembly: Putting the Puzzle Back Together
Okay, time to put everything back together. This is where those pictures really come in handy. Just reverse the steps you took to disassemble the dryer.
Start by putting the back (or front) panel back on. Screw everything back in tightly.
The Big Test: Does It Work?
Plug the dryer back in and turn it on. Cross your fingers and say a little prayer to the appliance gods.
If everything went according to plan, your dryer should now be blowing hot air! Hallelujah! You fixed it! Time to do a celebratory load of laundry. (Or maybe just take a nap. You deserve it!)
If it's not blowing hot air, don't despair! Double-check all your connections. Make sure you bought the right heating element. And if all else fails, call a professional. Sometimes, you just gotta know when to throw in the towel. But hey, at least you tried!