5 Stage Reverse Osmosis System Filters Replacement

Okay, picture this: you're sipping on what you think is pure, refreshing water from your trusty 5-stage reverse osmosis system. But what if I told you, your "pristine" water might be closer to swamp juice than you think? Dramatic, I know. But hear me out!
It all boils down to those unsung heroes of your system: the filters. Like tiny water-purifying gladiators, they tirelessly battle sediment, chlorine, and other nasty contaminants. But even gladiators need a break (and new swords!), which is where filter replacement comes in.
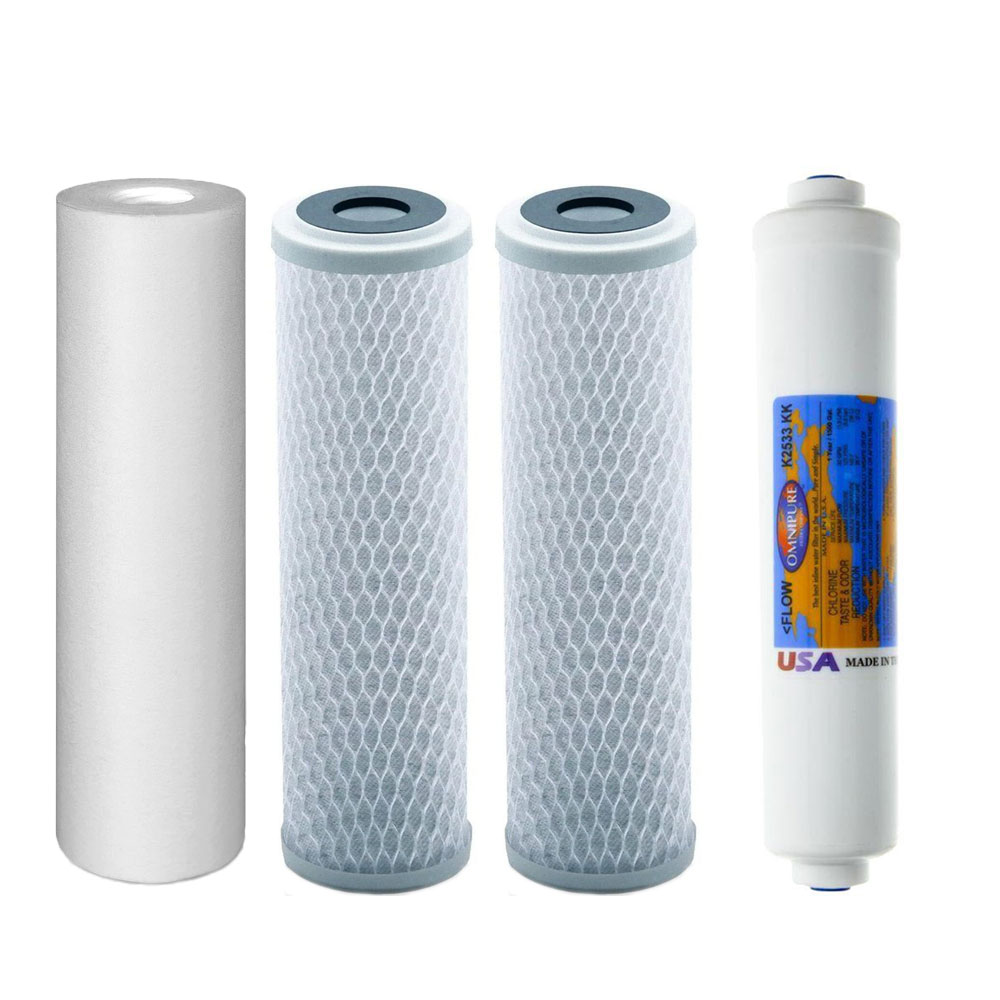
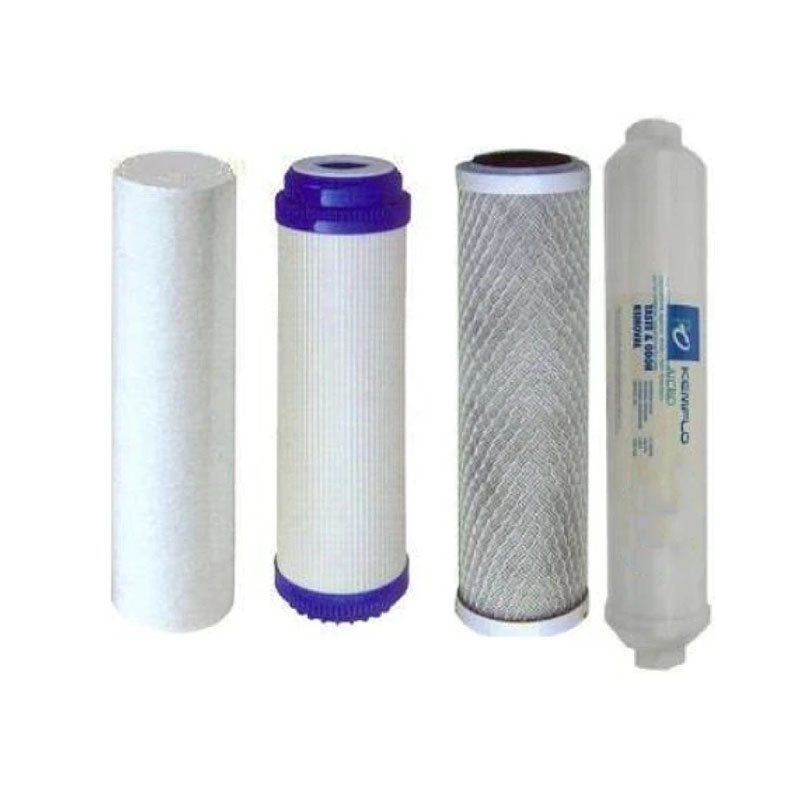
The Fab Five: Understanding Your Filter Family
Let's meet the stars of the show, shall we? Your 5-stage RO system is like a boy band, each member with a specific role, and they need to be kept in top condition to churn out those pure water hits.
Must Read
Stage 1: The Sediment Filter
First up, we've got the Sediment Filter. This is your system's bouncer, kicking out the big, bulky stuff like sand, silt, and rust. Think of it as the goalie preventing a tidal wave of yuck from crashing the party further down the line.
If you skip replacing this one, imagine trying to filter soup through a teabag that's already full of tea leaves. Gross, right? Your other filters will be overwhelmed and your water will taste like… well, let’s not go there.
Stage 2 & 3: The Carbon Filters (Activated & Block)
Next, we have the dynamic duo: the Activated Carbon Filter and the Carbon Block Filter. These guys are like the cleanup crew after a wild party, soaking up chlorine, odors, and other flavor-ruining villains.
The activated carbon filter is usually granulated. The carbon block is a more densely packed version, offering finer filtration. Together, they ensure your water doesn't taste like a public swimming pool.
Neglecting these filters is like trying to make lemonade with tap water straight from a chemical factory. Your water will taste… interesting. And by "interesting," I mean "absolutely disgusting."
Stage 4: The RO Membrane
Now, for the head honcho, the MVP, the one and only: the Reverse Osmosis Membrane. This is the real superstar of your system, the one responsible for the heavy lifting. This semipermeable membrane removes almost everything else – lead, arsenic, fluoride, you name it! It's like a microscopic bouncer only allowing the H2O VIPs to pass.
Think of the membrane like a sieve with tiny, tiny holes. Over time, these holes get clogged with impurities, reducing its efficiency. So when this happens the nasties start slipping through.
If you let this one go too long, you're basically drinking unfiltered water. All that fancy equipment, and you're back to square one. What a waste!
Stage 5: The Post-Carbon Filter (aka Polishing Filter)
Last but not least, we have the Post-Carbon Filter, also known as the polishing filter. This is the final touch, the cherry on top, ensuring your water tastes its absolute best. It’s like the finishing school graduate that make your water looks good.
It's the final exam of taste, making sure every drop is crystal clear and utterly delicious. Think of it as the final polish on a brand-new car.
Skipping this one is like wearing a tuxedo with muddy boots. You look pretty good, but there's still something off. So make sure to take care of this last guy!
The Great Filter Swap: A Step-by-Step Guide (Simplified!)
Okay, enough talk. Let's get our hands dirty! Replacing your filters isn't brain surgery, but it's important to follow a few simple steps. You can find your system's manual which is your best friend during this process.
Step 1: Gather Your Supplies. You'll need your replacement filters (duh!), a filter wrench (usually included with your system), a bucket or towels (for inevitable spills!), and maybe a motivational playlist.
Step 2: Shut Off the Water Supply. Locate the valve that feeds water to your RO system and turn it off. You don't want a surprise geyser in your kitchen!
Step 3: Relieve the Pressure. Open your RO faucet and let it run until the water flow stops. This releases any pressure built up in the system.
Step 4: Unscrew the Filter Housings. Using your filter wrench, carefully unscrew the filter housings. Have your bucket ready to catch any water that spills out. This is when you'll see the condition of your old filters, which can be pretty shocking.
Step 5: Remove and Discard the Old Filters. Take out the old filters and dispose of them according to your local regulations. Don't even think about reusing them!
Step 6: Install the New Filters. Insert the new filters into their corresponding housings, making sure they're properly seated. Pay attention to the flow direction, which is usually indicated on the filter.
Step 7: Screw the Housings Back On. Carefully screw the filter housings back onto the system, using the filter wrench to tighten them securely. Don't overtighten, or you risk damaging the housings.
Step 8: Turn the Water Supply Back On. Slowly turn the water supply back on and check for leaks. If you see any leaks, tighten the housings a bit more.
Step 9: Flush the System. Open your RO faucet and let the water run for 5-10 minutes to flush out any air or debris from the new filters. The initial water may be cloudy, but it should clear up quickly.
Step 10: Enjoy Your Pristine Water! That's it! You've successfully replaced your RO system filters and are now ready to enjoy delicious, clean water. Give yourself a pat on the back; you deserve it!
When to Swap: Knowing the Filter Lifespan
Now, for the million-dollar question: how often do you need to replace these filters? Well, it depends on a few factors, such as the quality of your source water and your water usage. But here's a general guideline:

- Sediment and Carbon Filters: Every 6-12 months. Think of it as a spring cleaning for your water.
- RO Membrane: Every 2-3 years. This one's a bit more resilient, but still needs replacing eventually.
- Post-Carbon Filter: Every 12 months. Keep that flavor fresh!
Don't wait for your water to start tasting funky. Mark your calendar, set a reminder on your phone, or even hire a filter replacement elf (okay, maybe not the last one). Proactive maintenance is key!
Signs Your Filters Need a Change, Stat!
Not sure if it's time for a filter swap? Keep an eye out for these telltale signs:
- Reduced Water Flow: If your water is trickling out instead of flowing freely, your filters are probably clogged.
- Bad Taste or Odor: Your water should be tasteless and odorless. If it tastes like chlorine or smells like sulfur, something's definitely amiss.
- Cloudy Water: This could indicate sediment buildup or other contaminants slipping through.
- Increased TDS (Total Dissolved Solids): Use a TDS meter to measure the level of dissolved solids in your water. A significant increase means your membrane is failing.
Basically, trust your gut (and your taste buds). If something seems off, it probably is.
The Benefits of Filter Replacement: Beyond Just Taste
Okay, so we've established that replacing your filters is essential for great-tasting water. But the benefits go far beyond just flavor:
- Improved Health: Clean water is essential for overall health and well-being. You're reducing your exposure to harmful contaminants that could cause long-term health problems.
- Longer System Lifespan: Replacing your filters regularly protects your RO system from damage and extends its lifespan. Think of it as preventative medicine for your water purifier.
- Cost Savings: By preventing damage and extending the lifespan of your system, you'll save money in the long run. Plus, you'll avoid the cost of bottled water!
- Environmental Responsibility: Reducing your reliance on bottled water is a great way to reduce plastic waste and help protect the environment.
So, there you have it! Filter replacement is an essential part of owning a 5-stage reverse osmosis system. It may seem like a chore, but it's a small price to pay for clean, delicious water and peace of mind.
Now, go forth and conquer those filters! Your taste buds (and your body) will thank you.