4 Digit 7 Segment Display Arduino Clock
Ever glance at a digital clock and wonder, "How does that actually work?" Building a 4-digit 7-segment display Arduino clock is a fantastic way to demystify this everyday technology. It's not just about telling time; it's about understanding the fundamental principles of electronics, programming, and how these things come together to create something useful and, frankly, pretty cool!
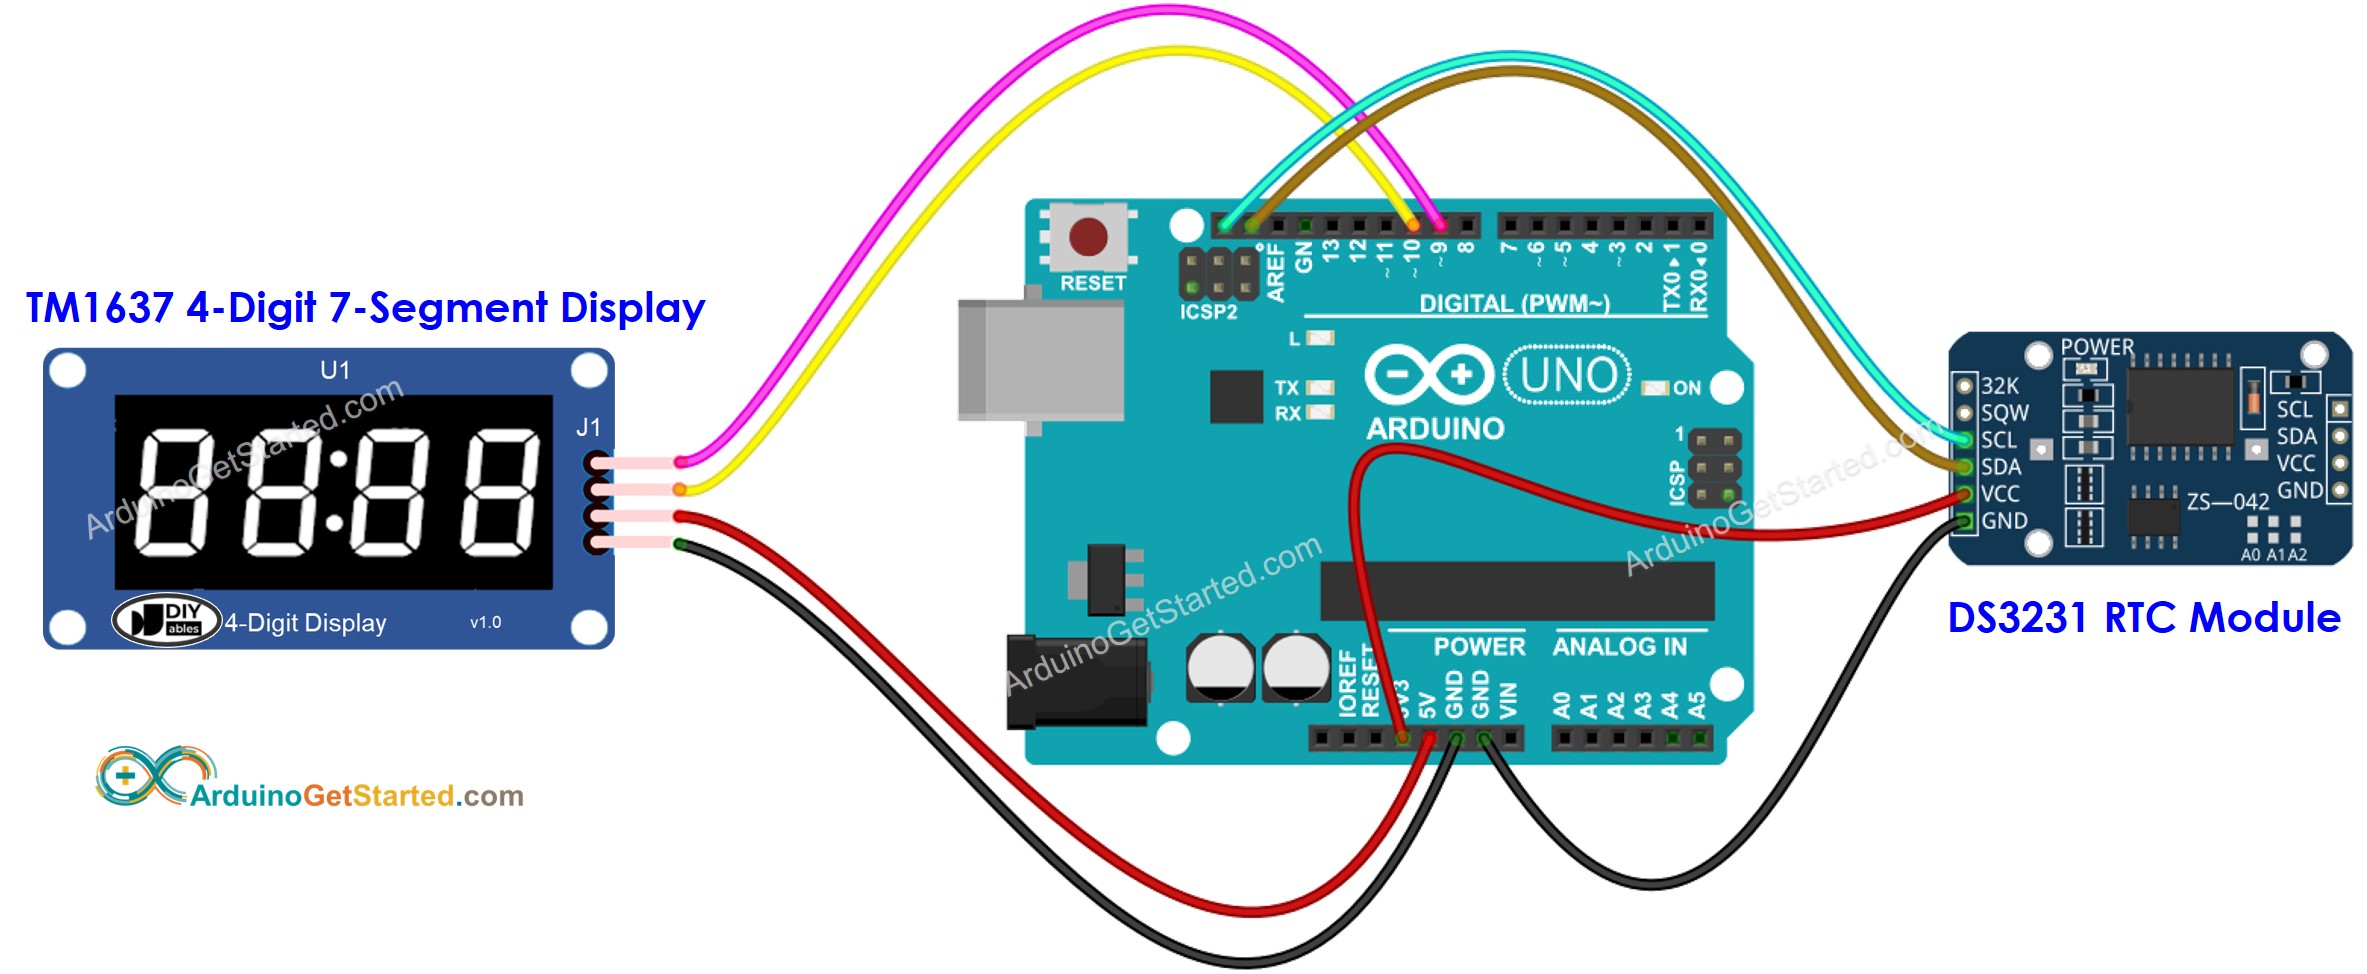
The purpose of this project is simple: to create a functional clock using readily available components. You'll use an Arduino (a small, programmable microcontroller board), a 4-digit 7-segment display (the red number displays you often see), and a few other basic electronic parts. The benefit? You gain hands-on experience with electronics, learn to code in the Arduino language (which is based on C++), and end up with a working clock to show off your skills! Plus, the satisfaction of building something yourself is incredibly rewarding.
But why bother? Well, consider this: understanding the building blocks of technology empowers you. This project breaks down a common device into manageable parts, making the abstract world of electronics feel much more concrete. It’s a great stepping stone to more complex projects. Think of it as learning the alphabet of electronics – once you know the letters, you can start writing sentences, then paragraphs, and eventually, whole stories!
Must Read
In education, this project is invaluable. It's often used in introductory electronics and programming courses to teach students about digital logic, microcontrollers, and real-time systems. Students learn about binary numbers, how to control LEDs, and how to write code that interacts with the physical world. It's a tangible application of theoretical concepts, making learning more engaging and effective.
In daily life, these displays are everywhere! From kitchen timers and microwave ovens to industrial control panels and elevator displays, 7-segment displays are a ubiquitous part of our modern world. Building your own clock helps you appreciate the engineering and design that goes into these everyday devices.
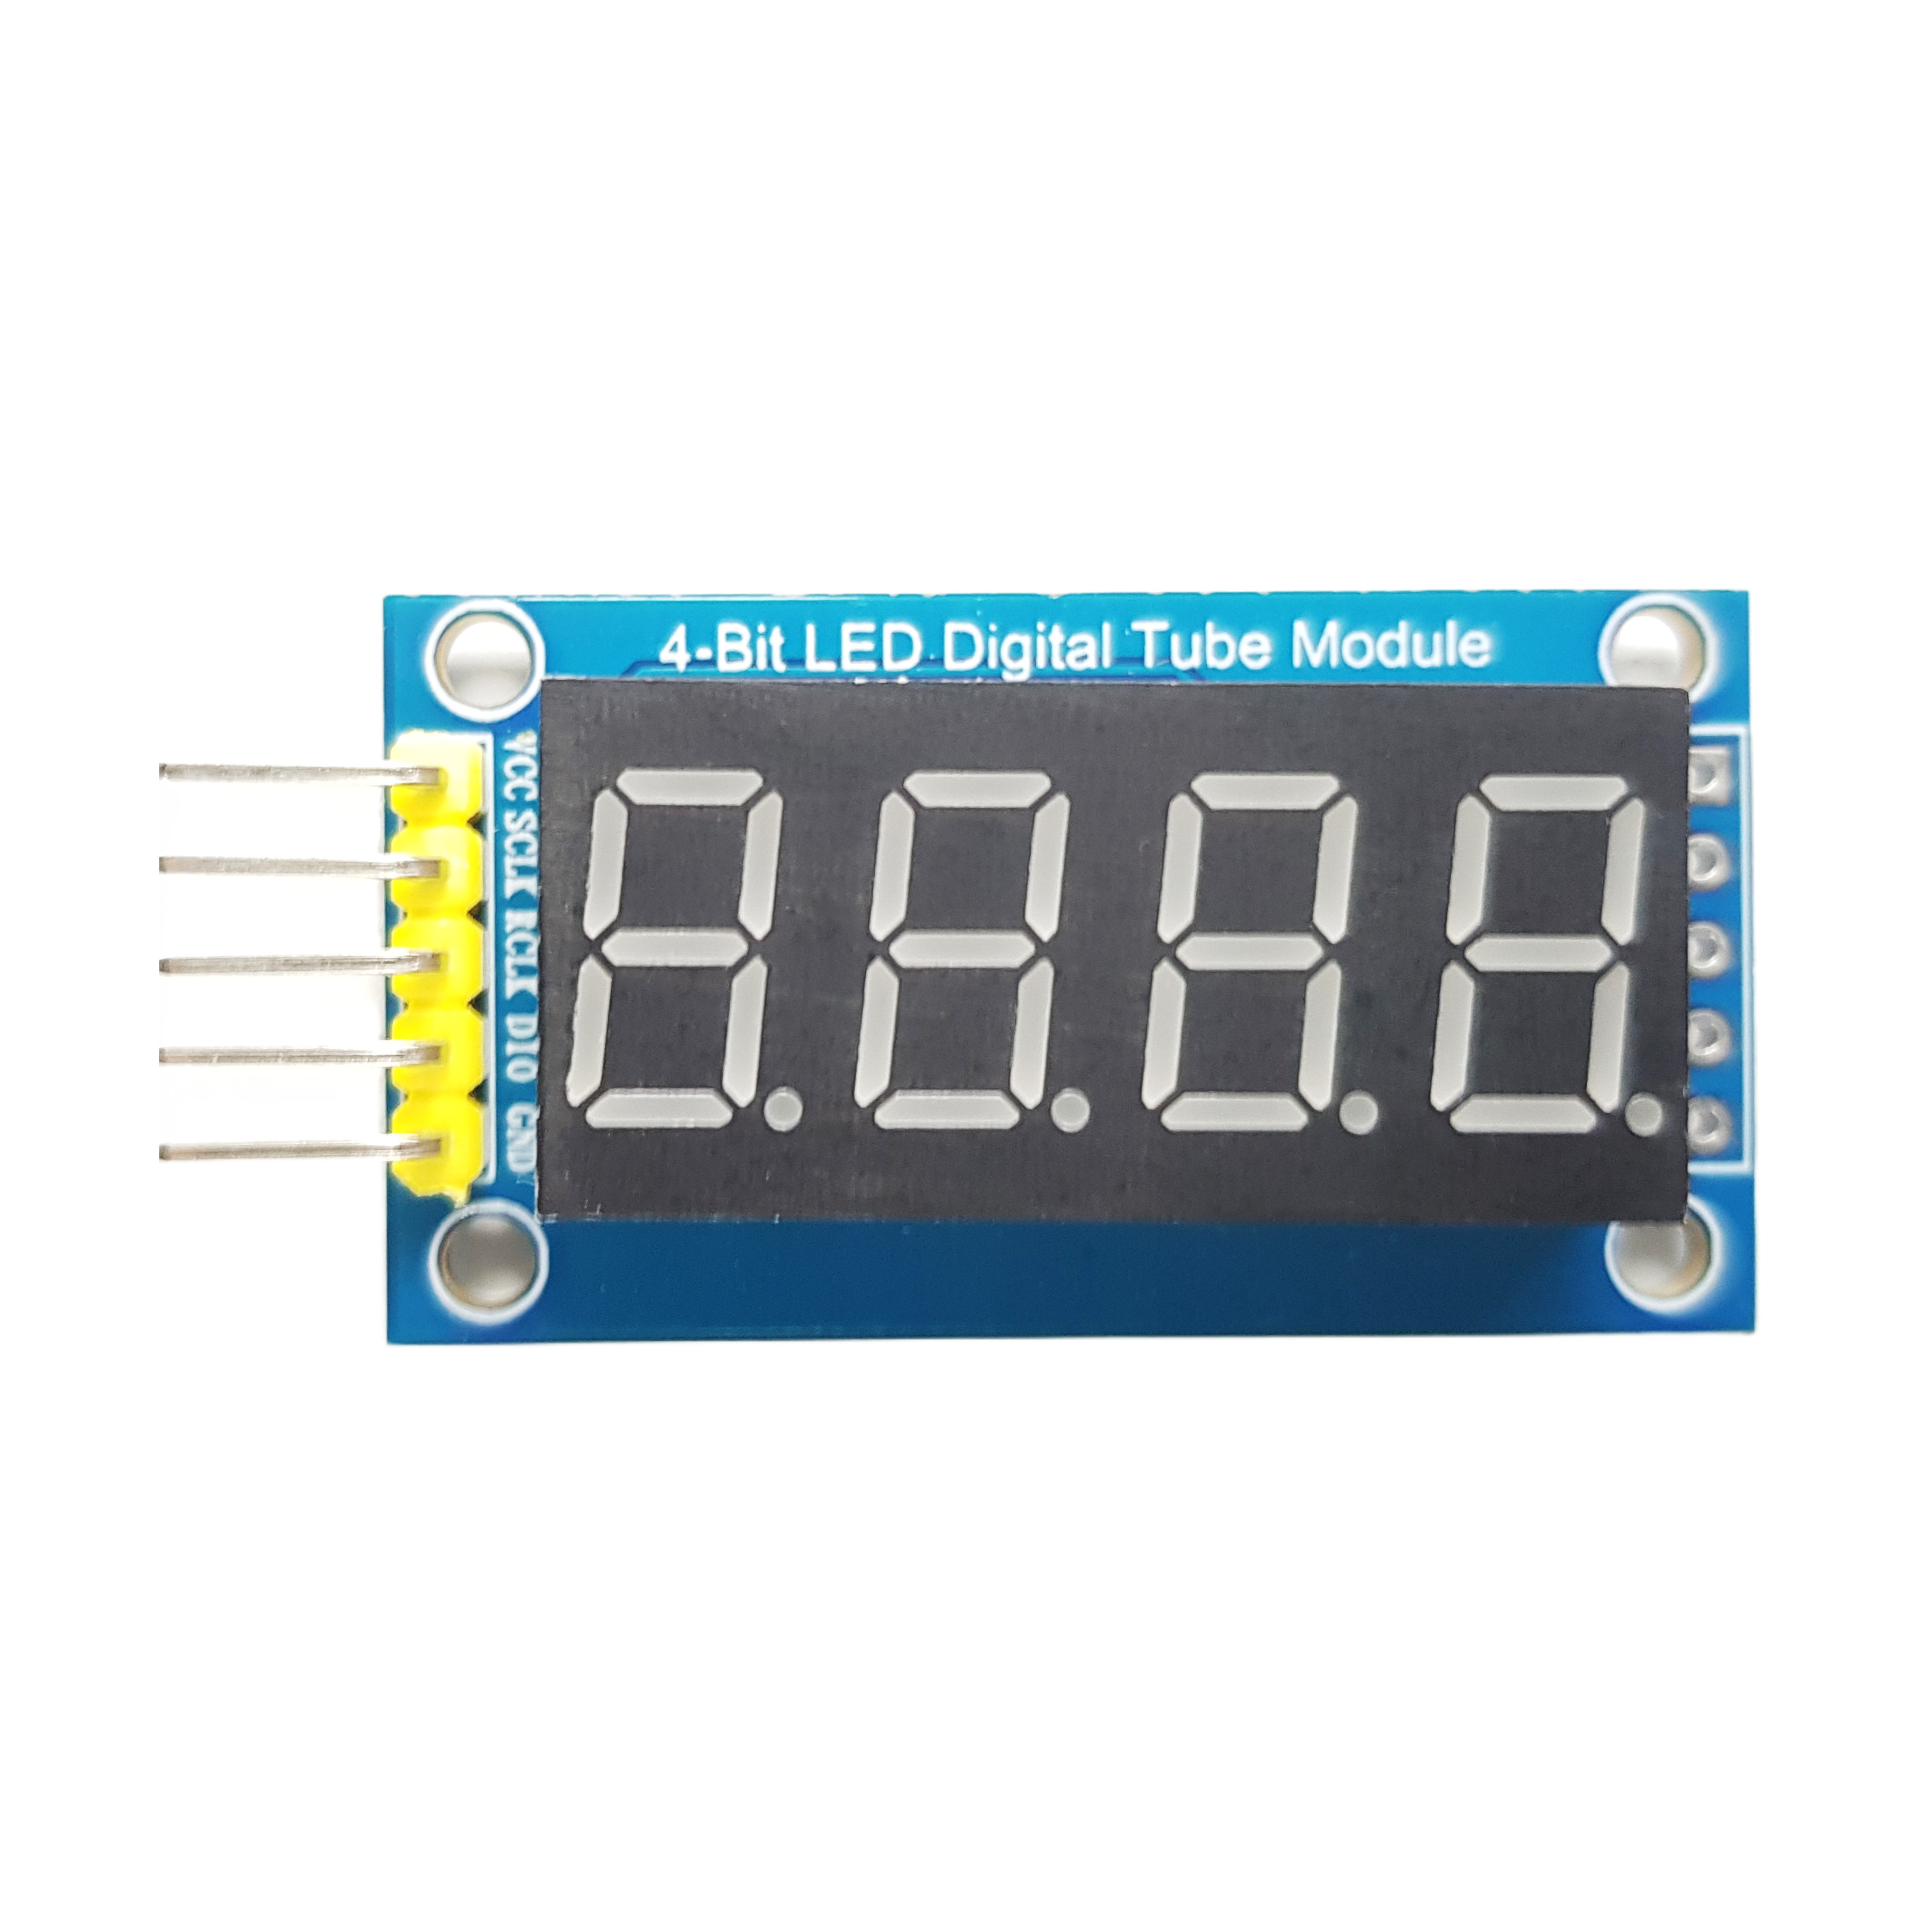
So, how can you get started? Here are a few practical tips. First, gather your supplies. You’ll need an Arduino Uno (or similar), a 4-digit 7-segment display (common anode or common cathode – be sure you know which type you have!), some resistors, connecting wires, and a breadboard. There are tons of online tutorials that provide step-by-step instructions and example code. Start with a simple tutorial that uses a library to control the display. This allows you to focus on understanding the basic concepts without getting bogged down in the low-level details.
Experiment! Try changing the colors of the segments (if you have an RGB display). Add a button to set the time. Incorporate an alarm function. The possibilities are endless! Don't be afraid to make mistakes. That's how you learn. The key is to be curious and to keep experimenting. Building a 4-digit 7-segment display Arduino clock is more than just a project; it's a journey into the fascinating world of electronics and programming.


