Ever thought about where your carbon monoxide detector should live in your home? It might not sound like the most thrilling topic, but trust me, understanding CO detector placement is like having a superpower for home safety! It's one of those simple, smart moves that gives you immense peace of mind. Think of it as a friendly guardian, silently watching over your household. Knowing where to put these essential devices isn't just useful; it’s a tiny bit empowering, making you a savvier homeowner or tenant. It’s about taking control of your environment and protecting what matters most.
So, who benefits from this knowledge? Well, everyone! For beginners and new homeowners, getting this right is an easy win for establishing a safe foundation. It’s often overlooked amidst the excitement of moving in, but it’s a crucial first step. For families and parents, this information is priceless. Carbon monoxide, often called the “silent killer,” is colorless and odorless, making detectors your only line of defense. Protecting children, who are more vulnerable to CO poisoning, is paramount, and proper placement ensures the earliest possible detection. Even hobbyists—like those who tinker in a garage, enjoy a cozy fireplace, or travel in an RV—have unique needs. An attached garage often needs a detector, especially if you ever warm up the car inside, and RVs have their own specific placement rules due to their confined spaces and different appliance setups.
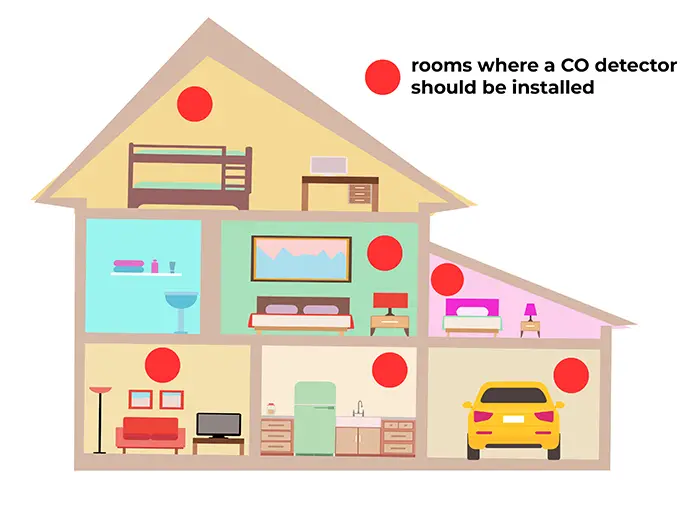
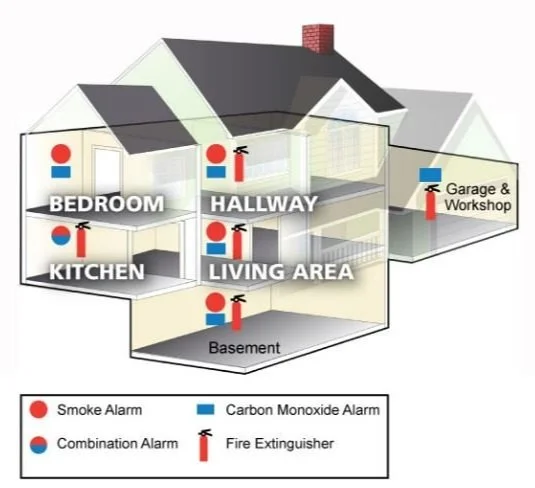
When it comes to placement, there are some generally accepted best practices, along with a few variations. The golden rule? Install a CO detector on every level of your home, and most importantly, near or within every sleeping area. This means outside each bedroom or within a master suite. Why near sleeping areas? Because CO can affect you while you sleep, rendering you unable to wake up or react. For homes with gas stoves or fuel-burning appliances (like furnaces or water heaters), consider an additional detector in the kitchen or utility room. As for height, most manufacturers recommend placing detectors about 5 feet from the floor, or at least not directly on the ceiling like smoke detectors, nor right on the floor. Carbon monoxide mixes relatively evenly with air, so mid-level placement is usually ideal. Always check your specific device's manual though, as recommendations can vary.
Ready to get started? Here are some simple, practical tips. First and foremost, always read the manufacturer’s instructions that come with your detector. They often have specific guidance for optimal placement and maintenance. Second, make it a habit to test your detectors monthly by pressing the test button. You'll hear a chirp, confirming it's working. Third, change the batteries at least once a year, or better yet, twice a year when you adjust your clocks for daylight saving time. And remember, CO detectors don't last forever; they typically need to be replaced every 5 to 7 years. Check the manufacture date on the back of your unit. Finally, ensure detectors aren't blocked by furniture, curtains, or anything that could impede airflow to the sensor.
See? It's not intimidating at all! Taking a few minutes to correctly place your carbon monoxide detectors is one of the easiest yet most impactful ways to safeguard your home and loved ones. It’s a small effort that delivers immense value—a true investment in your peace of mind. So go ahead, be the hero of your home safety plan, and enjoy the comfort of knowing you’ve got one less thing to worry about!
.jpg?format=2500w)