What To Do After Installing A New Water Heater
So, you've conquered Everest... I mean, installed a new water heater! Congratulations! You're officially a plumbing ninja (or at least, you’ve survived an experience that feels like one). Now, before you celebrate with a steaming hot shower that lasts approximately three hours (we've all been there), let’s talk about what comes next. Think of it as the “cool-down” lap after the plumbing marathon.
First things first: Breathe. Seriously. Installing a water heater is stressful. It’s like trying to assemble IKEA furniture without the instructions – except with the added threat of flooding your basement. You deserve a pat on the back (and maybe a beverage of your choice).
The Post-Installation Checklist: No Leaks Allowed!
Okay, deep breaths aside, let's make sure this thing isn’t going to spring a leak the moment you turn your back. This is crucial. We're talking about avoiding a potential indoor swimming pool situation.
Must Read
Here’s what you need to do:
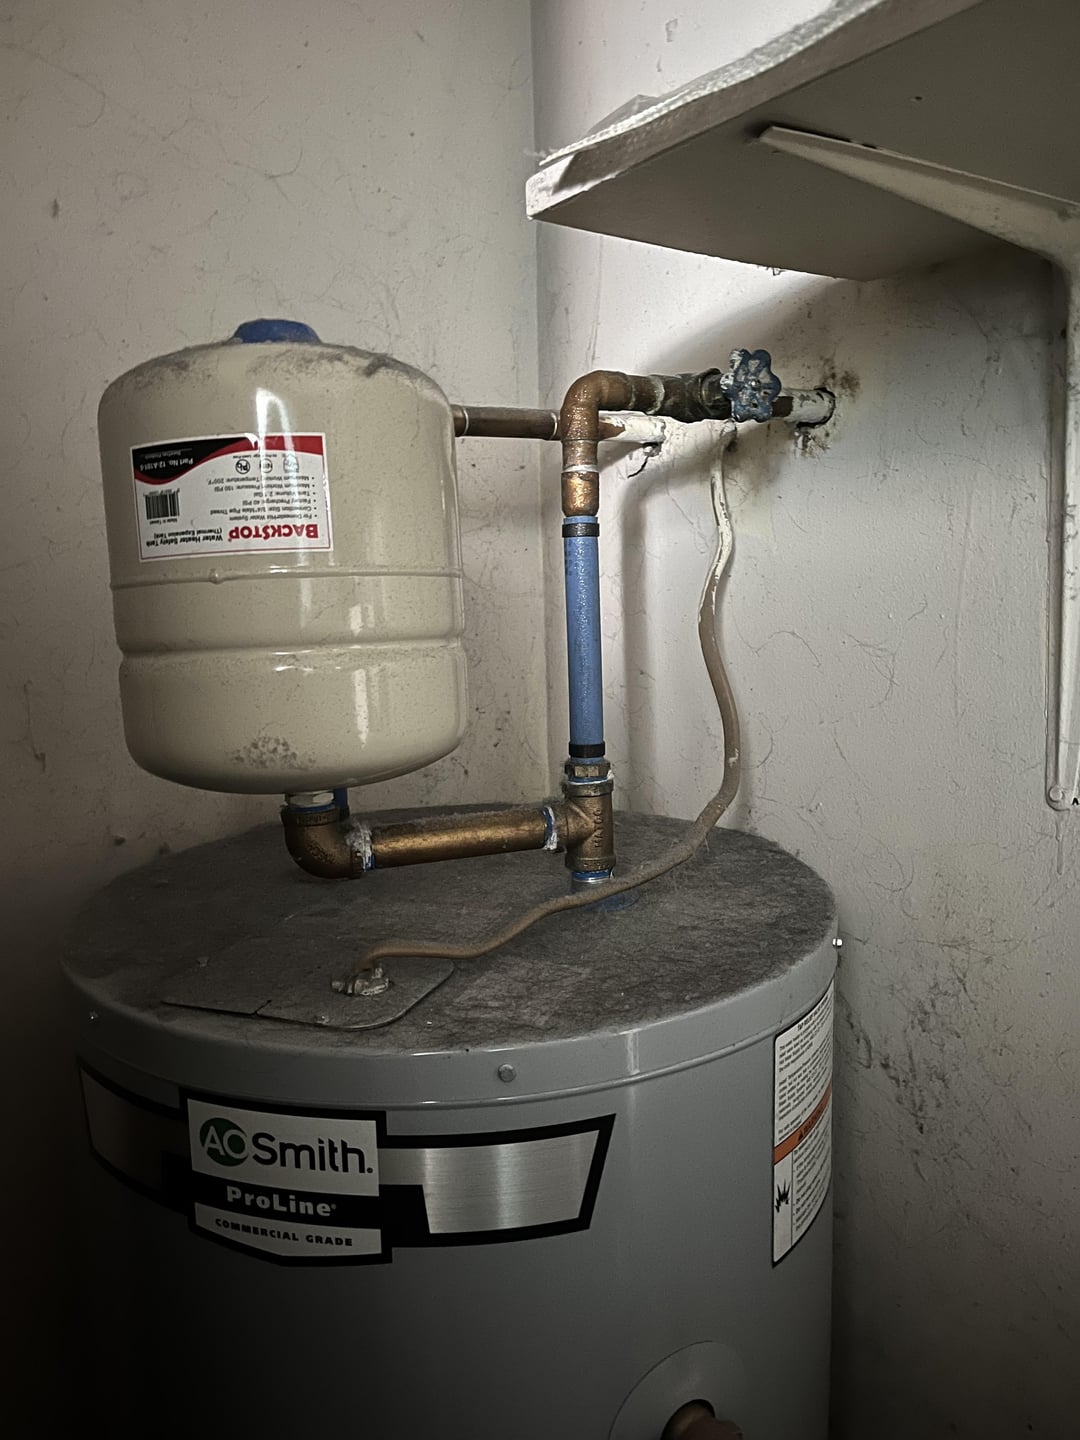
- Inspect all the connections: This is where you become a water-leak detective. Grab a flashlight (because who knows what lurks in the shadows under your water heater?) and carefully examine all the pipes and fittings. Look for any signs of moisture. Even a tiny drip can turn into a major problem later on. Think of it like a small crack in your phone screen – it only gets worse over time!
- Tighten, but don't overtighten: If you spot a leaky connection, gently tighten the fitting. Emphasis on the "gently." You don't want to Hulk-smash it and strip the threads. A little nudge is usually enough. If it still leaks, consider calling a plumber. Trust me, a professional is cheaper than replacing your entire floor.
- Check the pressure relief valve: This little guy is your water heater's safety valve. Make sure it’s properly installed and functioning. There should be a discharge pipe leading away from the valve. This pipe is important! It's designed to safely release excess pressure if the water heater malfunctions. Don't mess with it unless you know what you're doing.
Turning on the Hot Water (Finally!)
Alright, you’ve successfully completed your leak inspection. Now comes the moment of truth: turning on the hot water. This is like the grand finale of a fireworks show – hopefully, everything goes smoothly and there are no unexpected explosions (of water, of course).
Here’s how to do it:
- Slowly open the main water valve: Don't just crank it open full blast. Be gentle. Let the water fill the tank gradually. You might hear some gurgling and sputtering – that's normal. The water heater is just burping up trapped air.
- Run hot water from several faucets: This helps bleed the air out of the system. Start with the faucet closest to the water heater and work your way outward. Let the water run until it flows smoothly and consistently hot.
- Check for leaks again: Yes, I know, you just did this. But it's worth another look. Once the system is pressurized, leaks that were previously invisible might become more apparent.
Adjusting the Temperature: Avoiding the Scald Zone
Now that you have hot water, let’s talk about temperature. Most water heaters come with a factory setting that’s ridiculously hot – hot enough to scald you in seconds. You don't want that! Think of it as setting your toaster to "inferno" and ending up with charcoal instead of toast.

Here’s what to do:
- Locate the thermostat: This is usually located behind an access panel on the water heater.
- Adjust the temperature to 120 degrees Fahrenheit: This is the recommended setting to prevent scalding and conserve energy.
- Test the water temperature: Use a thermometer to check the water temperature at your faucets. You might need to make minor adjustments to the thermostat to get the desired temperature.
And finally: Enjoy your nice, hot, leak-free shower! You’ve earned it. Just remember to occasionally check around the base of your water heater for any signs of leaks in the coming days and weeks. Think of it as preventative plumbing maintenance. Happy showering!