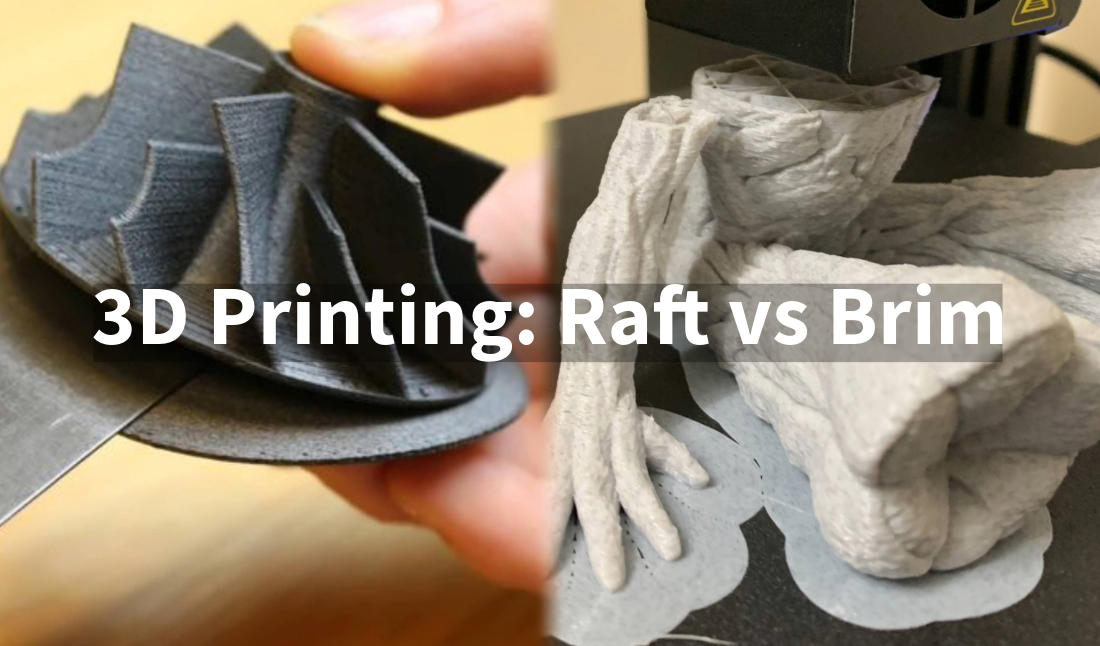
What Is Raft In 3d Printing
Ever marveled at the magic of 3D printing, watching your digital ideas materialize layer by delicate layer? It’s an incredibly rewarding hobby, bringing everything from practical tools to fantastical figures to life right on your desktop. But sometimes, especially when starting out, your creation might need a little extra help to ensure it begins its journey on the right foot. That’s where the unsung hero of many a successful print comes in: the raft.
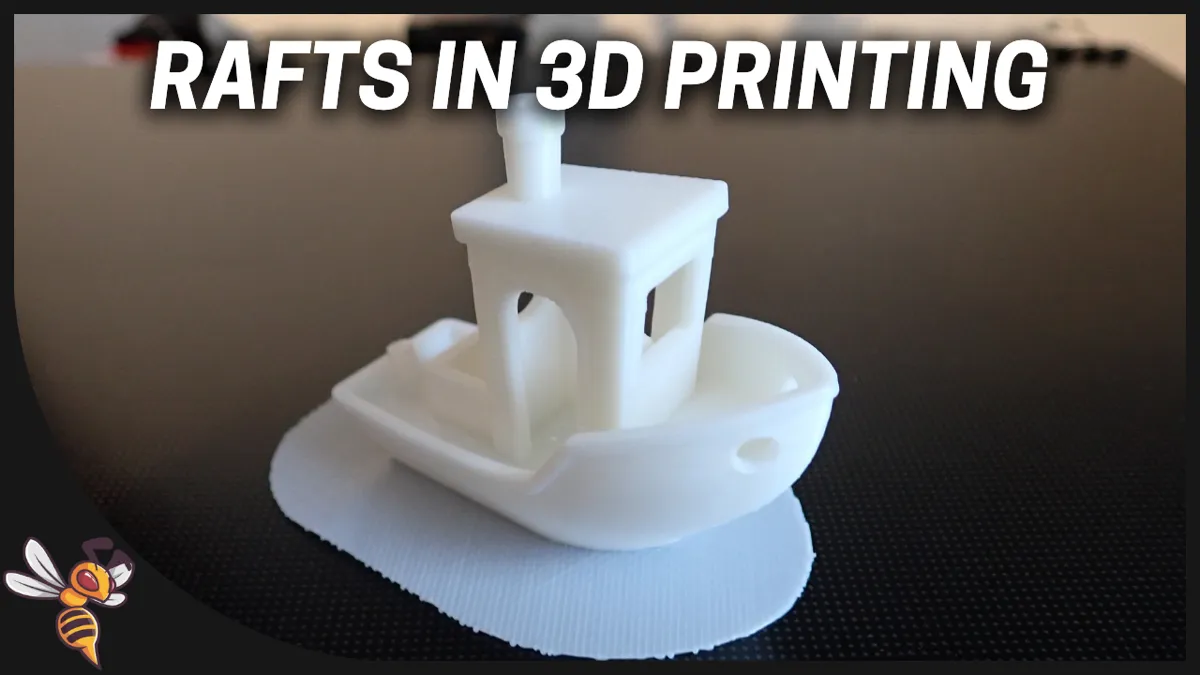
So, what exactly is a raft in 3D printing? Imagine it as a temporary, flat platform that your actual 3D print sits on, kind of like a sturdy little base camp for your model. It’s printed directly onto your build plate first, and then your model is printed on top of the raft. Once your print is finished and cooled, you simply peel the raft away, leaving your perfect print behind. It’s a sacrificial layer, designed purely to ensure the success of the main event!
The purpose and benefits of using a raft are fantastic, especially for different audiences. For beginners and families just getting into 3D printing, rafts can be a game-changer. They provide superior bed adhesion, which means your print is much less likely to lift, warp, or detach from the print bed mid-print – a common frustration. This means fewer failed prints and less wasted filament, making the whole experience much more enjoyable and less intimidating. For hobbyists tackling more complex or intricate models, a raft offers a perfectly flat and stable surface, which is crucial for models with small footprints or delicate first layers. It can even help compensate for a slightly uneven print bed, ensuring a smooth and consistent start every time.
Must Read
When should you consider using a raft? It's particularly useful for models with a small contact area on the build plate, where there isn't much surface for the first layer to stick. Materials known for warping, like ABS, often benefit greatly from a raft. If you've ever had the corners of your print curl up, a raft is your friend! Conversely, if you have a large, flat-bottomed print made from a material that sticks well (like PLA), or if the absolute best surface finish on the bottom is critical, you might skip the raft. Alternatives like a "brim" (just a few extra outline layers around the base) can offer some adhesion benefits without a full solid raft.

Ready to give it a try? Getting started with rafts is incredibly simple. In most 3D printing "slicer" software (like Cura or PrusaSlicer), it’s usually just a checkbox or a simple drop-down option under "Build Plate Adhesion." You can often tweak settings like the "air gap" – the tiny distance between the raft and your print – which affects how easily the raft detaches. A good rule of thumb is to start with your slicer's default raft settings and experiment from there. Always allow your print to cool completely before attempting to remove the raft; this makes separation much cleaner and easier.
Ultimately, the raft is a simple yet powerful tool in your 3D printing arsenal. It removes a layer of common frustration, allowing you to focus on the fun and creativity of bringing your designs to life. So go ahead, don’t be afraid to add a little temporary platform to your next print – it might just be the secret to your next successful creation and many joyful hours of 3D printing!