Ring Video Doorbell Pro Installation Guide

Alright, let's talk about getting that fancy Ring Video Doorbell Pro up and running. If the thought of a DIY project usually sends shivers down your spine – perhaps evoking flashbacks of trying to assemble flat-pack furniture after a particularly long Monday – take a deep breath. We're going to tackle this together, and I promise, it'll be more like a fun little puzzle and less like deciphering ancient scrolls.
Installing your Ring Pro isn't brain surgery, though sometimes it can feel like it when you're staring at a tangle of wires. But trust me, with a dash of patience and a sprinkle of humor, you'll have your home's new digital greeter ready to roll in no time. Think of it as upgrading your front door from a flip phone to a smartphone – a truly revolutionary leap!
First Things First: What's in the Box? (And What You Might Need)
Before we dive in, let's play "What's in the Box?" Unpack everything. You'll find the Ring Pro itself, a mounting plate, screws, anchors, a little screwdriver (bless their hearts for including it!), and the crucial Power Kit. This Power Kit is like the Ring Pro's personal bodyguard for your existing doorbell chime – it keeps things stable. Don't lose it!
Must Read
Beyond the box, you'll probably need a few common household heroes: a drill (with a masonry bit if you have brick), a pencil, maybe some needle-nose pliers, and ideally, a headlamp. Why a headlamp? Because trying to hold a flashlight in your teeth while wrestling with wires is a rite of passage, but not a comfortable one. Save your teeth, get a headlamp!
Step 1: The Great Power Down (Safety First!)
This is probably the most important step, so pay attention! We're talking about electricity here, and nobody wants a surprise hair-raising experience. Head to your electrical breaker box – that mysterious metal box usually lurking in your garage, basement, or utility closet.
Find the breaker that controls your doorbell (it might be labeled "doorbell," "chime," or "general purpose"). Flip that breaker OFF. Don't just dim the lights, completely kill the power to your doorbell circuit. Think of it as hitting the mute button on reality for a few minutes. To double-check, try pressing your old doorbell. If it stays silent, you've successfully entered the safe zone. Bravo!

Step 2: The Old Doorbell's Swan Song
It's time to say goodbye to your old doorbell. It's served you well, perhaps through countless pizza deliveries and unsolicited sales pitches. Carefully unscrew it from the wall. You'll usually find two wires connected to it. These are your friends. Remember their faces (or at least their colors). Gently disconnect them. Don't worry, they won't bite. Just try to keep them from disappearing back into the wall like shy earthworms.
Now, while you're at it, let's deal with the chime box inside your house (the thing that actually dings). Locate it – usually near the front door, or in a hallway. Open its cover. You'll see a bunch of wires. Find the ones labeled "FRONT" and "TRANS" (short for transformer). These are the ones we're going to introduce to your Ring Pro's Power Kit.
The Power Kit comes with two wires. One connects to "FRONT," the other to "TRANS." It’s pretty straightforward, like matching up colored spaghetti. Follow the Power Kit's diagram precisely. This kit ensures your Ring Pro gets the right amount of juice without overwhelming your existing chime. Secure the Power Kit inside your chime box, pop the cover back on, and let's head back to the front door.

Step 3: The Ring Pro's Grand Entrance (Wiring & Mounting)
Back at the front door, take the mounting plate from your Ring Pro box. Place it where your old doorbell used to be, ensuring those two wires are peeking through the middle. Use a pencil to mark where you'll need to drill holes for the screws. This is where your inner artist (or perhaps your inner perfectionist) comes out. Measure twice, drill once – unless you're like me, in which case it's "measure once, drill, realize it's slightly off, and then measure again." It’s fine, we all have our quirks.
If you're drilling into stucco, brick, or concrete, use those handy plastic anchors. They give your screws something solid to grip onto, preventing your Ring Pro from doing an unexpected swan dive off your house. Once the mounting plate is secure, it's time for the wires.
The Ring Pro has two small screws on its back, designed to hold your doorbell wires. It doesn't matter which wire goes into which screw – no need to stress over red to red, black to black here. Just loop one wire around each screw, tighten them down snugly, and ensure there are no stray copper strands looking to make trouble. A good connection is a happy connection!
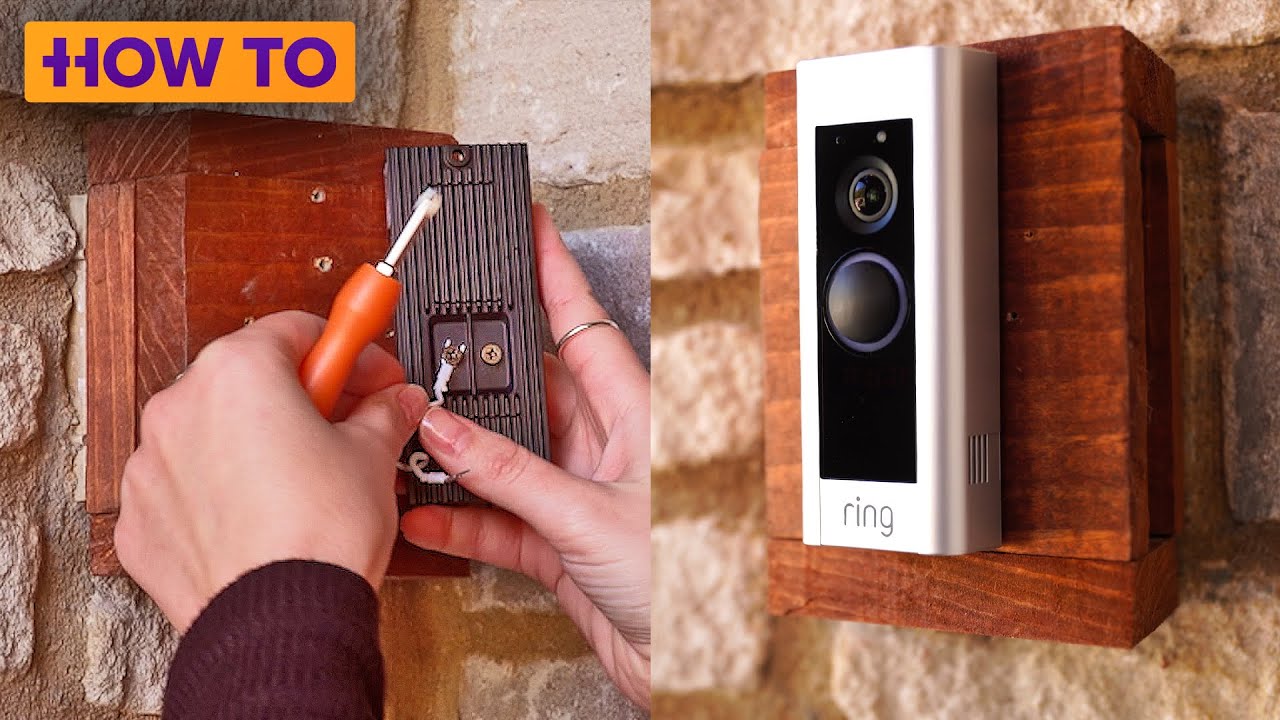
Now, carefully align your Ring Pro with the mounting plate and push it firmly into place. It should click. Use the included security screw at the bottom to secure it. This tiny screw is like the final seal on a secret mission – it keeps your Ring Pro from walking away with anyone who wasn't invited.
Step 4: The Moment of Truth (Power Up & App Setup)
Alright, deep breath! Head back to your breaker box and flip the power back ON. Your doorbell chime inside might make a little noise – a hopeful little hum. This is a good sign! Your Ring Pro should light up. If it starts talking to you, even better!
Now, grab your smartphone. Download the Ring app if you haven't already. Follow the on-screen instructions to set up your device. This usually involves connecting to a temporary Ring Wi-Fi network, then guiding your Ring Pro to connect to your home Wi-Fi. It’s like teaching a smart dog new tricks – sometimes they get it on the first try, sometimes they need a few gentle nudges.

Troubleshooting & High-Fives
If for some reason your Ring Pro isn't lighting up, or the app is giving you grief, don't panic. Go back to the breaker, turn the power off, and double-check your wiring connections at both the doorbell and the chime box. Sometimes a wire just needs a little wiggle or a tighter screw. Patience is your superpower here. The Ring app also has some fantastic troubleshooting guides built right in, so don't be shy about consulting them.
Once everything is connected, and you get that glorious "Setup Complete!" message, take a moment. You did it! You just enhanced your home's security, gave yourself peace of mind, and probably saved yourself a hefty installation fee. Go ahead, press that button yourself. Admire your handiwork. High-five yourself, you DIY superstar!
Now you can see who's at the door from anywhere, talk to delivery drivers, and generally feel a bit more connected to your home. Enjoy your new high-tech sentinel!