Replacing Battery In First Alert Carbon Monoxide Detector

Oh, the glorious sound! Not a fanfare, not a thunderclap, but that oh-so-familiar, polite, yet persistent
chirp-chirp
that emanates from your trusty guardian angel of the airwaves: your First Alert Carbon Monoxide Detector. It’s not complaining, dear reader; it’s simply whispering, “Hey, champ! A little pick-me-up would be super!” And you, my friend, are about to become a certified home hero, armed with nothing but a smile and a few simple tools, ready to banish that low-battery chirp into the annals of history!Think of it as a mini-mission, a delightful diversion in your day that yields monumental peace of mind. You’re not just changing a battery; you’re renewing a vow of safety, ensuring your family’s silent protector is at its absolute peak performance. So, let’s gather our heroic arsenal, shall we?
Must Read
Your Hero’s Toolkit (aka, stuff you probably already have!)
First up, your trusty sidekick: the screwdriver. Now, don’t fret if you don’t have a whole toolkit worthy of a NASA engineer. Chances are, a humble Philips-head (the one with the cross at the tip) or a flathead (the one that looks like, well, a flat line!) will do the trick. This isn't brain surgery; it’s more like a playful treasure hunt for a tiny screw. Find the one that feels right, the one that whispers, "I am the chosen one!"
Next, the star of our show, the
new battery
! Most First Alert models are delightfully powered by a standard 9-Volt battery, that chunky rectangular marvel of energy. However, some might prefer a couple of sleek AA batteries or even a trio of AAA power-packs.Always, always, always peek at your specific detector or its manual

The Grand Detachment: Gently Taking Your Guardian Down
Now, cast your gaze upon your First Alert Carbon Monoxide Detector. Is it mounted on the wall or ceiling? Fear not, for these devices are usually designed for maximum user-friendliness. Many simply twist off their mounting bracket like a jar lid. Give it a gentle counter-clockwise turn.
Voila!
It should unlatch with satisfying ease. Other models might have a couple of small screws holding them in place; this is where your trusty screwdriver waltzes in. With a few turns, it’ll be free, ready for its power-up transformation!Don’t yank or tug; treat it with the respect it deserves, like a sleeping dragon you're gently nudging awake. Once it’s off its perch, cradle it like the important piece of home security it is. Take a moment to admire its sleek design – truly a marvel of modern safety!

The Core Mission: The Battery Swap!
Flip your detector over. You’ll notice a little compartment on the back, usually clearly marked. This is the battery chamber, the very heart of your device! It might have a small latch or a tiny screw holding it closed. If it’s a screw, your screwdriver is back in the game! Undo it with a flourish.
Now, carefully open the compartment. Inside, you'll see the
old, tired battery
. It’s served its purpose with quiet dignity, but its energy reserves are depleted. It's like a superhero who’s just finished an epic battle and needs a long nap. Gently, but firmly, disconnect it. Often, 9-Volt batteries have two little clips; just give it a soft tug to separate them. Other batteries might just pop out.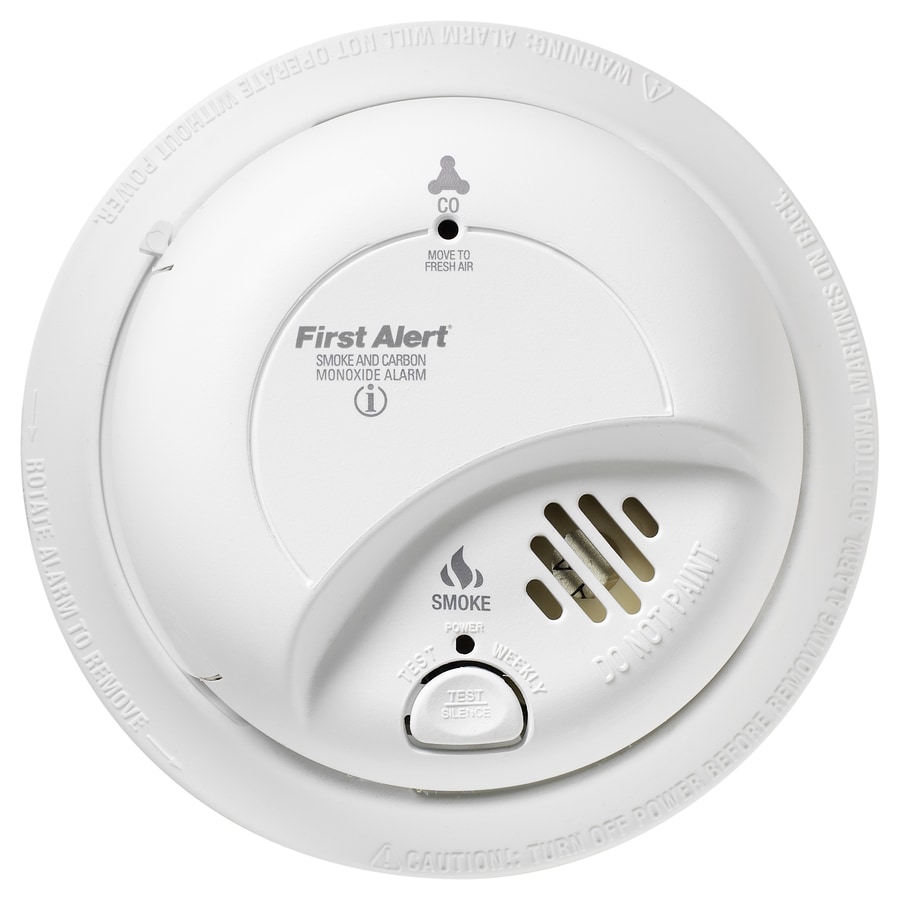
Take your
brand-spanking-new battery
and marvel at its vibrant potential! See the positive (+) and negative (-) terminals? It’s like a tiny puzzle. Match them up perfectly with the connectors inside the detector. Push it in firmly until it’s snug and secure. You might hear a little happy click, or even a triumphant beep – that’s its way of saying,“Oh, sweet, sweet power!”
Close the battery compartment lid. If there was a screw, put it back with confidence. You've just performed a mini-miracle!
The Grand Finale: The Test Button Tango!
With the new battery happily nestled, it’s time for the moment of truth! Locate the
Test button

Press it! Don’t be shy! Hold it down for a few seconds. Prepare for a glorious, robust, and yes,
LOUD
alarm! It’s not meant to be a whisper; it's a full-throated roar of readiness. This loud symphony is your confirmation that the new battery is fully engaged and your detector is ready to stand guard once more. If it chirps its alarm like a champ, you’ve absolutely nailed it!Reattach your detector to its mounting bracket, twisting or screwing it back into place. Give it a gentle pat. You’ve done it! You’ve wrestled with a tiny power cell, vanquished the dreaded chirp, and restored peace of mind to your home. Go forth and bask in the warm glow of knowing you’re a fantastic home maintainer. Your home, and especially your First Alert Carbon Monoxide Detector, salutes you!