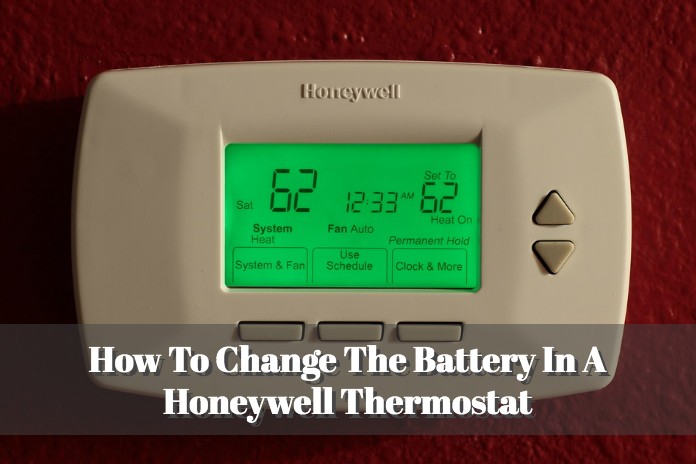
Replacing Batteries In Honeywell Thermostat

Ah, the Honeywell thermostat. It's often the unsung hero of our homes, quietly doing its job, regulating our comfort without a fuss. Until, that is, it decides to throw a little diva fit. You know the scenario, right? You walk by, perhaps a bit chilly, ready to nudge the temperature up a degree or two, and you're met with… nothing. Or worse, a
It’s that moment of mild panic, that split second where your brain leaps to worst-case scenarios. Is the furnace broken? Is the AC on the fritz? Are we doomed to a future of wearing parkas indoors or sweating through our pajamas? You prod it, you tap it, you might even whisper a gentle plea. It's like trying to coax a grumpy teenager out of bed on a Saturday morning – utterly unresponsive and radiating an aura of nope.
The Grim Signs: When Your Thermostat Goes on Strike
Before you call an HVAC technician (and prepare your wallet for impact), let's talk about the usual culprits. Often, your Honeywell isn't actually broken; it's just feeling a bit peckish. Or, more accurately, its batteries are doing the equivalent of a slow, dramatic faint. You might see a
Must Read
Sometimes, the screen just goes completely blank, leaving you with a sleek, unresponsive black rectangle where your temperature settings used to be. It’s like a tiny, domestic version of the monolith from 2001: A Space Odyssey, but instead of advancing human evolution, it's just making you wonder if you need to put on another sweater. Other times, the numbers might seem to be doing a peculiar dance, or the backlight is just barely there, like a distant memory of brightness. These are all your thermostat's way of saying,
The Great Battery Hunt: A Quest for Power
Once the realization hits –
Then comes the actual hunt. Where do you keep your fresh batteries? Is it the infamous "junk drawer" – that glorious, chaotic repository of everything from twist ties to ancient phone chargers? Or perhaps you're a highly organized individual with a dedicated battery drawer (I aspire to be you). Failing that, there's always the classic move: swiping them from a remote control that you rarely use. The TV remote, the old DVD player remote, even the kid's toy that's been under the couch for a month. Desperate times, my friends, call for desperate measures. Just make sure to grab a pair!
The Moment of Truth: A DIY Victory
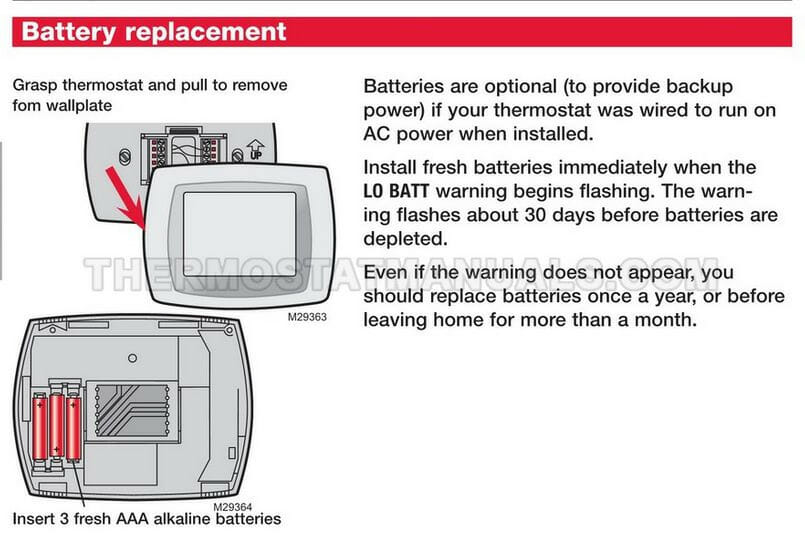
Alright, batteries in hand, you approach your ailing thermostat with newfound confidence. Most Honeywell models are incredibly user-friendly when it comes to battery access. Often, it's a matter of gently pulling the bottom of the front panel outwards, or sometimes there’s a little latch on the side or bottom you push. It’s not like cracking a safe, though the satisfying click of it opening can make you feel like James Bond.

Once open, you'll see the battery compartment. Note the orientation of the old batteries – the
Now, for the glorious moment: insert the fresh batteries. Hear that reassuring snap as they slide into place? Make sure they're snug. Then, gently close the cover. You might hear another satisfying click as it secures itself. And then… wait for it…
That feeling of triumph? That little internal cheer? Priceless. You just saved yourself a service call, avoided a potential home disaster, and proved once again that you are, indeed, fully capable of handling basic home maintenance. Go forth, my friend, and bask in the comfortable glow of your newly revitalized Honeywell thermostat. You've earned it!