Overhead Door Keypad Battery Replacement

There's a special kind of satisfaction that comes from fixing something yourself, even when it's as seemingly mundane as changing a battery. And when that "something" is your garage door keypad, the satisfaction factor shoots right up! Why is swapping out a few AAAs for your Overhead Door keypad such a fun and popular topic? Simple: it’s a quick win against modern inconveniences. Imagine rushing out the door, only to find your trusty keypad unresponsive, leaving you locked out of your garage and scrambling for keys. Or, perhaps you’re coming home late, groceries in hand, and the keypad just won't light up. Frustrating, right? This little DIY task isn’t just about changing batteries; it’s about reclaiming control, saving time, and feeling like a home maintenance superhero without breaking a sweat.
For beginners in home DIY, replacing your keypad battery is the perfect entry-level project. It requires minimal tools, zero specialized knowledge, and provides an immediate, tangible result. It’s a confidence booster, proving that not every little hiccup requires a costly service call. For families, a reliable garage keypad is practically a lifeline. Kids coming home from school, the dog walker needing access, or simply getting bikes in and out – seamless entry is crucial. Keeping that keypad in top shape means one less thing to worry about in a busy household. And even for seasoned hobbyists or DIY enthusiasts, this task serves as a great reminder that sometimes the simplest solutions are the most effective. It's about being proactive and ensuring your home systems run smoothly.
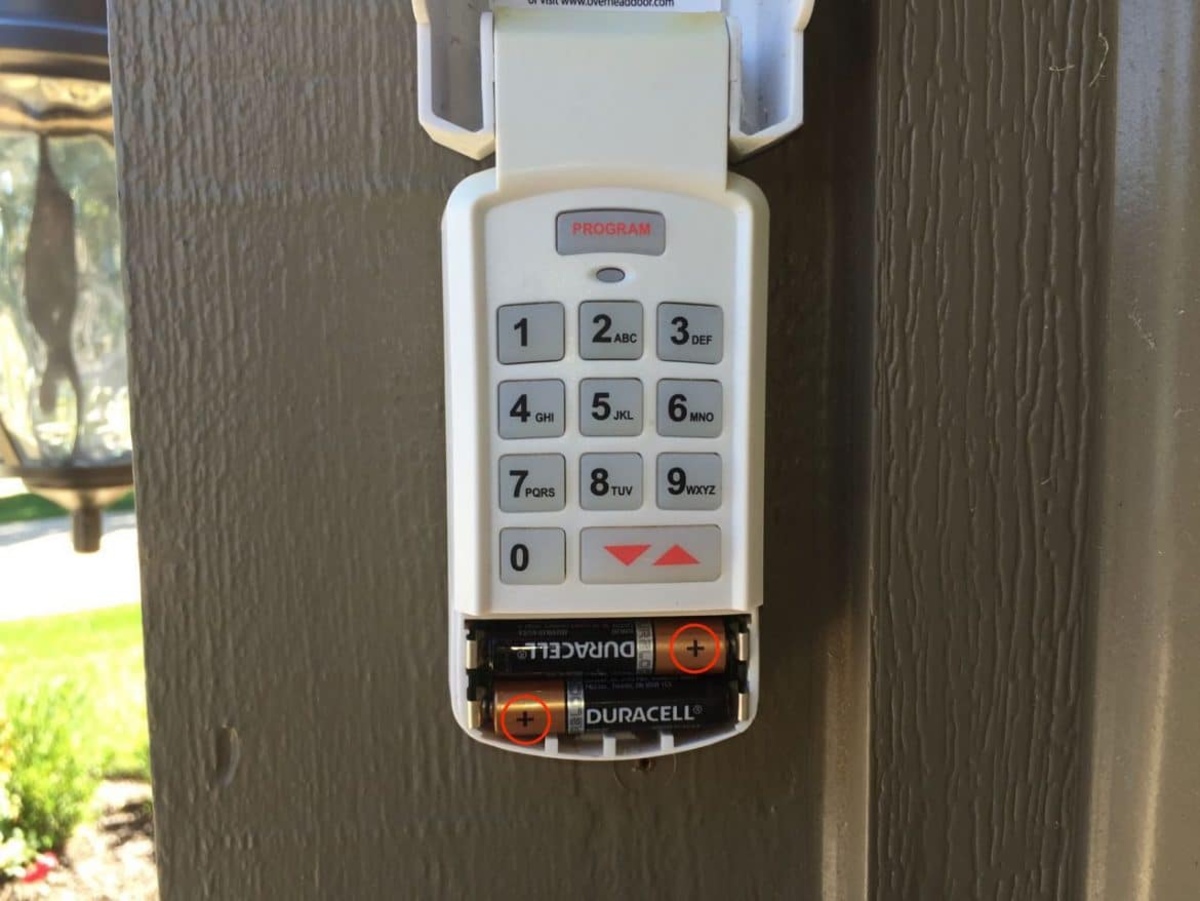
While the core task is straightforward, you'll find some variations. Most Overhead Door keypads, like their popular models, use common batteries such as AA or AAA, sometimes a 9-volt, or even a small coin cell battery. The location of the battery compartment might differ too – some keypads have a sliding cover on the front, others require a small screwdriver to access a panel on the back or bottom. Common symptoms that scream "change my batteries!" include the keypad lights dimming, a reduced range from which it operates, or the unit becoming completely unresponsive. Sometimes, after changing the batteries, you might even need to briefly re-enter your access code, which is usually a simple two-step process outlined in your keypad's quick start guide.
Must Read
Ready to tackle this minor but mighty task? Here are a few simple tips to get you started. First, identify your keypad model and the battery type it uses. Often, the battery type is printed inside the compartment. Second, gather your tools: usually a small Phillips head screwdriver or a flathead for prying, if needed. Open the battery compartment carefully. Pay attention to the polarity (+/-) when you remove the old batteries, and ensure you insert the new ones correctly. Always use fresh, good-quality batteries for longevity. Once the new batteries are in and the cover is secure, test your keypad immediately. Try it from different distances to ensure full functionality. A pro tip: don't wait for your keypad to completely die. If you notice it getting sluggish or the lights dimming, that's your cue to proactively swap out those batteries!
In the end, replacing your Overhead Door keypad battery is more than just a maintenance chore; it’s an act of empowerment. It saves you time, frustration, and money, all while giving you that satisfying feeling of a job well done. It’s a little win that contributes to the overall ease and enjoyment of your home life. So go ahead, tackle that simple task, and enjoy the smooth, reliable access to your garage!