Nest Learning Thermostat Install Guide

Alright, grab your imaginary latte and settle in, because we're about to embark on an epic quest. No dragons, no ancient prophecies, just the slightly terrifying, yet ultimately rewarding, journey of installing a Nest Learning Thermostat. You're probably thinking, "Me? DIY? With electricity?" And to that, I say, "Yes, you magnificent creature of courage and frugality!"
You’ve seen the commercials: sleek, shiny, promising to save you money while making your home smarter than some of your relatives. It’s the thermostat of the future, whispering sweet nothings about energy efficiency directly into your smart home ecosystem. But between you and that glorious future lies one small hurdle: the installation. Fear not, for I, your trusty guide, shall light the way with puns and questionable anecdotes.
The Unboxing: A Ceremony of Wires and Wonder
First things first, let’s admire your new digital overlord. Open that box! Inside, you’ll find the Nest display itself – looking like a fancy puck from a futuristic hockey game. Then there’s the base plate, a trim kit (if your old thermostat left a questionable tan line on your wall), a screwdriver (because Nest believes in you!), and some handy wire labels. Take a moment. Breathe it in. This is the calm before the storm of ultimate comfort.
Must Read
Before we go full MacGyver, a quick reality check: this guide assumes you have a low-voltage system (24V). If you’re dealing with high-voltage (120V or 240V, often found in older homes with thick wires or baseboard heaters), STOP! Call a professional. Seriously, we want to save energy, not become human conductors. Safety first, folks!
Step 1: The Sacred Ritual of Powering Down
This is probably the most crucial step, unless you enjoy the sensation of your hair standing on end (and not in a good, styling way). You need to cut the power to your existing thermostat. Head to your circuit breaker box. It's usually in a utility closet, basement, or garage – basically, wherever the boogeyman lives. Look for a breaker labeled "Furnace," "AC," or "HVAC."

FLICK THAT SWITCH OFF! Don't just trust me; go back to your thermostat and try to turn it on. If it's dead as a doornail, congratulations! You've successfully performed the sacred power-down ritual. If it still works, you’ve flipped the wrong switch, you cheeky monkey. Go back and try another one until it's completely lifeless. We're aiming for total darkness in the thermostat realm.
Step 2: The Old Guard's Farewell Tour
Now, approach your old, clunky thermostat. It’s served its time. Maybe it's a beige relic from the 80s, perpetually stuck between "chilly" and "arctic blast." Gently pry off its cover. Underneath, you'll see a spiderweb of wires connected to terminals. Don't panic! It looks scarier than it is.
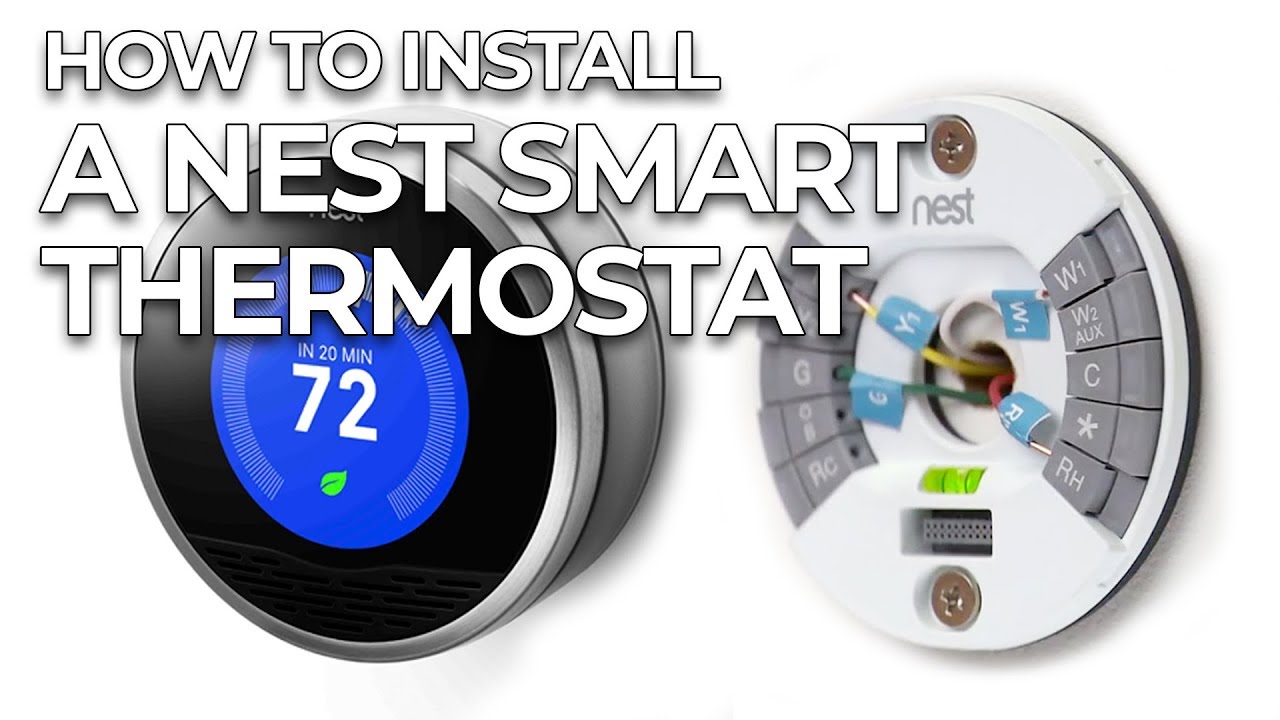
Here's where those delightful little wire labels come in. Take a label and attach it to each corresponding wire before you disconnect it. For instance, if a red wire is connected to a terminal labeled "R," stick the "R" label on that red wire. This is paramount! It's like naming your children – you don't want to mix them up later. Take a picture with your phone too, because sometimes, a visual aid is worth a thousand "oops" moments.
Once everything is labeled and photographed, use that fancy Nest screwdriver (or your own) to disconnect each wire. Then, unscrew the old thermostat's base plate from the wall. You might find a treasure trove of dust bunnies, pet hair, and maybe even a tiny mummified insect. Marvel at the archaeological finds, then dispose of them responsibly.
Step 3: Nest Base: The Foundation of Future Comfort
With the old guard gone, it's time for the new. Thread your wires through the center of the Nest base plate. If your old thermostat left a gaping hole or weird paint marks, now's the time to use that trim plate. It's like a little cosmetic surgeon for your wall.
Use the provided screws to mount the Nest base plate securely to the wall. Make sure it's level, unless you enjoy feeling slightly off-kilter every time you look at your thermostat. Now, the moment of truth: connecting the wires. This is where your labels and photo become your best friends. Match each labeled wire to the corresponding terminal on the Nest base.

For example, your "R" wire goes into the "R" terminal. Push the lever down, insert the wire, and release the lever to secure it. Give each wire a gentle tug to ensure it's firmly in place. This is critical. Loose wires are like rebellious teenagers – they just cause problems.
Step 4: The Grand Finale: Attaching the Display
Once all the wires are snug as bugs in a rug, it's time for the magic moment. Take the Nest display and align it with the base. Gently push it until you hear a satisfying click. It’s like LEGO for adults, but with significantly higher stakes (and potentially more comfortable results).
Now, head back to that breaker box. Take a deep breath. Channel your inner Zeus. FLICK THAT POWER SWITCH BACK ON!

Step 5: The Brainy Bits: Setup and Learning
If you've done everything right, your Nest will spring to life, glowing with an ethereal warmth. It'll walk you through the initial setup: language, location, Wi-Fi connection. This is where you connect it to your home network, essentially giving it the ability to talk to the outside world (and your phone).
Download the Nest app on your smartphone, create an account, and add your new thermostat. The app will guide you through setting up your schedule, eco-friendly settings, and teach your Nest how you like your home. It’s incredibly intuitive – Nest learns your habits over time, adjusting temperatures to save energy when you’re away or asleep. It's like having a tiny, climate-controlling butler who gets smarter every day.
Congratulations, HVAC Hero!
You did it! You've conquered the wires, befriended the breaker box, and brought smart comfort to your domain. You are now the proud owner and installer of a Nest Learning Thermostat. Bask in the glory of your DIY prowess. Enjoy the savings. Revel in the fact that your home is now just a little bit smarter, all thanks to your courage and a willingness to follow instructions (mostly). Now, go forth and enjoy your perfectly tempered castle!