Msconfig Number Of Processors Windows 10

Ever feel like your computer is trudging through molasses, especially when you're trying to juggle multiple demanding tasks? There's a nifty little tool hidden within Windows 10 that can sometimes give your system a surprising boost, and it's called... Msconfig! Yes, that's right, the old System Configuration utility isn't just for tech whizzes anymore. By tweaking a seemingly obscure setting related to the number of processors your system uses at boot, you might just unlock hidden potential, making it a fun little experiment for everyone from casual gamers to budding digital artists.
So, how can this benefit artists, hobbyists, or even those just dipping their toes into the digital world? Imagine you're a digital painter working with massive canvases and intricate layers in Photoshop. Or perhaps you're a musician experimenting with virtual instruments and a demanding DAW (Digital Audio Workstation). These applications can really put a strain on your system. By ensuring your computer is utilizing all available processor cores from the get-go, you could see a noticeable improvement in performance. Less lag, smoother brushstrokes, and faster rendering times – all contribute to a more fluid and enjoyable creative process. It's like giving your computer a quick cup of coffee before it tackles a big project!
Think of it this way: imagine your computer's processor is a team of workers. By default, sometimes Windows might only be assigning a few workers to the initial setup tasks. Adjusting the processor count in Msconfig is like telling Windows, "Hey, use the whole team right from the start!" This can be particularly helpful when dealing with complex 3D modeling in Blender, rendering high-resolution videos, or even just running multiple browser tabs while researching your next creative project. It's about maximizing efficiency for a smoother workflow. While it's not a magic bullet, it can often provide a tangible boost, especially on systems with multiple cores.
Must Read
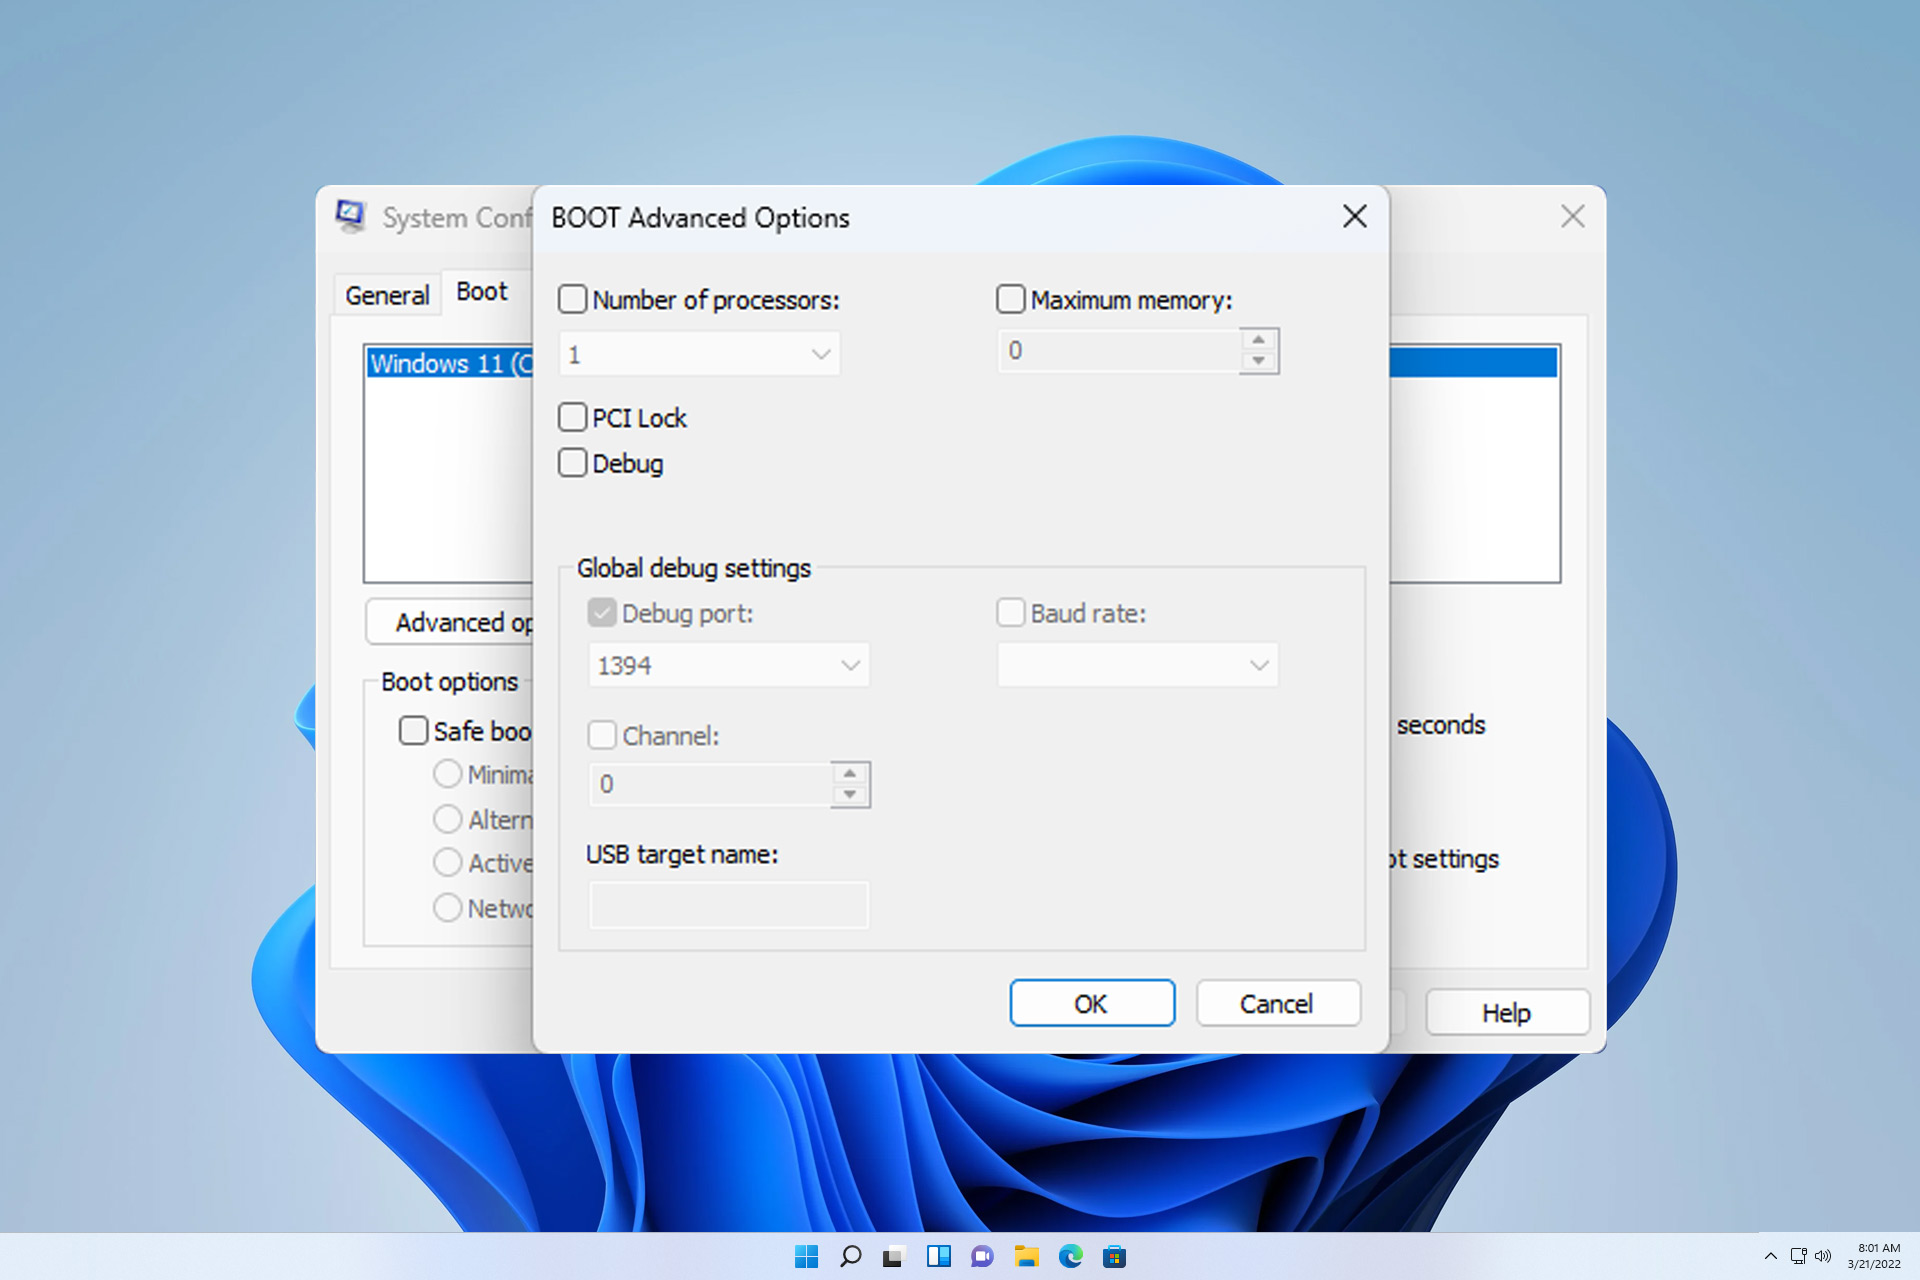
Ready to give it a try at home? It's surprisingly simple! First, press the Windows key + R, type "msconfig" (without the quotes) and hit Enter. In the System Configuration window, go to the "Boot" tab. Click "Advanced options...". You'll see an option labeled "Number of processors". Uncheck the box next to it first (this is crucial!), then re-check it. Windows should now automatically select the highest number of processors available. If not, manually select the highest number from the dropdown menu. Click "OK" on both windows and restart your computer. That's it! Be sure to observe your system's behavior after the reboot. If you experience any issues, simply revert the changes by going back into Msconfig and unchecking the box.
Remember, results can vary depending on your hardware and software. This isn't about creating a supercomputer out of thin air. It's about optimizing your existing resources for a smoother and more responsive experience. The real enjoyment comes from the experimentation – from tinkering under the hood and discovering small tweaks that can make a noticeable difference in your daily digital life. Who knows? You might just unlock the full potential of your machine and find a newfound appreciation for the inner workings of your computer.

![Enable All Cores in Windows 10 [Easiest Methods 2024]](https://10pcg.com/wp-content/uploads/win10-run-msconfig-ok-boot-advanced-options-number-of-processors-ok.jpg)