How To Wire Up A Doorbell

Ever stood on someone's porch, pressed a button, and heard that familiar chime inside? It's such a common, everyday interaction that we rarely stop to think about the magic that makes it happen. But what if I told you that understanding how to wire up a doorbell is not only surprisingly simple, but also a fantastic gateway into the fascinating world of basic electricity and home automation? It's a fun little puzzle to unravel, and once you grasp it, you’ll start seeing similar principles at play all around you!
At its core, a doorbell's purpose is elegantly straightforward: to create an audible signal, letting someone inside know there’s an visitor at the door. Think of it as a super-simple communication system. The benefits extend beyond mere politeness; it offers convenience, security, and a structured way for the outside world to announce its presence. Instead of knocking loudly and potentially startling someone, a gentle ring serves as a much more agreeable alert. For families, it means knowing when the kids are home; for businesses, it’s about managing deliveries or client arrivals. It's a small piece of technology that brings a lot of order and ease to our daily lives.
Exploring the mechanics of a doorbell isn't just for aspiring electricians. In an educational setting, it's a perfect hands-on project for teaching fundamental concepts like electrical circuits, switches, and electromagnetism. Imagine a classroom where students build their own simple doorbell circuits using batteries, wires, and buzzers – it’s a brilliant way to make abstract scientific principles tangible and exciting. In daily life, beyond the obvious home application, understanding these basics can help you troubleshoot minor issues with other low-voltage devices, or even inspire ideas for custom notification systems. It demystifies the "black box" of electronics and empowers you with a basic understanding of how things work.
Must Read
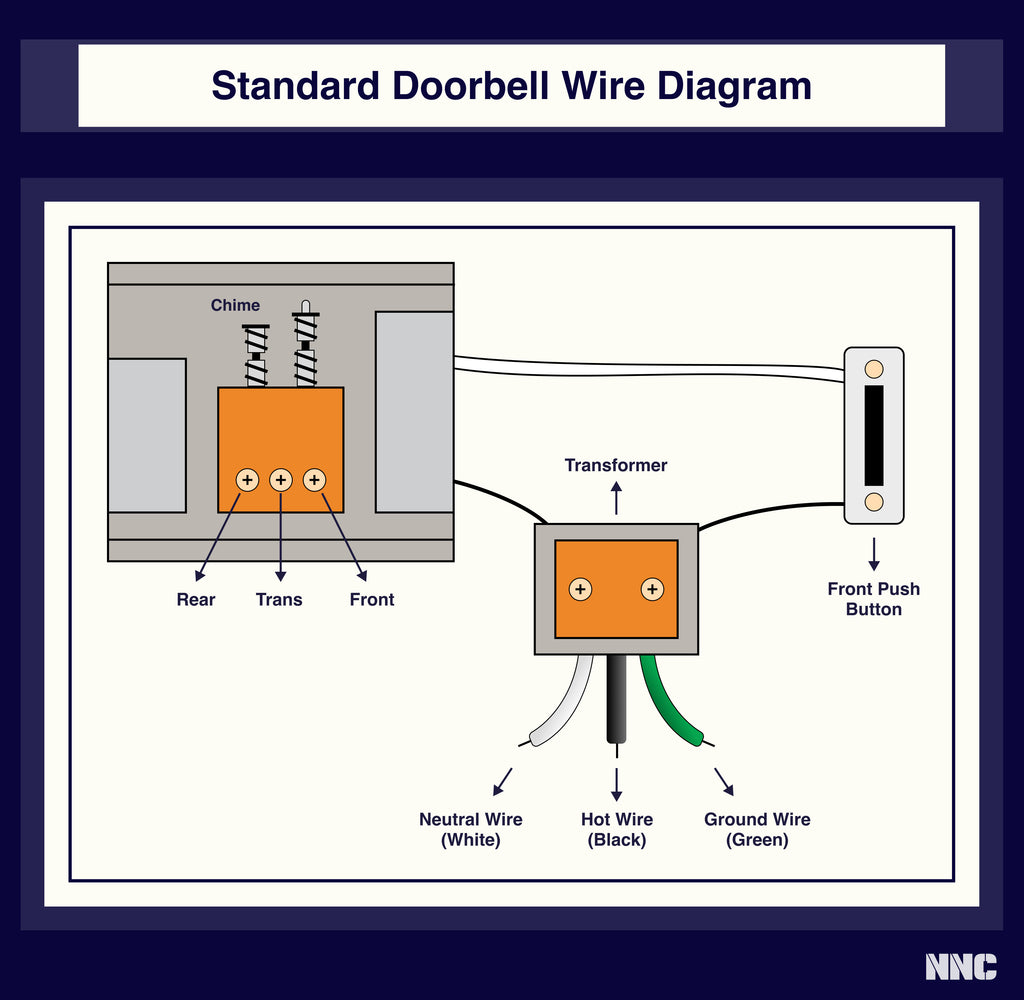
So, how can you start exploring this without diving headfirst into complex wiring diagrams? The easiest way to grasp the concept is to first understand the components: a power source (usually a low-voltage transformer connected to your home's main power, but for learning, a simple battery will do!), a button (the doorbell switch itself), wires to connect everything, and the chime unit. You press the button, it completes a circuit, and electricity flows to the chime, making it ring. That's it! You can literally draw this out on paper to visualize the path of electricity.
For a more hands-on approach, consider getting a basic electronics kit designed for beginners. Many of these kits come with simple switches, buzzers, LEDs, and battery packs that allow you to build safe, low-voltage circuits. You could even repurpose an old toy car battery and a small buzzer to create your very own experimental doorbell circuit on a breadboard. The key is to remember that safety is paramount: always work with low voltage when experimenting, and never mess with your home's main electrical wiring unless you are a qualified professional. By taking these small, curious steps, you’ll not only learn how to wire up a doorbell but also unlock a deeper appreciation for the simple, ingenious engineering that powers so much of our world.

![[22+] Typical Doorbell Wiring Diagram, Doorbell Wiring Diagram](http://waterheatertimer.org/images/Doorbell-system.jpg)
