How To Test Doorbell Wires
Alright, intrepid home adventurer! Are you ready to unravel a tiny mystery right on your doorstep? We're about to embark on a thrilling, super-easy quest to chat with those hidden wires that make your doorbell sing. Let's make those electrons dance!
Imagine your doorbell wires are like tiny, secret highways. We’re just going to pop open a few "rest stops" and see if the happy traffic (that's electricity, by the way!) is flowing smoothly. It's less like rocket science and more like a delightful treasure hunt.
Gear Up, Mighty Doorbeller!
First things first, every hero needs their tools, right? But fear not, we're not talking about a full workshop here. Just a few trusty sidekicks to help us on our mission.
Must Read
Your quest for knowledge starts with the right equipment!
Your main star today is a gadget called a multimeter. Sounds fancy, right? It's basically a little translator that helps us understand what those wires are saying. If you don't have one, they're super common and easy to find, like a universal remote for electrical currents!
Next, grab a trusty screwdriver. Sometimes a Phillips head, sometimes a flathead, just depending on your doorbell's whims. This is for gently unveiling the secret compartments where our wires reside.
And for a touch of sensible caution, some good old work gloves are a fantastic idea. While doorbell power is usually super mild, it’s always smart to protect those precious hands. Safety first, even when you're having fun!
The Grand Tour: Finding Your Wires
Our doorbell system has a few key players, and each one hides some wires we’re keen to meet. We'll start with the most obvious spots and then explore the more secretive hideouts.
The Doorbell Button's Secret Lair
Head to your front door, right where the magic "ding-dong" button lives. Gently pry off its cover or unscrew it. You'll usually find two small wires tucked neatly inside, ready to greet you. These are the main conduits of happiness!
The Chime Unit's Inner Sanctum
Next, let's visit the chime unit itself, often found in your hallway or living room. This is the part that actually makes the glorious sound. Pop off its cover – usually by gently pulling or unlatching it – and behold! More wires!
You'll typically see terminals labeled with exciting words like FRONT, REAR, and TRANS. These are the crossroads where the doorbell's journey begins and ends. Don't worry about what they do just yet; we're just making introductions!

The Elusive Transformer: The Powerhouse
Finally, there's the unsung hero, the doorbell transformer. This little powerhouse converts your house's main electricity into the gentle current your doorbell needs. It's often shy, hiding in a basement, a utility closet, or sometimes even in the attic.
Unplugging the Mystery (The Safe Way!)
Before we get cozy with any wires, we need to do one super important thing: turn off the power! It's like pausing the game before you adjust the settings.
Head to your main electrical panel, that big metal box with all the circuit breakers. Look for a breaker labeled DOORBELL, FURNACE, or a general LIGHTING circuit. Flip that switch to the OFF position.
When in doubt, flip the main! Better safe than sorry, even for tiny currents.
This ensures our interaction with the wires is perfectly safe and worry-free. No sparks, just pure, unadulterated wire-testing fun!
Let the Testing Begin! Phase One: The Button Wires
Now for the exciting part! Grab your multimeter, our trusty electrical interpreter. We're going to start where the action usually begins: at the doorbell button itself.
Set your multimeter to measure AC voltage. Look for the 'V~' or 'VAC' setting, usually in the range of 20V to 200V. This is like setting our translator to the correct language for doorbell wires.
Introducing Multimeter to Wires
With the button cover off and power still OFF, gently detach the two wires from the doorbell button terminals. These wires are now our primary subjects for investigation.
Now, go back to your electrical panel and flip that specific breaker back ON. Yes, we need the power to flow for our test!
Carefully touch one probe of your multimeter to one bare wire, and the other probe to the second bare wire. Hold them steady!
Watch your multimeter display! If the wires are carrying their usual happy current, you should see a number pop up. We're looking for readings typically between 16 and 24 volts AC. This is the sweet spot for most doorbell systems.
A good reading here means the electrical highway to your button is wide open!
What if the Button Wires are Sleeping?
If your multimeter shows a big fat zero, or a number extremely close to it, don't despair! It just means our adventure needs to continue further down the line. It's like finding a roadblock and deciding to take a scenic detour.
Phase Two: The Chime Unit Wires
Time to journey to the chime unit. Remember to turn the power OFF at the breaker before you start disconnecting any wires here!
With the chime cover off, you’ll see those terminals we mentioned: TRANS, FRONT, and sometimes REAR. We'll focus on the incoming power first.
Testing the Heart of the Chime
With the power OFF, gently disconnect the wire from the TRANS terminal. This wire is usually coming straight from your doorbell transformer.
.jpg?strip=all)
Now, head back to your electrical panel and flip that breaker back ON. We need the electricity flowing to check its pulse!
Carefully touch one probe of your multimeter to the bare end of the wire you just disconnected from the TRANS terminal. Then, touch the other probe to the wire that was connected to the FRONT terminal (or REAR, if you only have one button).
Look for that familiar happy number range: 16 to 24 volts AC. If you see it, then power is definitely making it all the way to your chime! Fantastic!
If you see a good reading here, those wires are humming with potential!
If your multimeter shows a flat zero here, or a very low number, it means the power isn't reaching the chime. It's time to investigate our final hidden hero, the transformer!
The Elusive Transformer's Checkup
If our adventures at the button and chime wires didn't yield that happy voltage, it's time to meet the source of all doorbell power: the transformer. First, turn the power OFF at the main breaker.
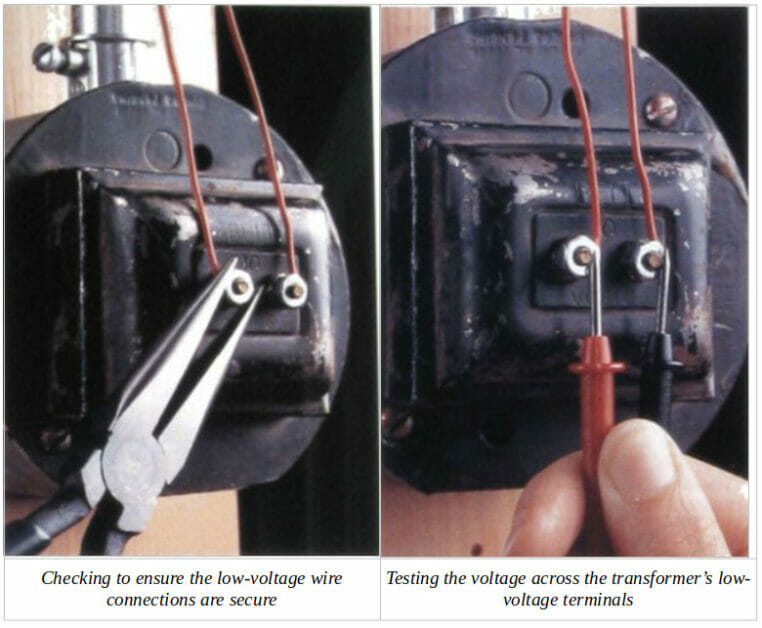
Once you've located it, you'll see two sets of wires. We're interested in the thinner, low-voltage wires. With your multimeter still set to AC voltage, turn the power back ON at the breaker.
Carefully place one probe on each of the two terminals where the low-voltage wires connect to the transformer. These are the wires that feed power to your entire doorbell system.

What numbers are we hunting for? You guessed it! That familiar range of 16 to 24 volts AC. If you see this, then your transformer is a mighty, working hero!
A good reading at the transformer means the problem isn't at the source. It's further down the line!
If you see zero, or a very low voltage, congratulations! You've found the culprit! The transformer itself might be the one taking a permanent nap.
The Grand Finale: What Your Readings Mean (in Fun Terms!)
You've bravely navigated the electrical highways and chatted with the wires. Now, let's decipher what all those numbers mean for your doorbell's destiny!
"Hooray! Power!" (Voltage Present)
If your multimeter joyfully displayed numbers between 16 and 24 volts AC at any of the points, give yourself a high-five! This means the wires at that location are successfully carrying power. The electrical current is flowing, and those electrons are zipping along exactly as they should be.
"Whoops! No Power!" (Voltage Absent)
Did your multimeter show a big, round zero, or something very close to it, where you expected a voltage? No worries, this is still a victory of discovery! It means the electrical current isn't reaching that particular point. You've pinpointed a break in the electrical highway, or the source isn't sending it out.
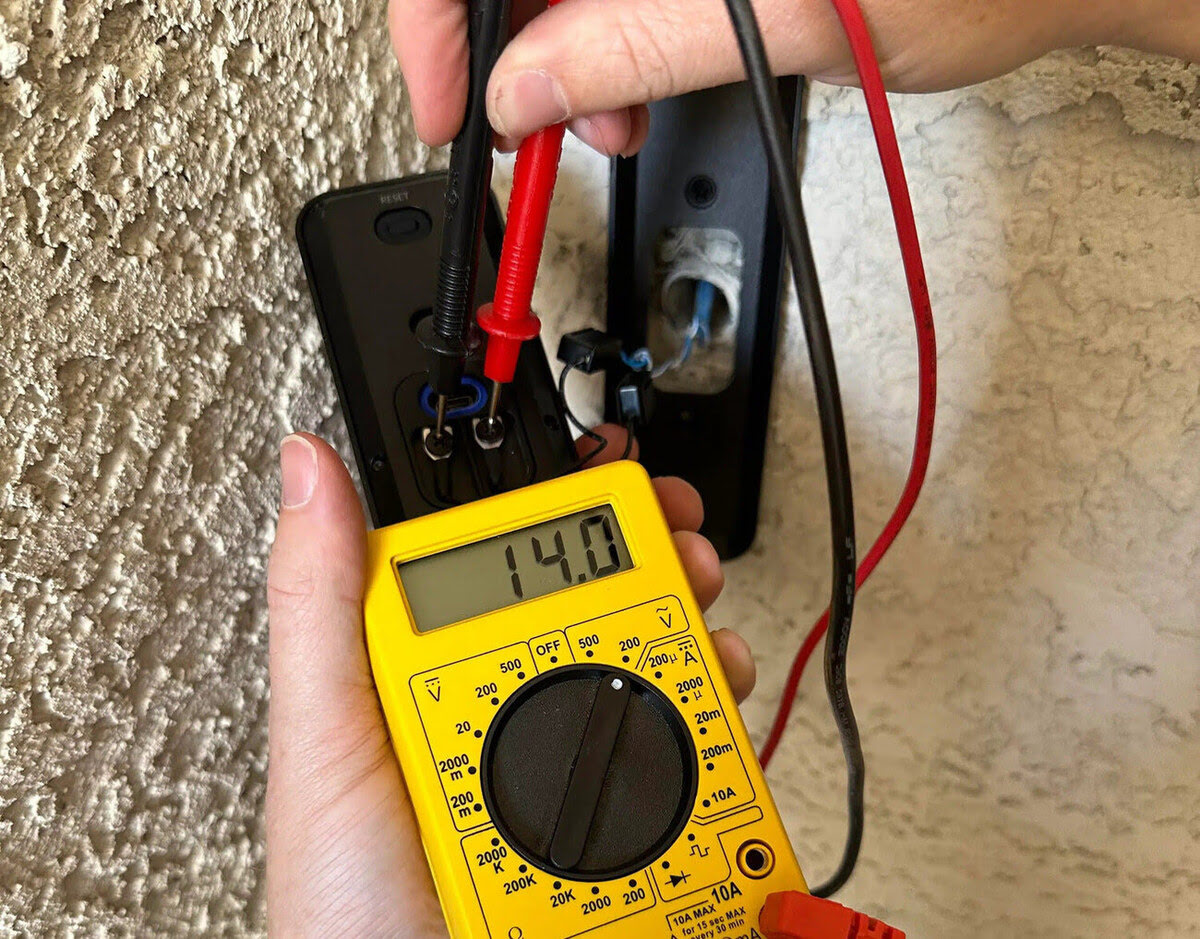
"A Little Less, A Little More" (Slight Variations)
Sometimes, you might see a reading that's just a tad outside the 16-24V range, say 14V or 26V. Usually, this isn't a huge cause for alarm for a low-voltage doorbell system. Slight fluctuations can happen, or your specific system might run on a slightly different voltage.
Your Quest, Accomplished!
Congratulations, fearless home electrician! You’ve successfully navigated the hidden world of doorbell wires, armed with nothing but a screwdriver, a multimeter, and your fantastic can-do attitude. You've demystified the process and gathered vital intelligence.
Whether you found glorious power or pinpointed a pesky problem, you've taken control and understood your home a little better. Give yourself a pat on the back – you're officially a doorbell wire testing wizard! Go forth and conquer your next home adventure!