How To Take Apart A Smok Stick V8
Alright, let's talk about taking apart a Smok Stick V8! Why would you want to do this? Well, maybe you're a curious tinkerer, trying to understand how things work. Or perhaps you've got a stubborn clog, a pesky leak, or you're just ready to give it a super deep clean. Whatever the reason, dismantling your vape pen can be surprisingly satisfying – almost like a little electronic autopsy! Plus, knowing how to do it yourself can save you a trip to the vape shop and potentially some cash.
The main purpose of taking apart your Smok Stick V8 is usually for maintenance. Over time, gunk and residue can build up inside, affecting performance and flavor. A good cleaning can restore it to its former glory. You might also want to disassemble it to replace a broken part, like the glass tube. Learning to do this yourself puts you in control of your vaping experience.
Now, let's be clear: we're not encouraging you to mess with anything that might be dangerous. Always handle electronic devices with care, and never attempt repairs you're not comfortable with. Safety first! This guide is meant for basic cleaning and component replacement, not for modifying the device beyond its intended use.
Must Read
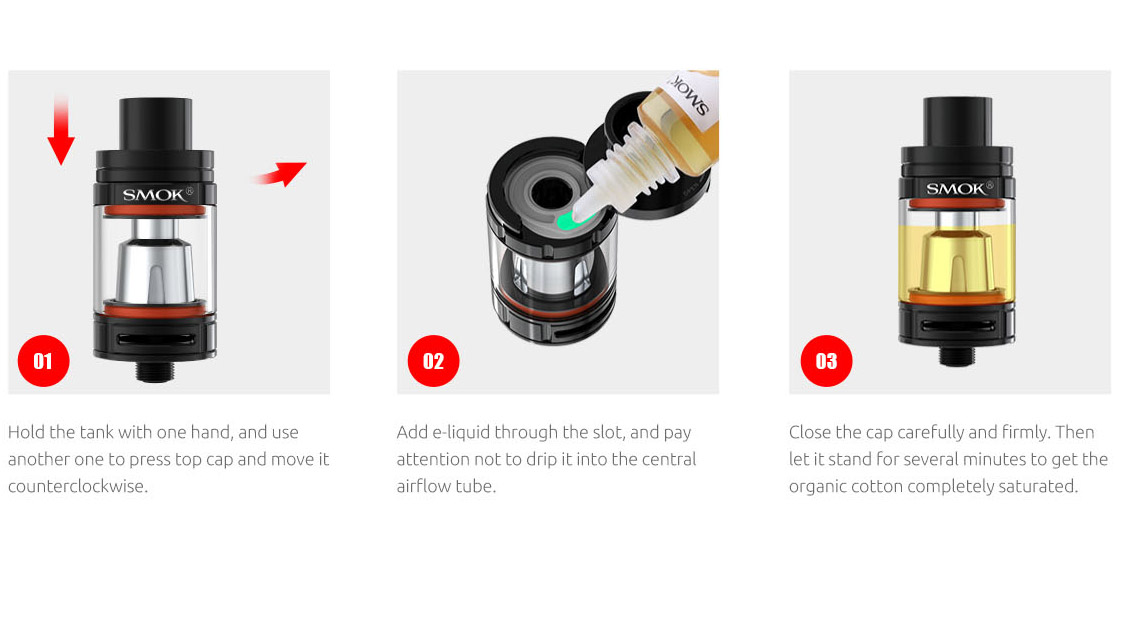
Okay, so how do we do it? First, make sure your Smok Stick V8 is completely powered off. You don't want any accidental firings! It's also a good idea to empty any remaining e-liquid from the tank. Nobody wants a sticky mess.
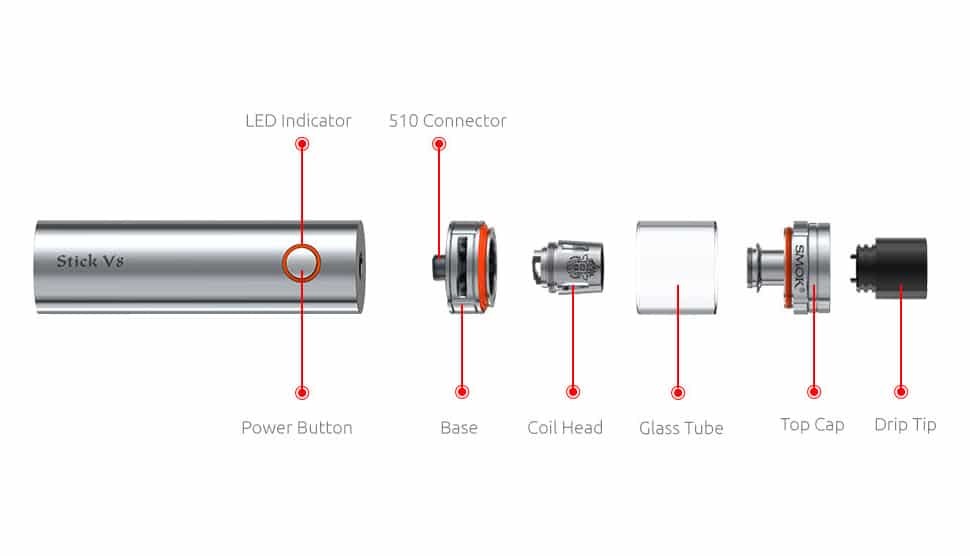
The Smok Stick V8 is generally comprised of two main parts: the battery section and the tank. To separate these, simply unscrew the tank from the battery. This is usually a pretty straightforward process, but sometimes it can be a little tight. If it's stuck, try using a rubber band for extra grip. Just be gentle – you don't want to force anything.

Next, let's tackle the tank. This is where things can get a little fiddly. Depending on your exact model, you'll likely be able to unscrew the base of the tank. This will give you access to the coil. Carefully remove the coil. This is a good time to inspect it for any damage or excessive buildup. If it looks burnt or gunked up, it's probably time for a replacement.
With the coil removed, you can now usually disassemble the tank further. Some tanks will allow you to remove the glass tube for cleaning. Again, be gentle! Glass can break, and nobody wants shattered glass and e-liquid everywhere. Rinse all the components (except the coil!) with warm water. You can use a mild soap, but be sure to rinse thoroughly to remove any residue. Let everything air dry completely before reassembling.
Reassembly is essentially the reverse of disassembly. Make sure everything is clean and dry before putting it back together. Screw the components back together snugly, but don't overtighten. Replace the coil with a new one if necessary. Fill the tank with your favorite e-liquid, and you're good to go!
Remember, this is a general guide, and specific models might vary slightly. Always consult your device's manual for detailed instructions. And most importantly, have fun and be careful!

