How To Make Paper Nails Step By Step

Ever wished you could rock a fabulous manicure without the hefty price tag or the commitment? Well, buckle up, buttercup, because I'm about to spill the beans on a DIY secret that's about to revolutionize your nail game: paper nails!
That's right, paper. I know, it sounds crazy, like something a kindergartener would dream up. But trust me, with a little patience and some household supplies, you can achieve surprisingly chic and surprisingly sturdy temporary nails.
Gather Your Supplies
First things first, let's raid your craft stash (or your kid's!). You'll need some paper.
Must Read
Think sturdy but flexible – construction paper works in a pinch, but printer paper is your best bet for ease of use and painting. Grab some scissors too.
Of course, you'll need some glue – Elmer's glue is your friend here, it's non-toxic and dries clear! Finally, get ready your nail polish and a top coat.
Don't forget those essential tools like an orange wood stick or cuticle pusher, just to make things a bit more professional.
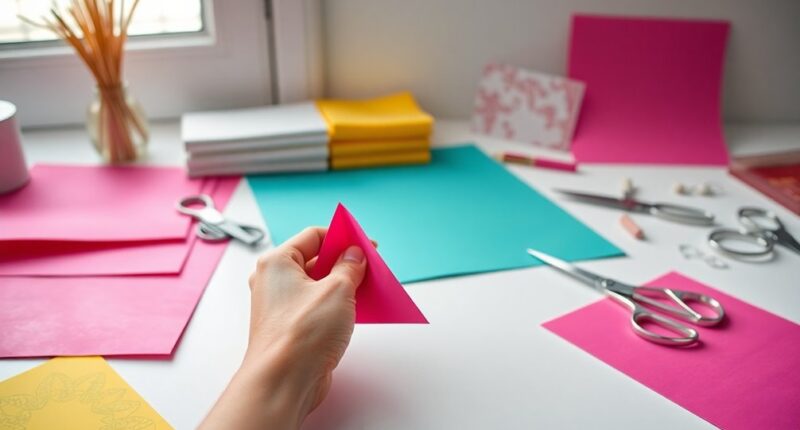
Cut Out Your Nail Shapes
Time to get artsy! Lay your hand flat on a piece of paper and roughly trace the outline of each nail. This is where you get to decide your nail shape.
Are you feeling a fierce stiletto, a classic square, or a rounded oval? Go wild! Just remember to make them slightly larger than your actual nail – you can always trim them down later.
Now, carefully cut out your paper nail shapes. Don't worry about perfection; they're temporary, and a little imperfection adds character, right?
Hold each paper nail up to your finger to check the size and shape. It is recommended to make it larger first before trimming down.
Trim and adjust until you're happy with the overall look. This is your chance to customize! Do this step for all nails.
Layer and Strengthen
Here's where the magic happens. We're going to layer those paper nails to give them some serious strength. And I mean serious as in, you might even be able to open a soda can with them (okay, maybe not, but they'll be surprisingly durable!).
Apply a thin layer of glue to one side of a paper nail. Then, carefully stick another paper nail on top.
Smooth out any wrinkles or bubbles. Repeat this process, adding at least two or three layers of paper to each nail. The more layers, the stronger they'll be!
Let the glue dry completely between each layer. Patience is key, my friend. Trust me, rushing this step will only lead to frustration and flimsy nails.
Once all the layers are glued together and dry, you might want to gently bend and shape the nails to better mimic the natural curve of your nail bed. This will make them look and feel more realistic.
Attach Your Paper Nails
Alright, the moment of truth! Apply a small dot of glue to your natural nail. Don't go overboard – a little goes a long way.
Carefully press the paper nail onto your natural nail, aligning it as best you can. Hold it in place for a few seconds while the glue starts to set.

Repeat this process for all ten fingers. Prepare to be amazed at how quickly your bare nails transform into a full-blown manicure!
If any glue seeps out around the edges, simply wipe it away with a damp cloth or a cotton swab. Cleanliness is next to nail-iness, after all!
Trim and File (Optional)
Feeling extra fancy? Once the paper nails are securely attached, you can further refine their shape with a pair of small scissors or a nail file.
Round the edges, shorten the length, or create a more dramatic angle – the choice is yours. Just be gentle and avoid cutting your actual nails!
Consider using a very fine grit nail file to smooth out any rough edges or imperfections. This will create a more polished and professional look.
Paint and Decorate!
The blank canvas is ready! Now for the fun part: unleash your inner nail artist. This is where you get to let your creativity shine.
Apply a base coat of your favorite nail polish. This will help the color adhere better and protect the paper from any potential staining.
Once the base coat is dry, apply two or three coats of your desired nail polish color. Get creative with different colors, patterns, and designs!

Consider using nail art brushes, dotting tools, or even just a toothpick to create intricate details. The possibilities are endless!
Feeling extra adventurous? Add some glitter, rhinestones, or nail stickers for a touch of sparkle and glam. Make sure to secure them with a dot of clear nail glue.
Finally, seal everything in with a top coat. This will protect your masterpiece from chipping and add a glossy shine. And it's very important to make your nail shine!
Rock Your Paper Nails
Voila! You've officially created your very own set of stunning paper nails. Strut your stuff and show off your DIY masterpiece to the world.
They might not last forever, but they're perfect for a special occasion, a themed party, or just a fun afternoon of crafting.
And when you're ready for a change, simply peel them off. No harsh chemicals or damaging removal processes required!
I hope this guide inspired you to try making your own paper nails! With a little creativity and some simple supplies, you can achieve stunning and unique manicures without breaking the bank.
So go ahead, embrace your inner artist and experiment with different colors, shapes, and designs. Remember, the only limit is your imagination!

Have fun with it, don't be afraid to make mistakes, and most importantly, enjoy the process. After all, isn't that what DIY is all about?
And who knows, you might just discover your new favorite way to express yourself through nail art! The sky's the limit, my friend, so go out there and rock those paper nails with confidence!
Consider using different types of paper for unique textures and effects. Try using textured cardstock for a more rugged look, or iridescent paper for a shimmering effect.
Experiment with different adhesive options. While Elmer's glue is a great option, you could also try using nail glue dots or double-sided tape for a more secure hold.
To make your paper nails even more durable, consider applying a layer of clear acrylic powder over the nail polish. This will create a hard, protective shell that will help prevent chipping and cracking.
And remember, practice makes perfect! Don't be discouraged if your first few attempts don't turn out exactly as planned. Just keep experimenting and refining your technique until you achieve the desired results. Good luck!
One final tip: take lots of pictures of your amazing paper nail creations and share them on social media! Use the hashtag #PaperNailsDIY so that others can admire your artistry and get inspired to try it themselves.
Now go forth and conquer the world, one fabulous paper nail at a time! You've got this!