How To Make A Ceramic Mould
Have you ever admired a beautiful ceramic piece and wished you could make many just like it? Or perhaps you've crafted a truly unique form from clay and dreamed of reproducing it perfectly, time and again? Welcome to the wonderful world of ceramic mould making! It might sound like a highly specialized craft, but demystified, it's an incredibly empowering skill that opens up a universe of creative possibilities. Think of it as creating a custom cookie cutter for your clay, allowing you to capture a moment of inspiration and replicate it with delightful ease.
Why delve into mould making? The benefits are abundant for anyone with a creative spark. For professional artists and potters, moulds are a game-changer for production, ensuring consistency across a series of pieces and freeing up valuable studio time. Hobbyists will discover the joy of reproducing their favourite forms for gifts, personalized decor, or even starting a small craft business. Imagine making a dozen identical handcrafted mugs or a collection of intricately detailed wall tiles! Even casual learners will gain a deeper understanding of material science and design principles, along with the immense satisfaction of mastering a new, tangible skill. It's about efficiency, consistency, and unlocking new dimensions of artistic expression.
The versatility of ceramic moulds is truly inspiring. You can create moulds for almost anything you can sculpt or find! Envision producing a series of perfectly matched bowls or plates for a dinner set, each one uniform and elegant. Move beyond dinnerware to replicate delicate figurines, intricate jewelry components, or even bespoke tiles with unique textures. Want a collection of cups with a specific ergonomic handle? A mould makes it possible. You can even use natural objects, like a beautifully veined leaf or a textured seashell, to create a unique impression that you can then cast repeatedly in clay. The only limit is your imagination and the shape of your original piece!
Must Read
Ready to give it a whirl? You absolutely can try this at home!
- Start Simple: Begin with a one-part mould for a shallow, non-undercut shape (meaning no parts that would get stuck when pulling the piece out).
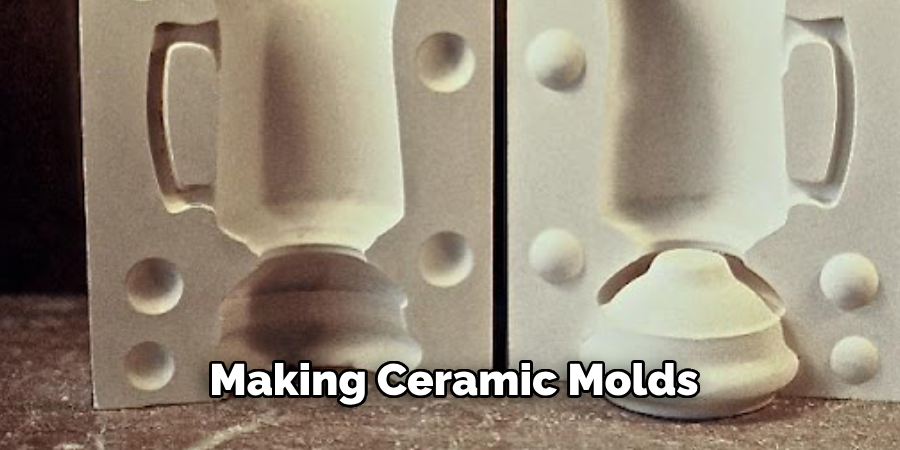
- Gather Your Gear: You'll need your original clay model (fully dry or bisqued), pottery plaster (a type of Plaster of Paris), a sturdy container for mixing, a release agent like petroleum jelly or soft soap, and material for a retaining wall (plasticine, cardboard, or even Lego blocks!).
- Preparation is Key: Thoroughly seal your original model and apply a generous coat of release agent. Build a secure retaining wall around it.
- Mix Wisely: Follow the plaster-to-water ratio instructions precisely. Sprinkle plaster into water, let it slake, then mix gently but thoroughly to avoid air bubbles.
- Pour and Cure: Pour the plaster steadily over your model. Let it cure completely – this takes hours, sometimes overnight. Patience is a virtue here!
- Safety First: When working with plaster, wear a dust mask and ensure good ventilation.
The true joy of making a ceramic mould lies in that magical moment when you gently separate your original from its plaster twin, revealing a perfect negative impression. Then, the first time you press soft clay into your new mould and pull out a flawless duplicate? It's pure exhilaration! This skill transforms you from a maker of unique items to a master replicator, empowering you to bring your creative visions to life in abundance. It's a blend of precise craft and artistic freedom, offering endless opportunities for experimentation and satisfaction. Dive in, and prepare to be amazed by what you can create!


